

Where the switches are
The composer has a mode menu next to the model picker. It shows the current mode, Build by default. Open it and pick Build, Plan, or Design. The same menu sits on the home screen and inside a project.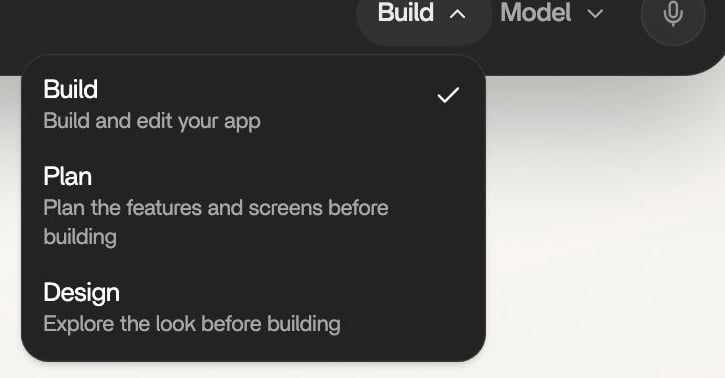
The mode menu. Only one mode is on at a time.
On the home screen, the Design row belongs to paid plans. Some free accounts start in Design automatically. Free credits cover design, and building your app needs a plan. See Plans & Subscriptions.
Design mode
Design mode is the cheap way to decide how your app looks. Rork asks a few questions about the style, then draws three or four screens. It writes no code until you press Build on the Review Design card.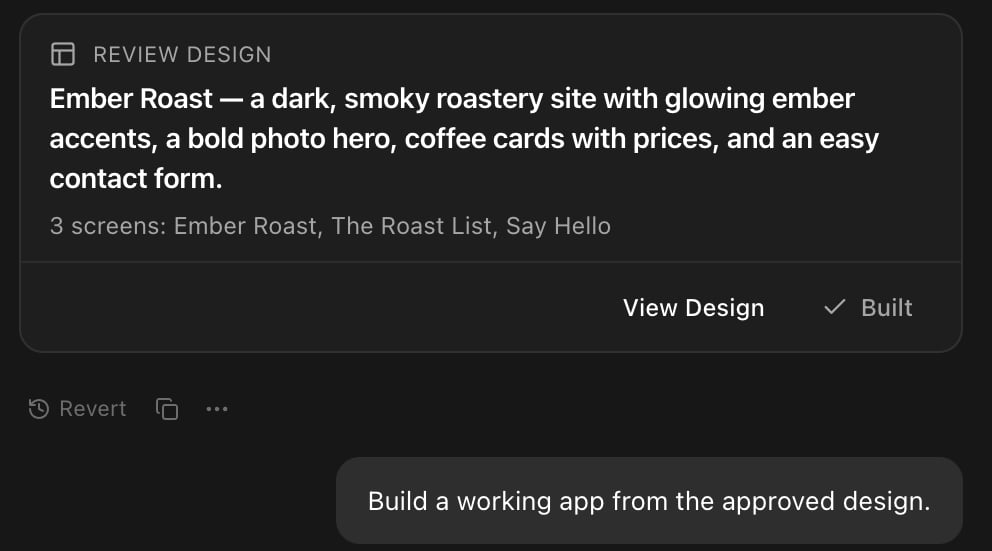
The Review Design card. After the build it keeps View Design and marks itself Built.
Design mode: the full guide
A demo, the questions Rork asks, choosing from four designs, websites, and what happens after Build.
Plan mode
Plan mode is for the changes that are too big to hand over blind. Rork writes down what it intends to do, and it changes no files until you agree. For a new app, the plan also draws the key screens and a small diagram of how they connect. Pick Plan in the mode menu, then send your message. Rork shows a Review Plan card in chat. View Plan opens the plan, and Build starts the work. Rork can also ask for Plan mode itself when a request looks large. Plan mode has no separate price. A plan message spends build credits like any other message.Plan mode: the full guide
A demo, three step-by-step tutorials, what a plan contains, and what Plan mode cannot do.
Building
Building is the default. Neither switch is on, you describe the change, and Rork edits the code. While it works, the chat shows what it does: Explored 7 files, Made 9 actions, Running checks, Building app. Each finished message lists the files it touched, and a preview of the result. Rork stops and asks when a step needs you: a key it does not have, a question with several sensible answers, a design decision it cannot guess. Those arrive as cards in the chat with buttons, not as walls of text.Choose the AI model
The composer has a model picker. It reads Auto by default.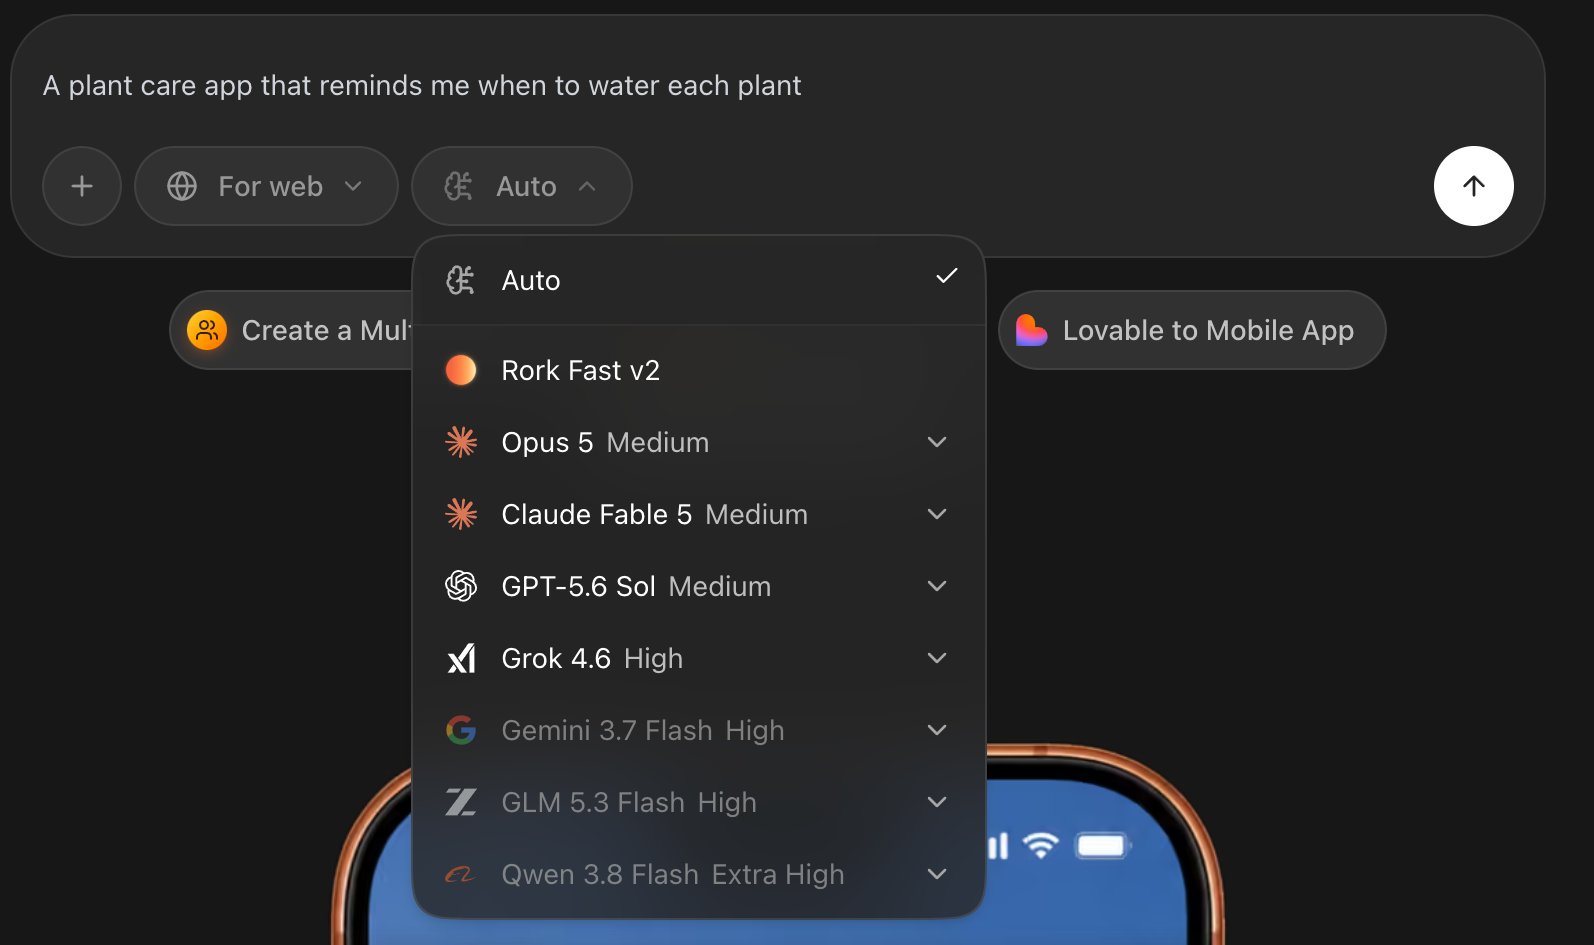
The model menu. Auto is the default, and models above your plan carry a Pro or Max badge.
Talk instead of typing
The microphone button records your voice and writes the text into the composer. Read it, edit it, then send it. Rork does not send a recording straight to the agent, so a wrong word costs you nothing.Attach what you already have
Use + → Upload image or drop a file onto the chat. Rork reads screenshots, photos, PDFs, video, audio, and 3D models. A screenshot is the fastest way to describe a design. Take a picture of a Figma frame, or of an app you like, and say what you want from it. Free accounts attach files up to 10MB. Paid plans go up to 5GB.Queue the next message
You do not have to wait for the agent. Send another message while it works and Rork queues it. The queue header counts them, for example 2 Queued, and each row can be edited or removed before its turn. If a turn stops or fails, the queue marks itself · Paused so nothing runs on top of broken work. Press Resume when you are ready.FAQ
Does the design step cost credits?
Does the design step cost credits?
Yes, but design credits, not build credits. The free plan includes a monthly allowance for designing. Turning an approved design into a working app needs a paid plan. See Build credits vs Cloud credits.
Can I skip Design mode?
Can I skip Design mode?
Yes. Pick Build in the mode menu before you send, and Rork builds without a design. To keep the design but skip changes, press Build on the first proposal. See Design mode.
How much did that message cost?
How much did that message cost?
Open the ⋯ menu under any answer. It shows the model that ran, the credits it used, and the size of the context. See Undo a change and go back a version.
Rork keeps breaking the same thing. What now?
Rork keeps breaking the same thing. What now?
Stop adding messages on top of it. Revert to the last good version, then describe the change more narrowly. See How to get out of an error loop.
Where do the plan and design files live?
Where do the plan and design files live?
Plans go to
.rork/plans/ and the design contract to .rork/DESIGN.md. Both travel with your code to GitHub. See How to sync your project with GitHub.Next steps
Undo and version history
Take back a change, or go back several versions.
Images, video, and 3D
Generate the pictures and sounds your app needs.
How to prompt successfully
Ask for an experience, not a list of features.
Share the project
Invite people to view or edit the same app.