Rork → Superwall Paywall
After building your app in Rork, use this documentation to setup a paywall with Superwall.
This tutorial was created alongside this video which has all the instructions the documentation has. Authored by @RasBuilds.Summary
This tutorial will guide you through taking your Rork project and adding a Superwall paywall to it, deploying it to the app store, and verifying it works Requirements- Apple AppStore Developer Account
- Superwall Account
- AI-Powered IDE (Windsurf/Cursor/Copilot/etc)
- Physical iPhone to Test
1. Sync your project to Git
Press the Integrations button at the top right inside of your Rork project. Press Create Repository and setup a new repo connected to your Github account.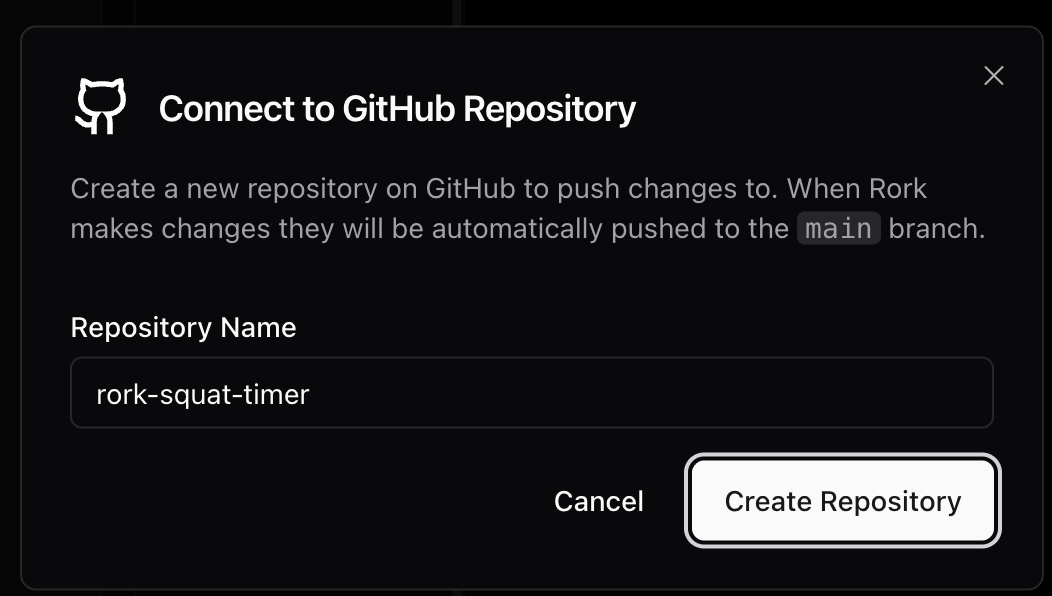
2. Open the Git repo locally in your IDE
Use the instructions inside of your Github repository or your IDE to locally connect your repo.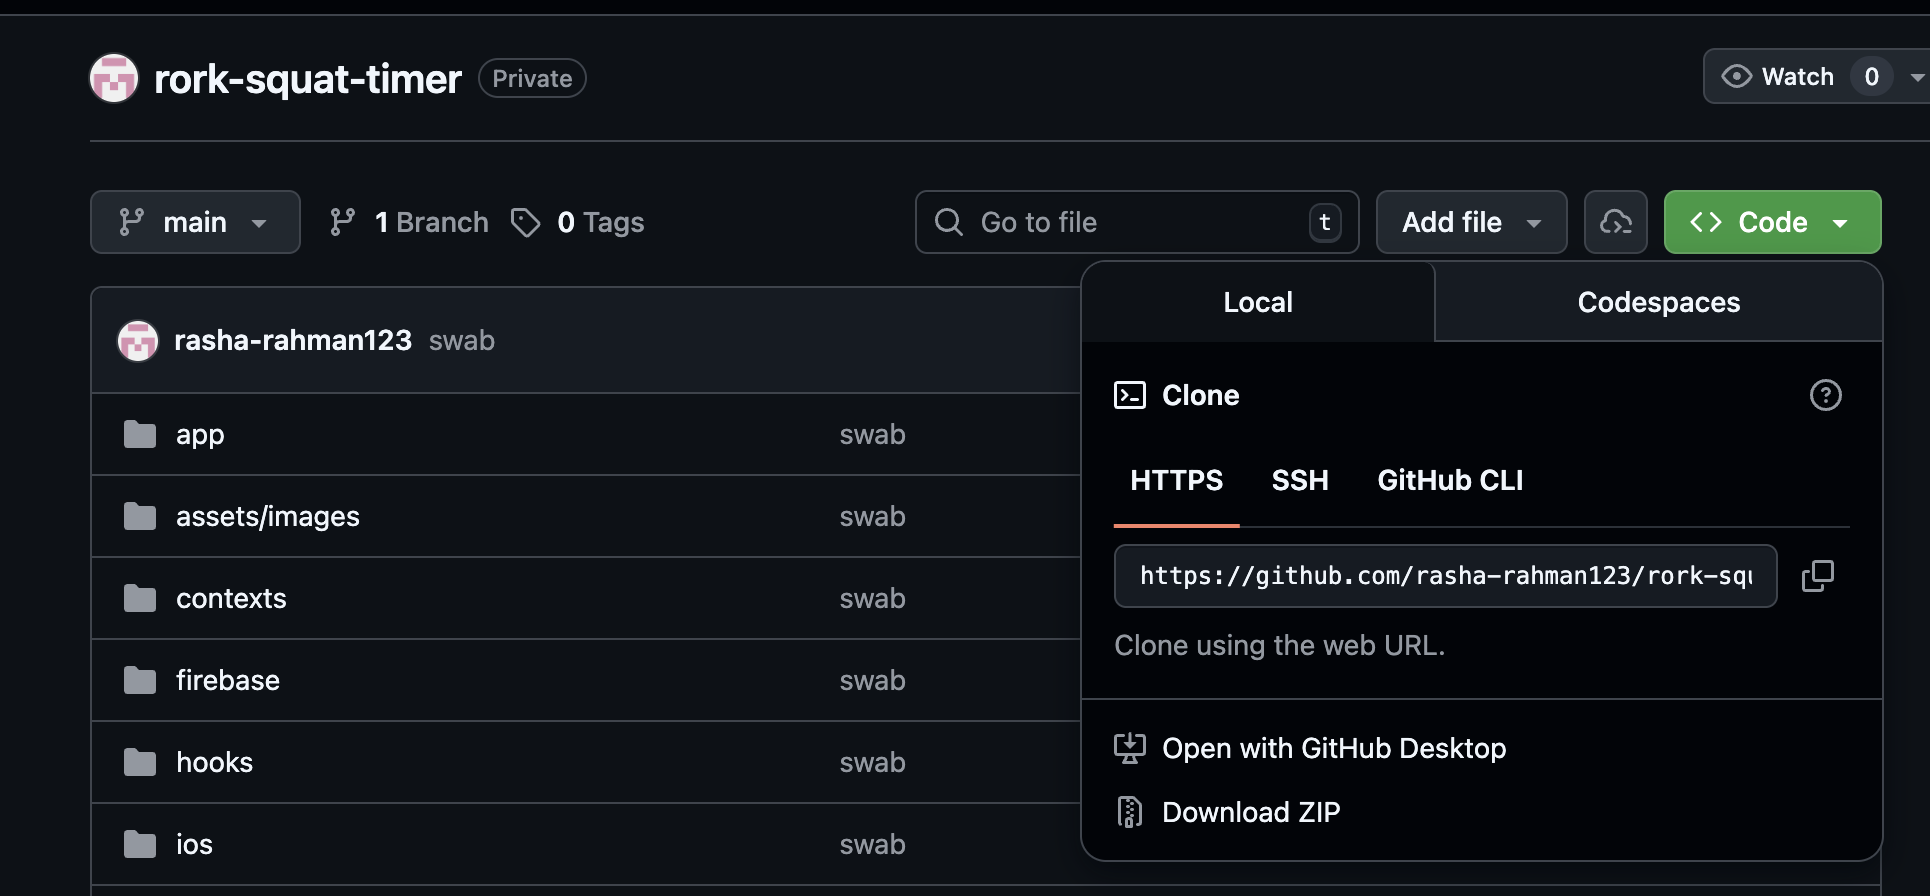
Install project packages
3. Setup local development builds
In order for us to test using a local device, we need to initialize the Expo project and setup development build. Lets first initialize Expo. If this is your first time using Expo, you will be asked to create an account and setup the project. The default yes to the questions are fine.Install EAS + Login
Initialize Expo
Install expo-dev-client
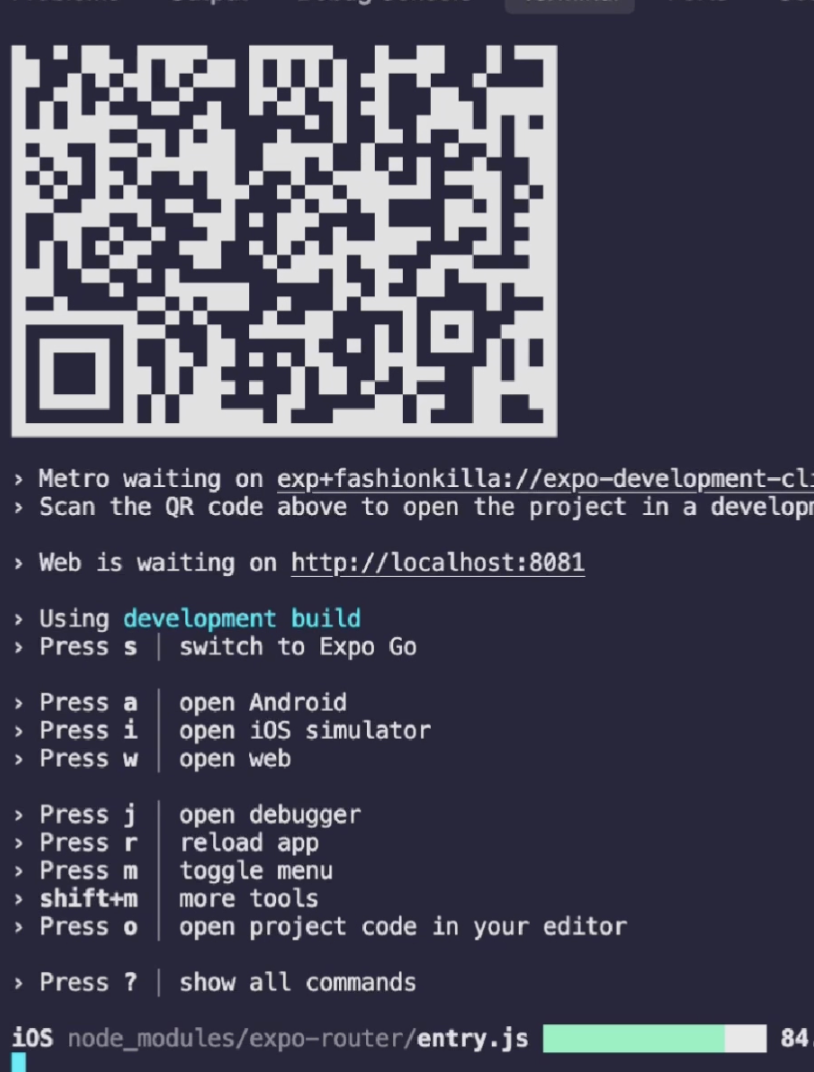
Deploy a Development Build
Test your Development Build
Development builds are considered development because they rely on you to run a local Expo server. It lets you update code in real time with the build that is in your phone. The only reason to deploy the build again is not for basic code changes, but if you change the binary (package installs that change native code).Run Expo locally
4. Initial Superwall Project Setup
Superwall helps you build & deploy paywalls without coding. You can even A/B test different paywalls here. Superwall makes it really convenient to gate features in your app and manage user payments. https://superwall.com/ Create a Superwall account and create a project and choose React Native platform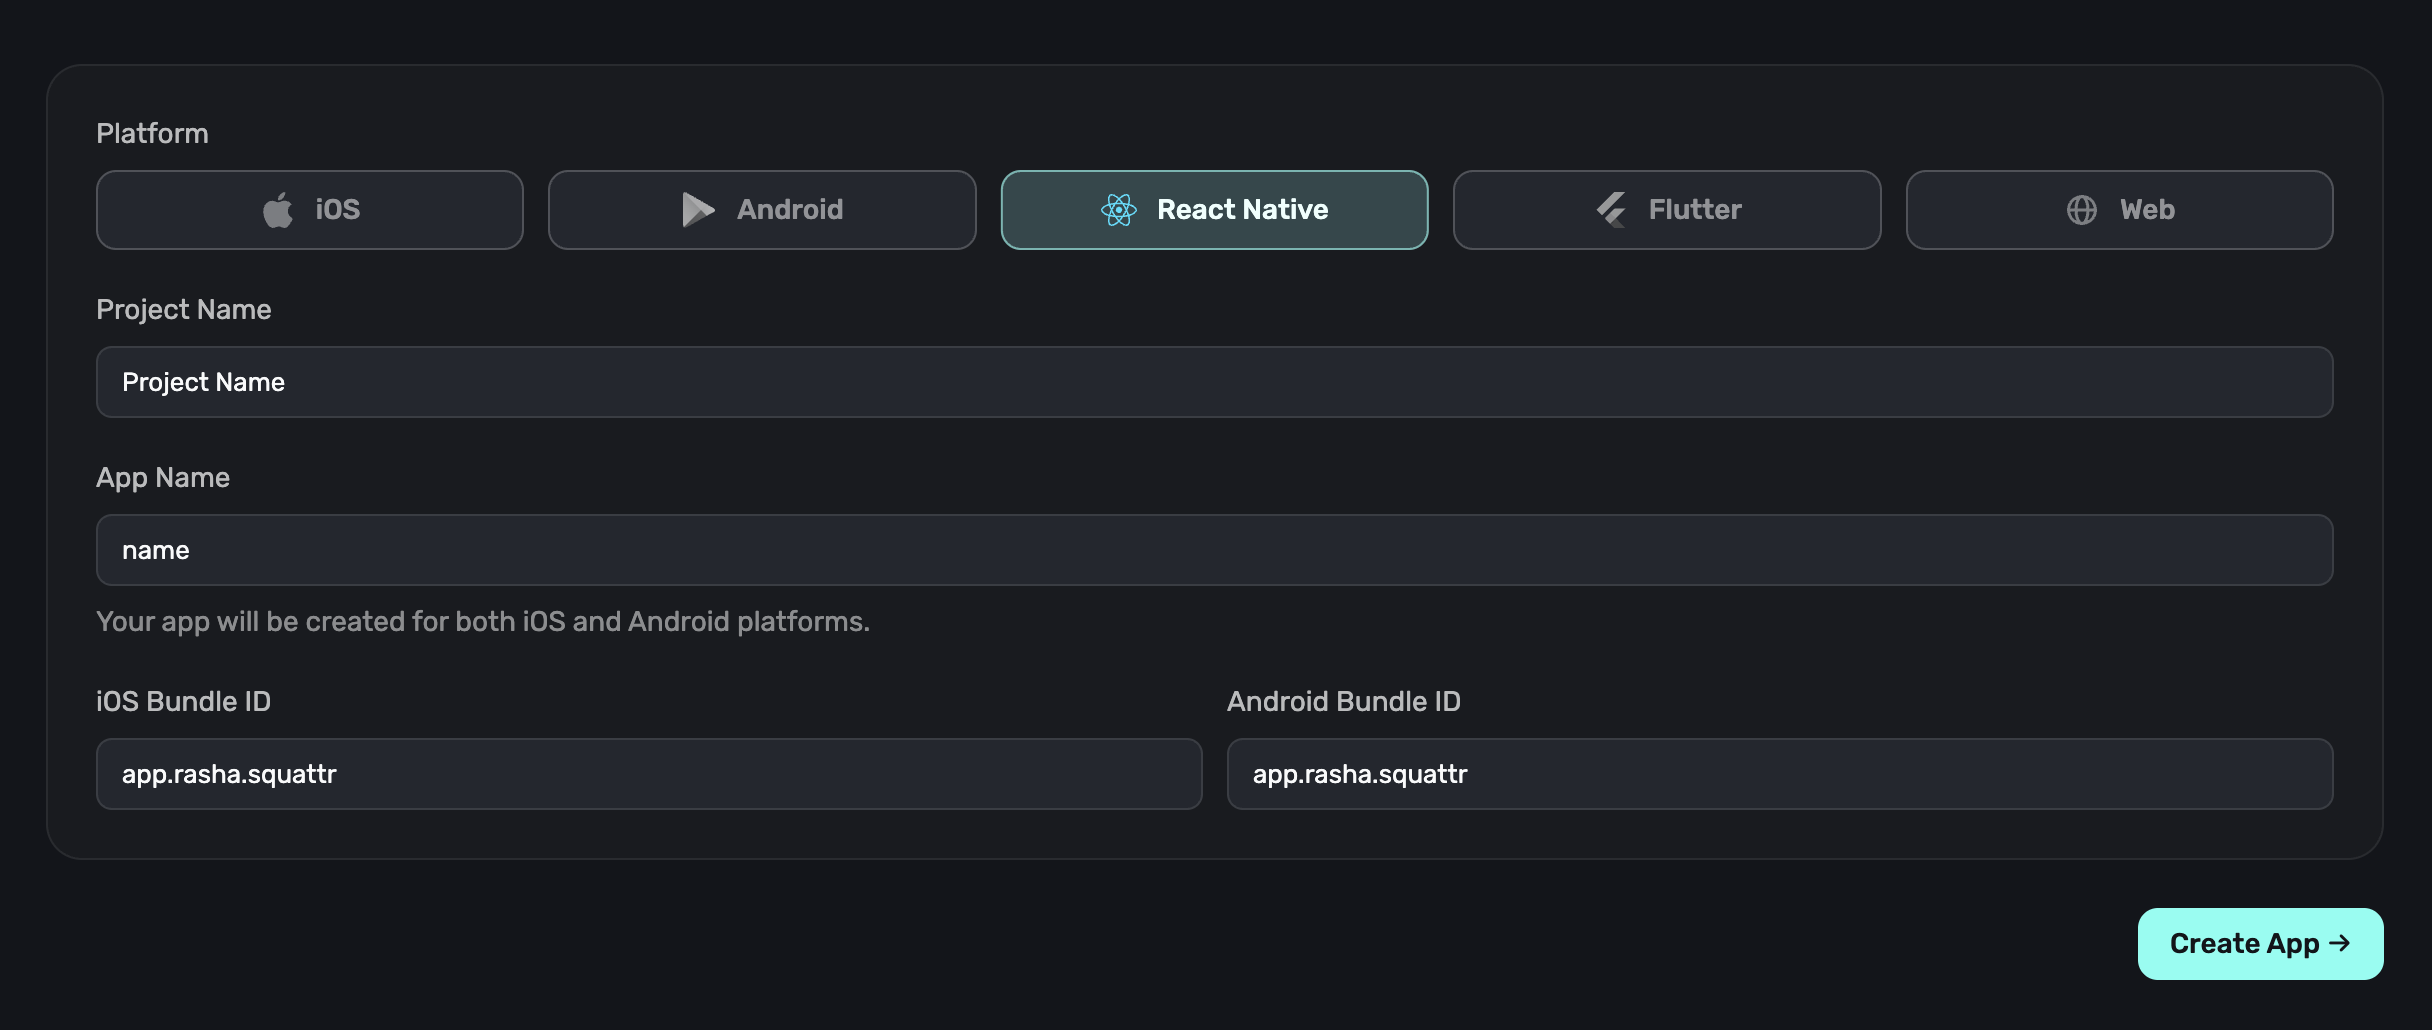
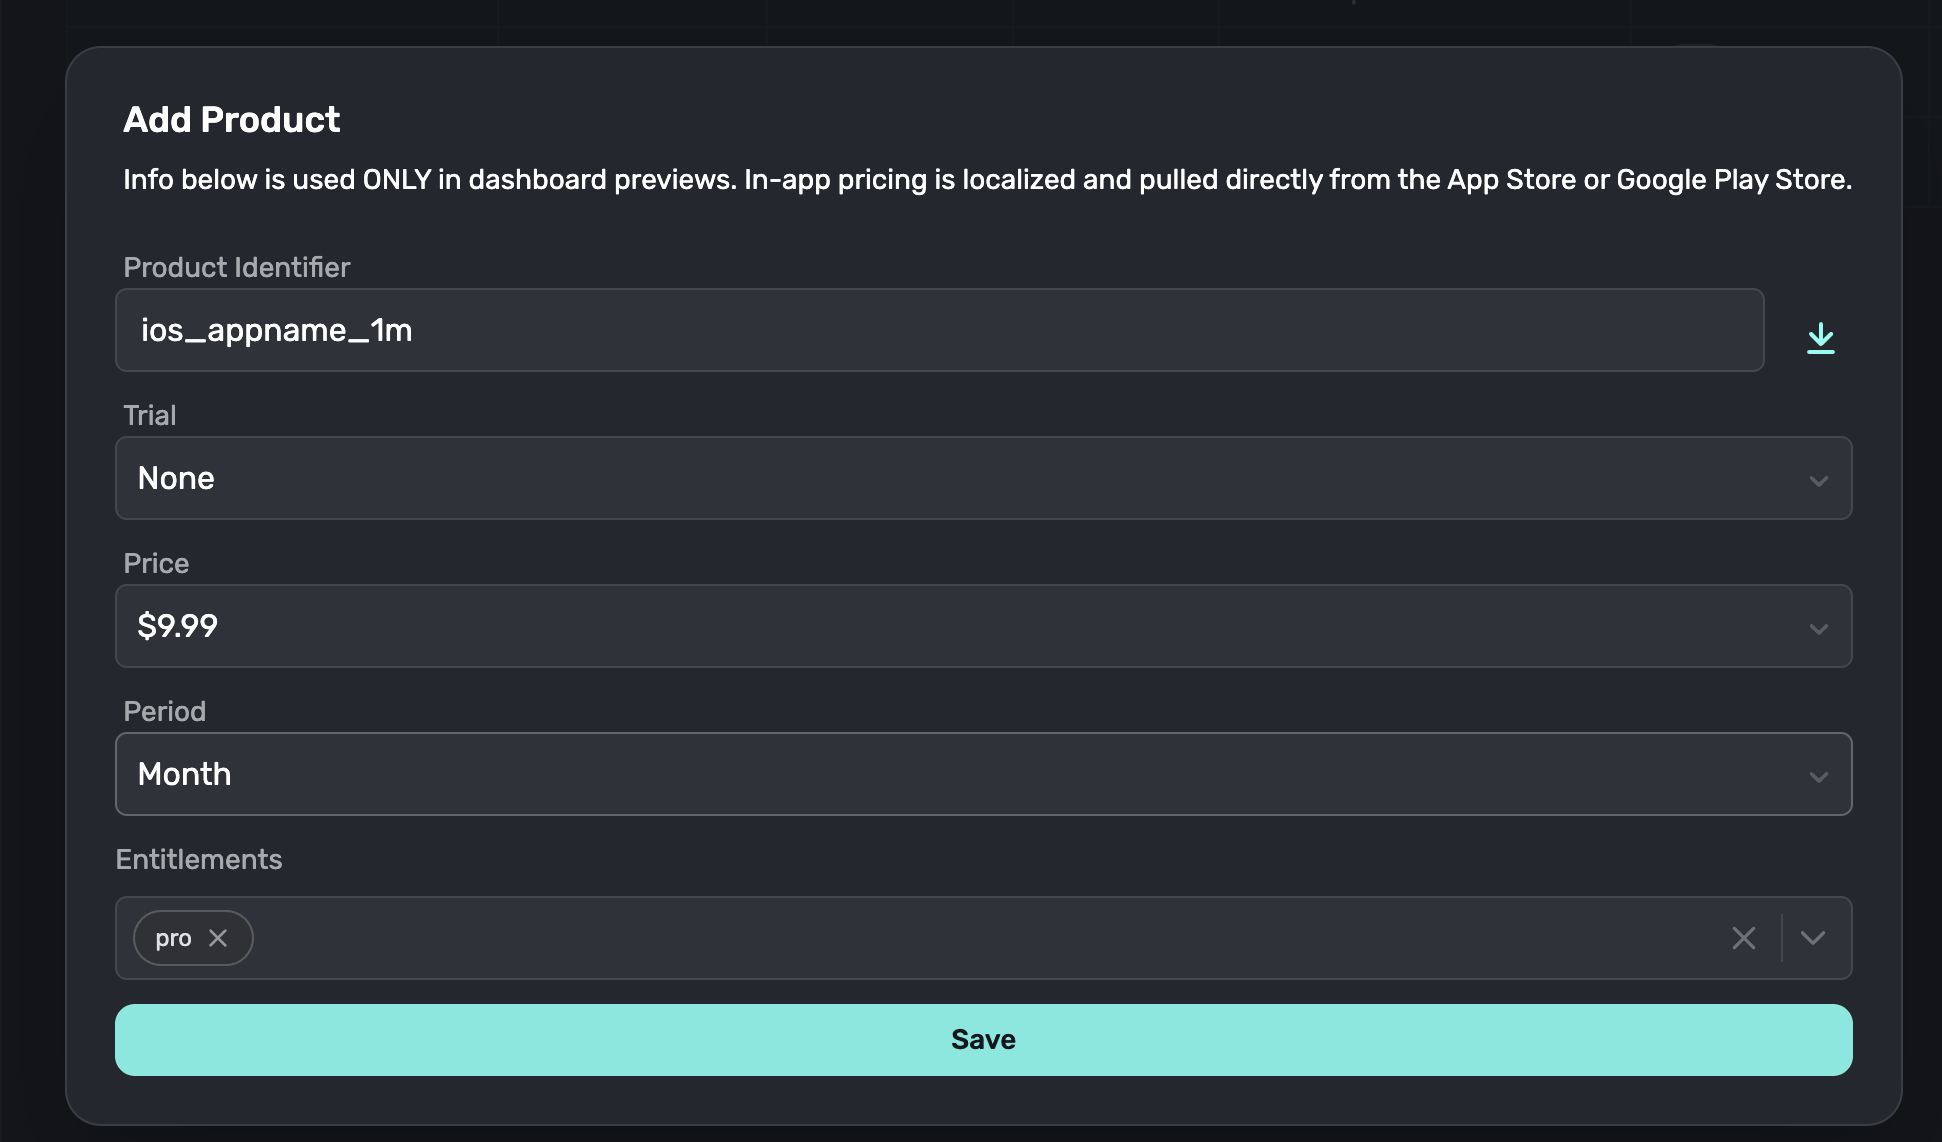
5. Create Your Superwall Products
Now we need to establish the different in-app purchases the user will be able to do. Each one of these is considered a product. We need to setup the products name, id, price, duration, and trial period. It is important that we have some naming convention for this. We will need to use these exact same names when we create our products in the AppStore Connect later in the tutorial. For this tutorial, we will create 3 products. Our app is a single “pro” subscription, but we will have 3 ways one can buy it. One is a 10/month plan. And finally a $100/year plan. The naming convention for the IDs will be like so:ios_appname_1m ← month plan
ios_appname_7d ← week plan
ios_appname_1y ← year plan
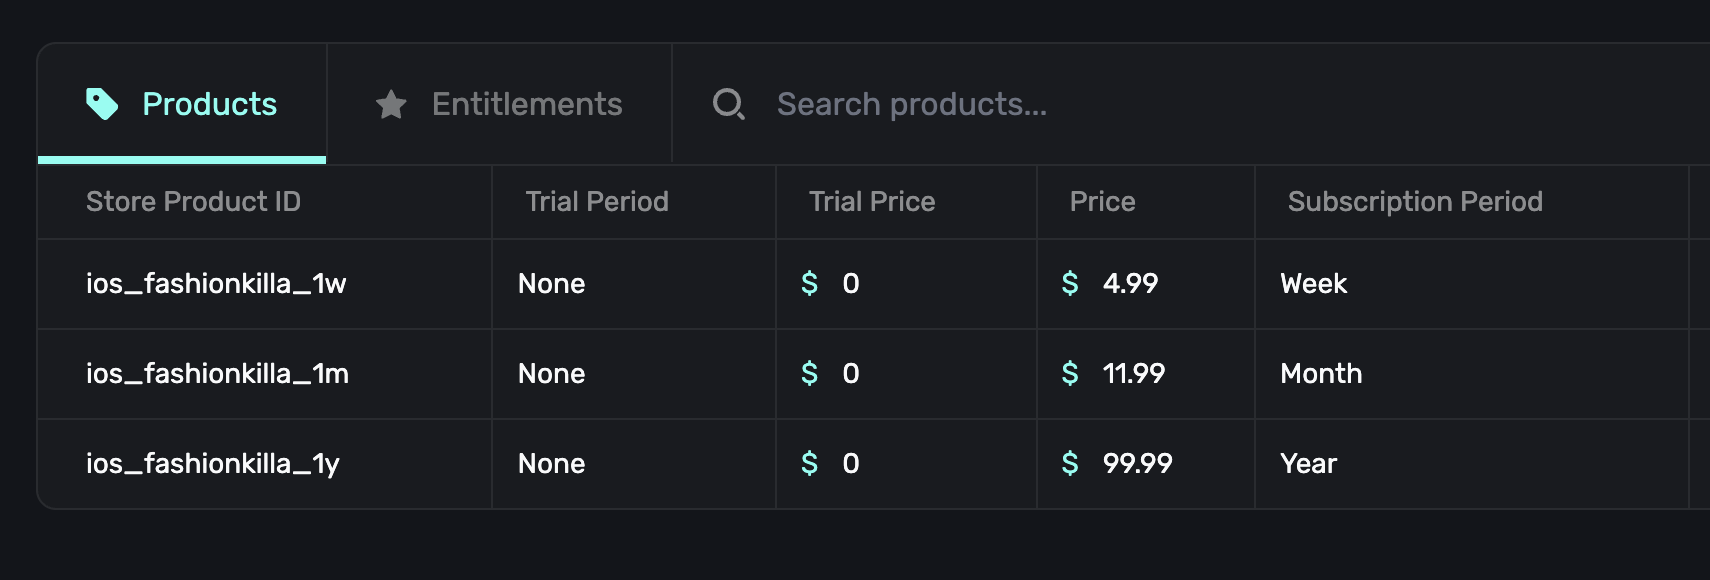
Click on the Products page inside of your Superwall project.
Create 3 products and label them correctly
6. Creating the Paywall
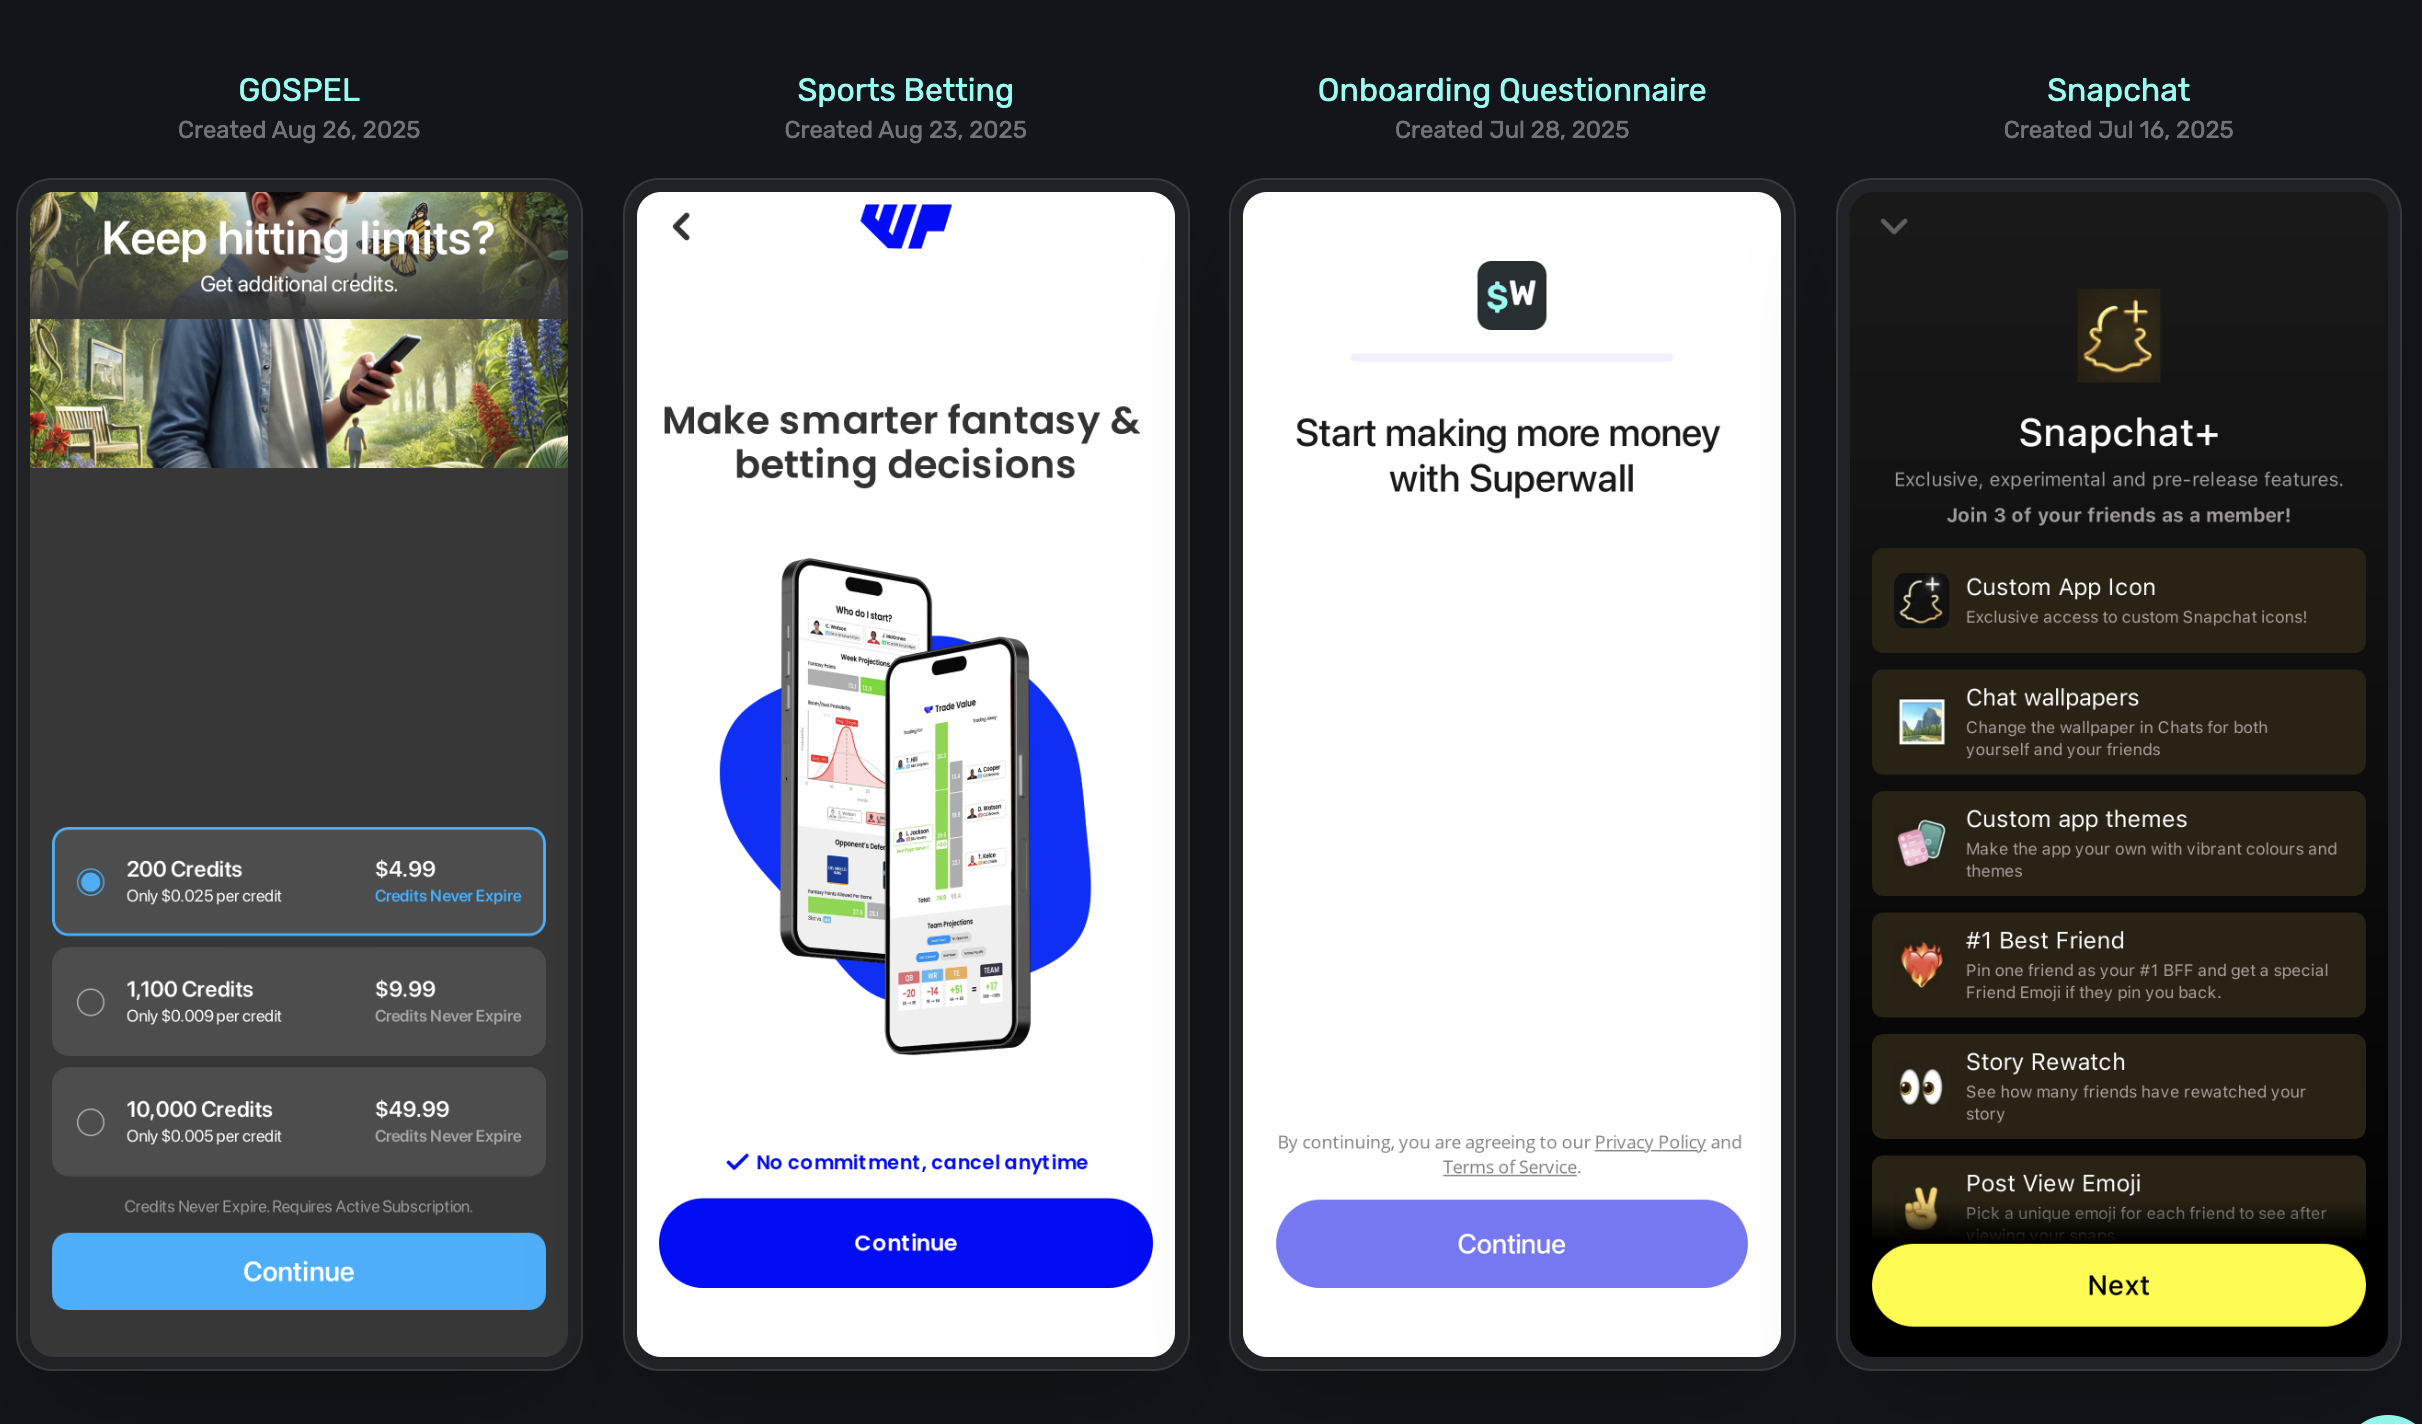
Superwall has a ton of templates for paywalls. You can use those and edit them to your liking in the paywall editor. Superwalls editor allows you to remotely update paywalls so you can optimize your paywalls for higher conversion rates. Go to the Paywall page and create a new one. Choose a paywall template that fits your aesthetic. Preferably one that also had 2-3 buttons already. This will open the paywall editor.Choose your Paywall Template
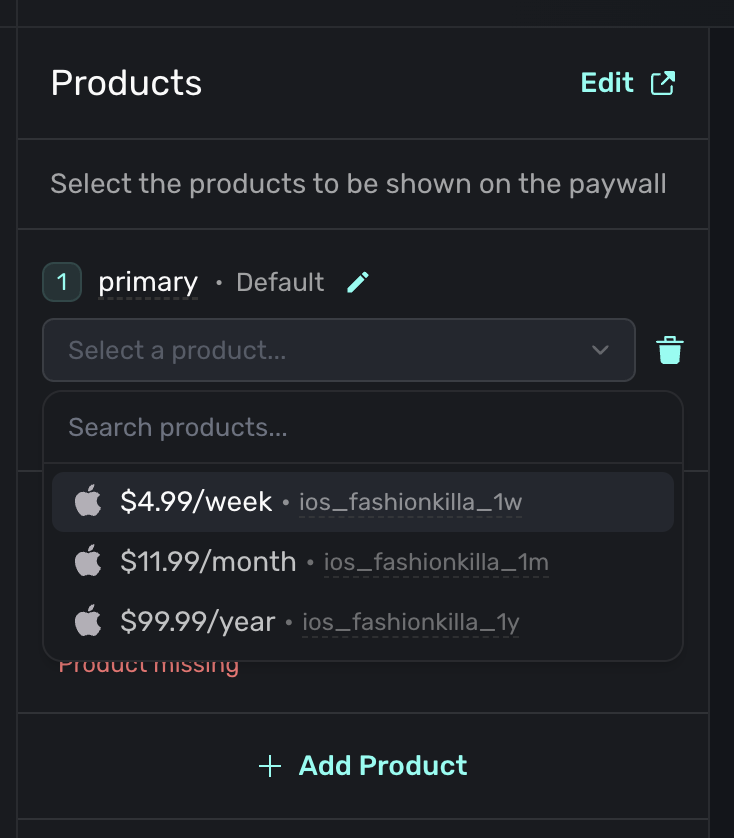
Connect your Products to your New Paywall
Once the editor opens, you’ll notice that the prices are empty. We need to connect the real products you setup earlier to it. Press the Products tab on the left side of your paywall editor.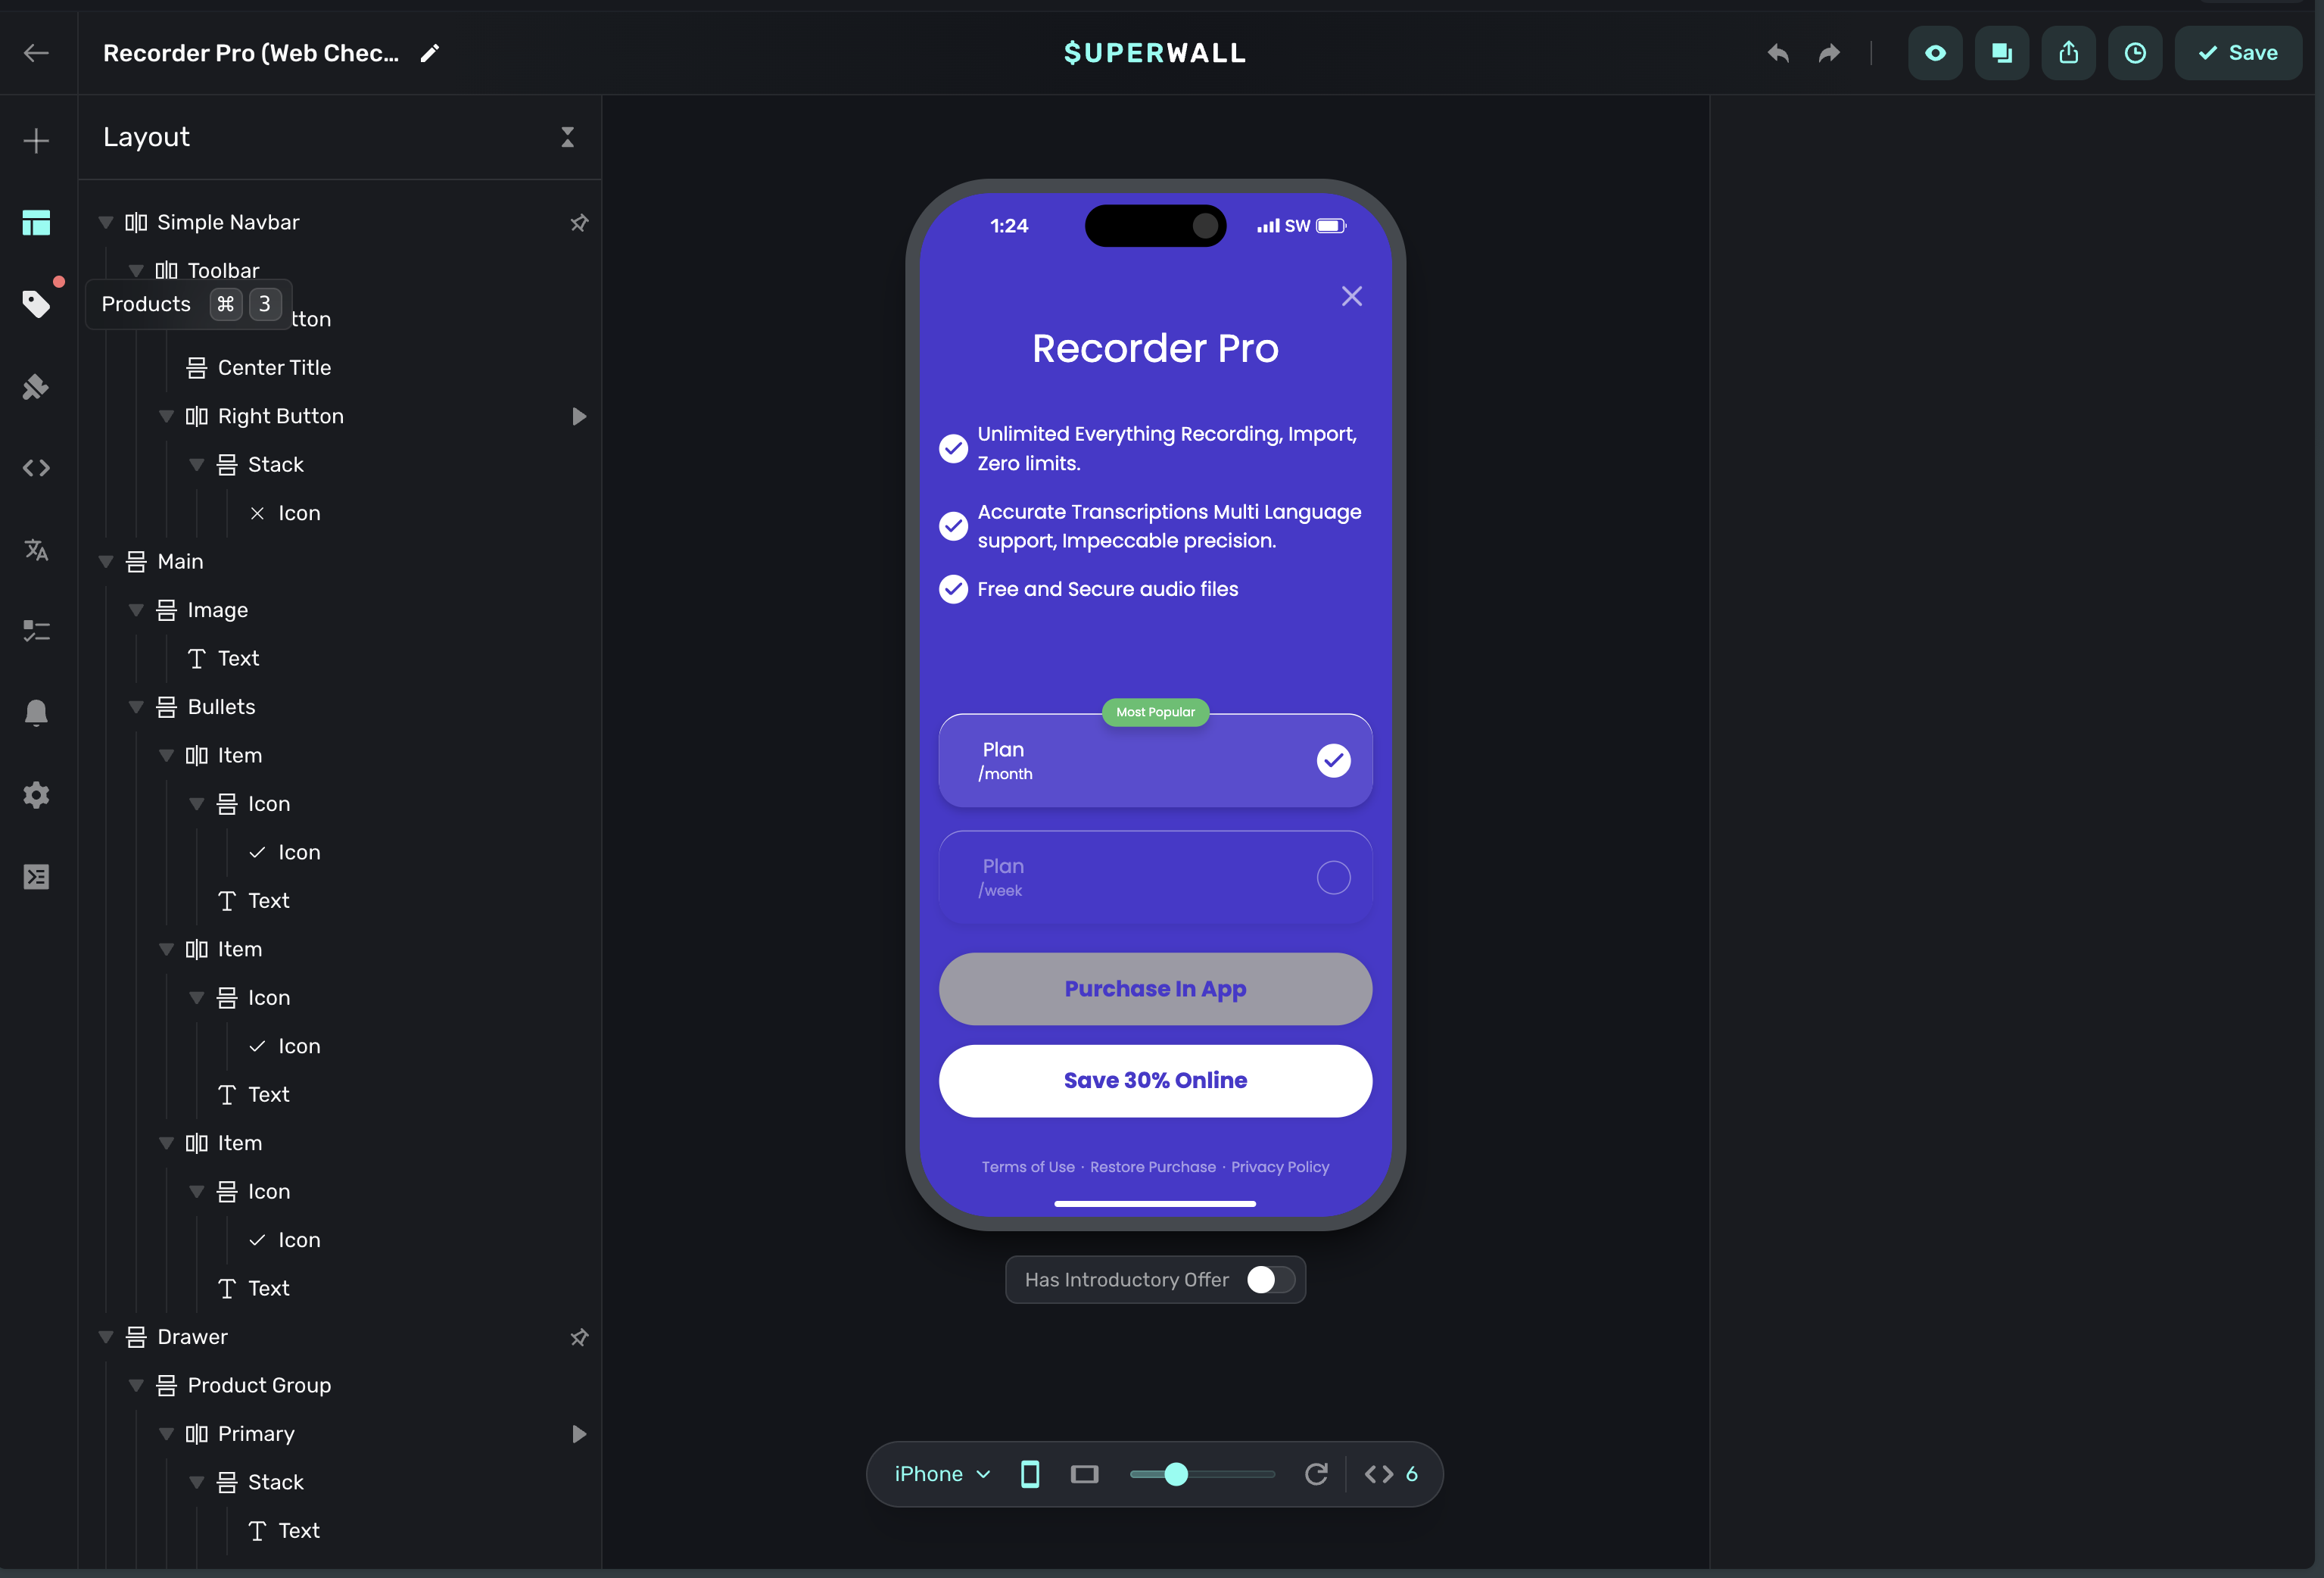
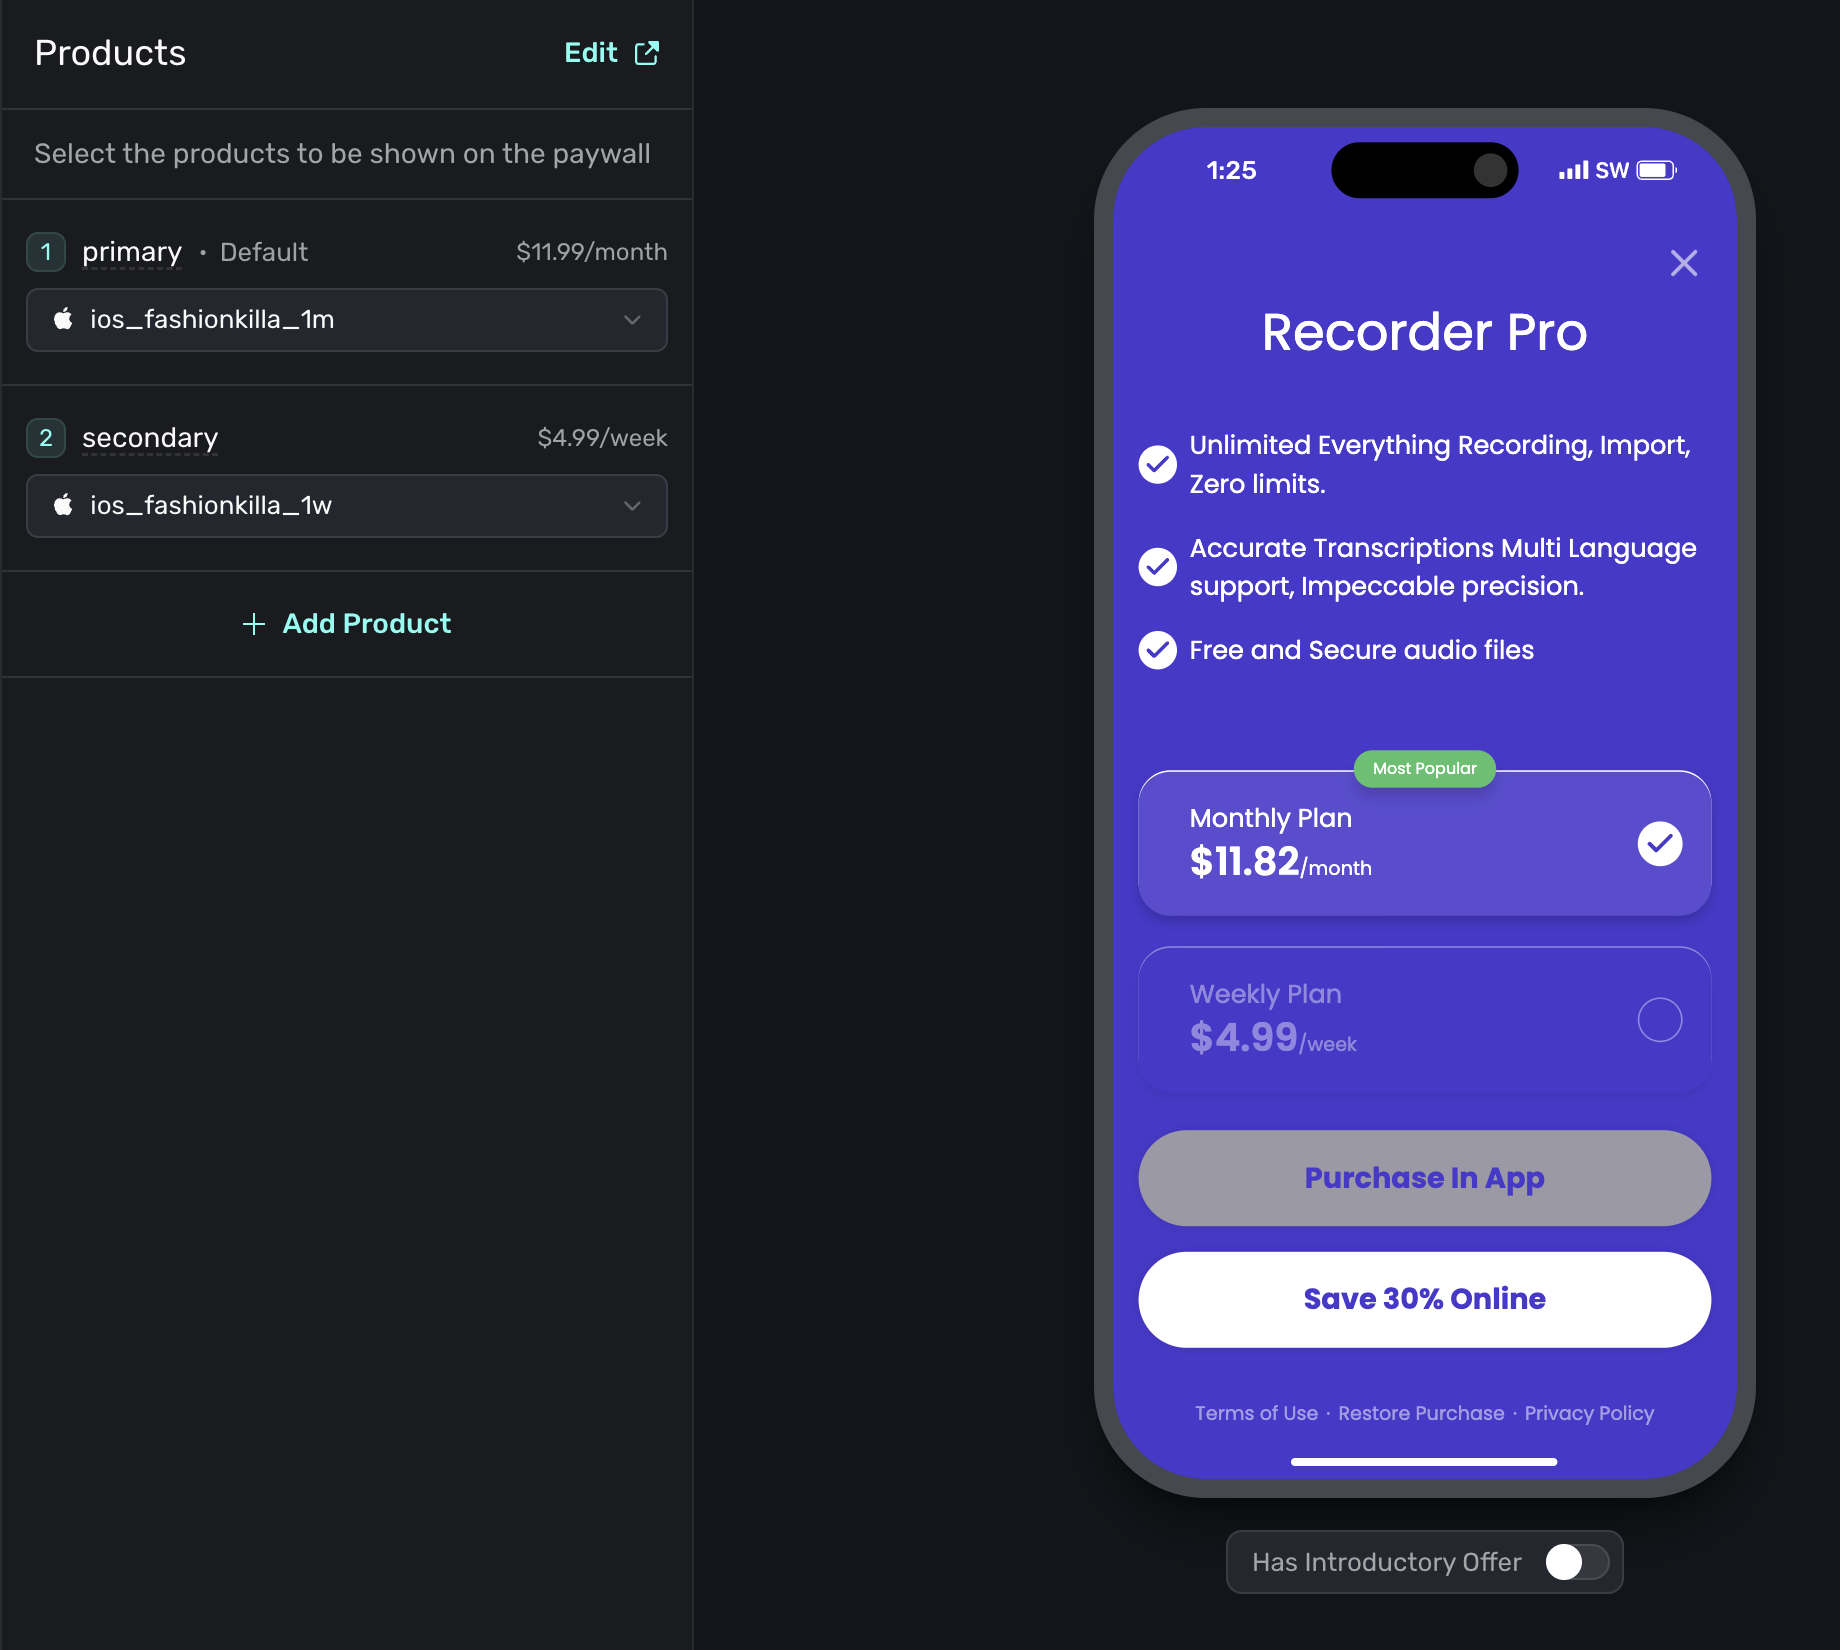
Update the text on the Paywall so it fits your App and finally press Publish
7. Linking your Paywall to a Campaign
Superwall is systematically setup to best support testing and different experiments for paywalls. Campaigns are experiments that can A/B test paywalls and track different trigger placements.What is a trigger placement?
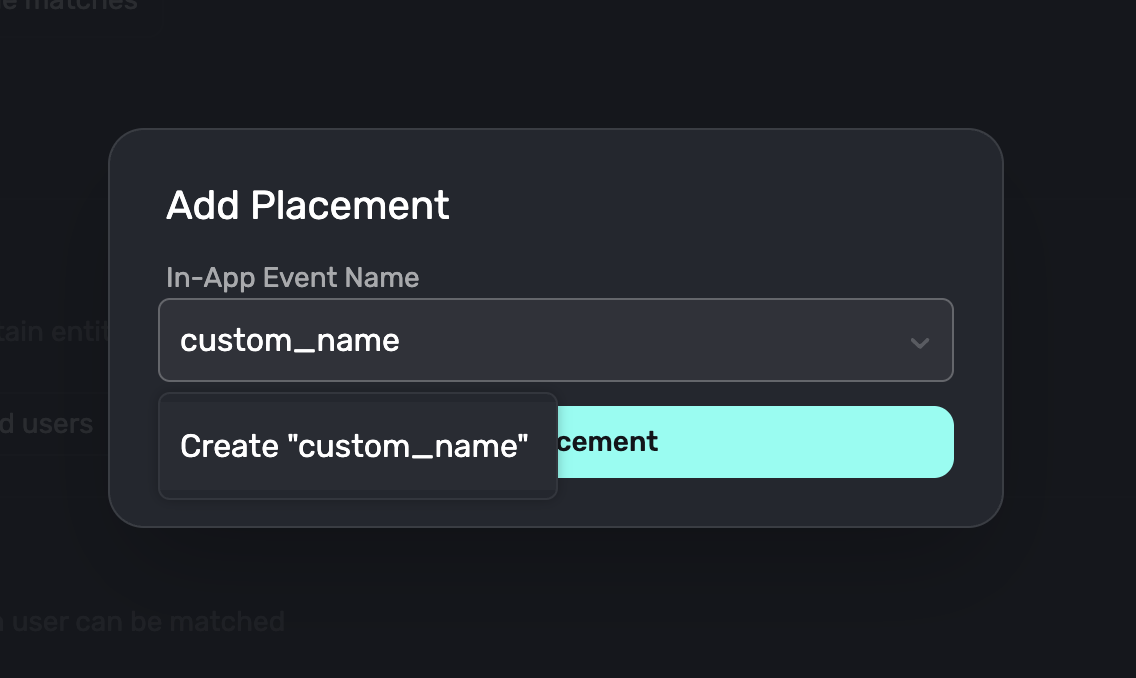
A trigger placement is the keyword + placement of a paywall inside of the app. If you are building an AI image generation app, you may place the trigger on the Home page Submit button.Go to Campaigns and update the first campaign trigger
Update thecampaign_trigger placement to something that would make sense with your app.
Ex: homepage_submit_button
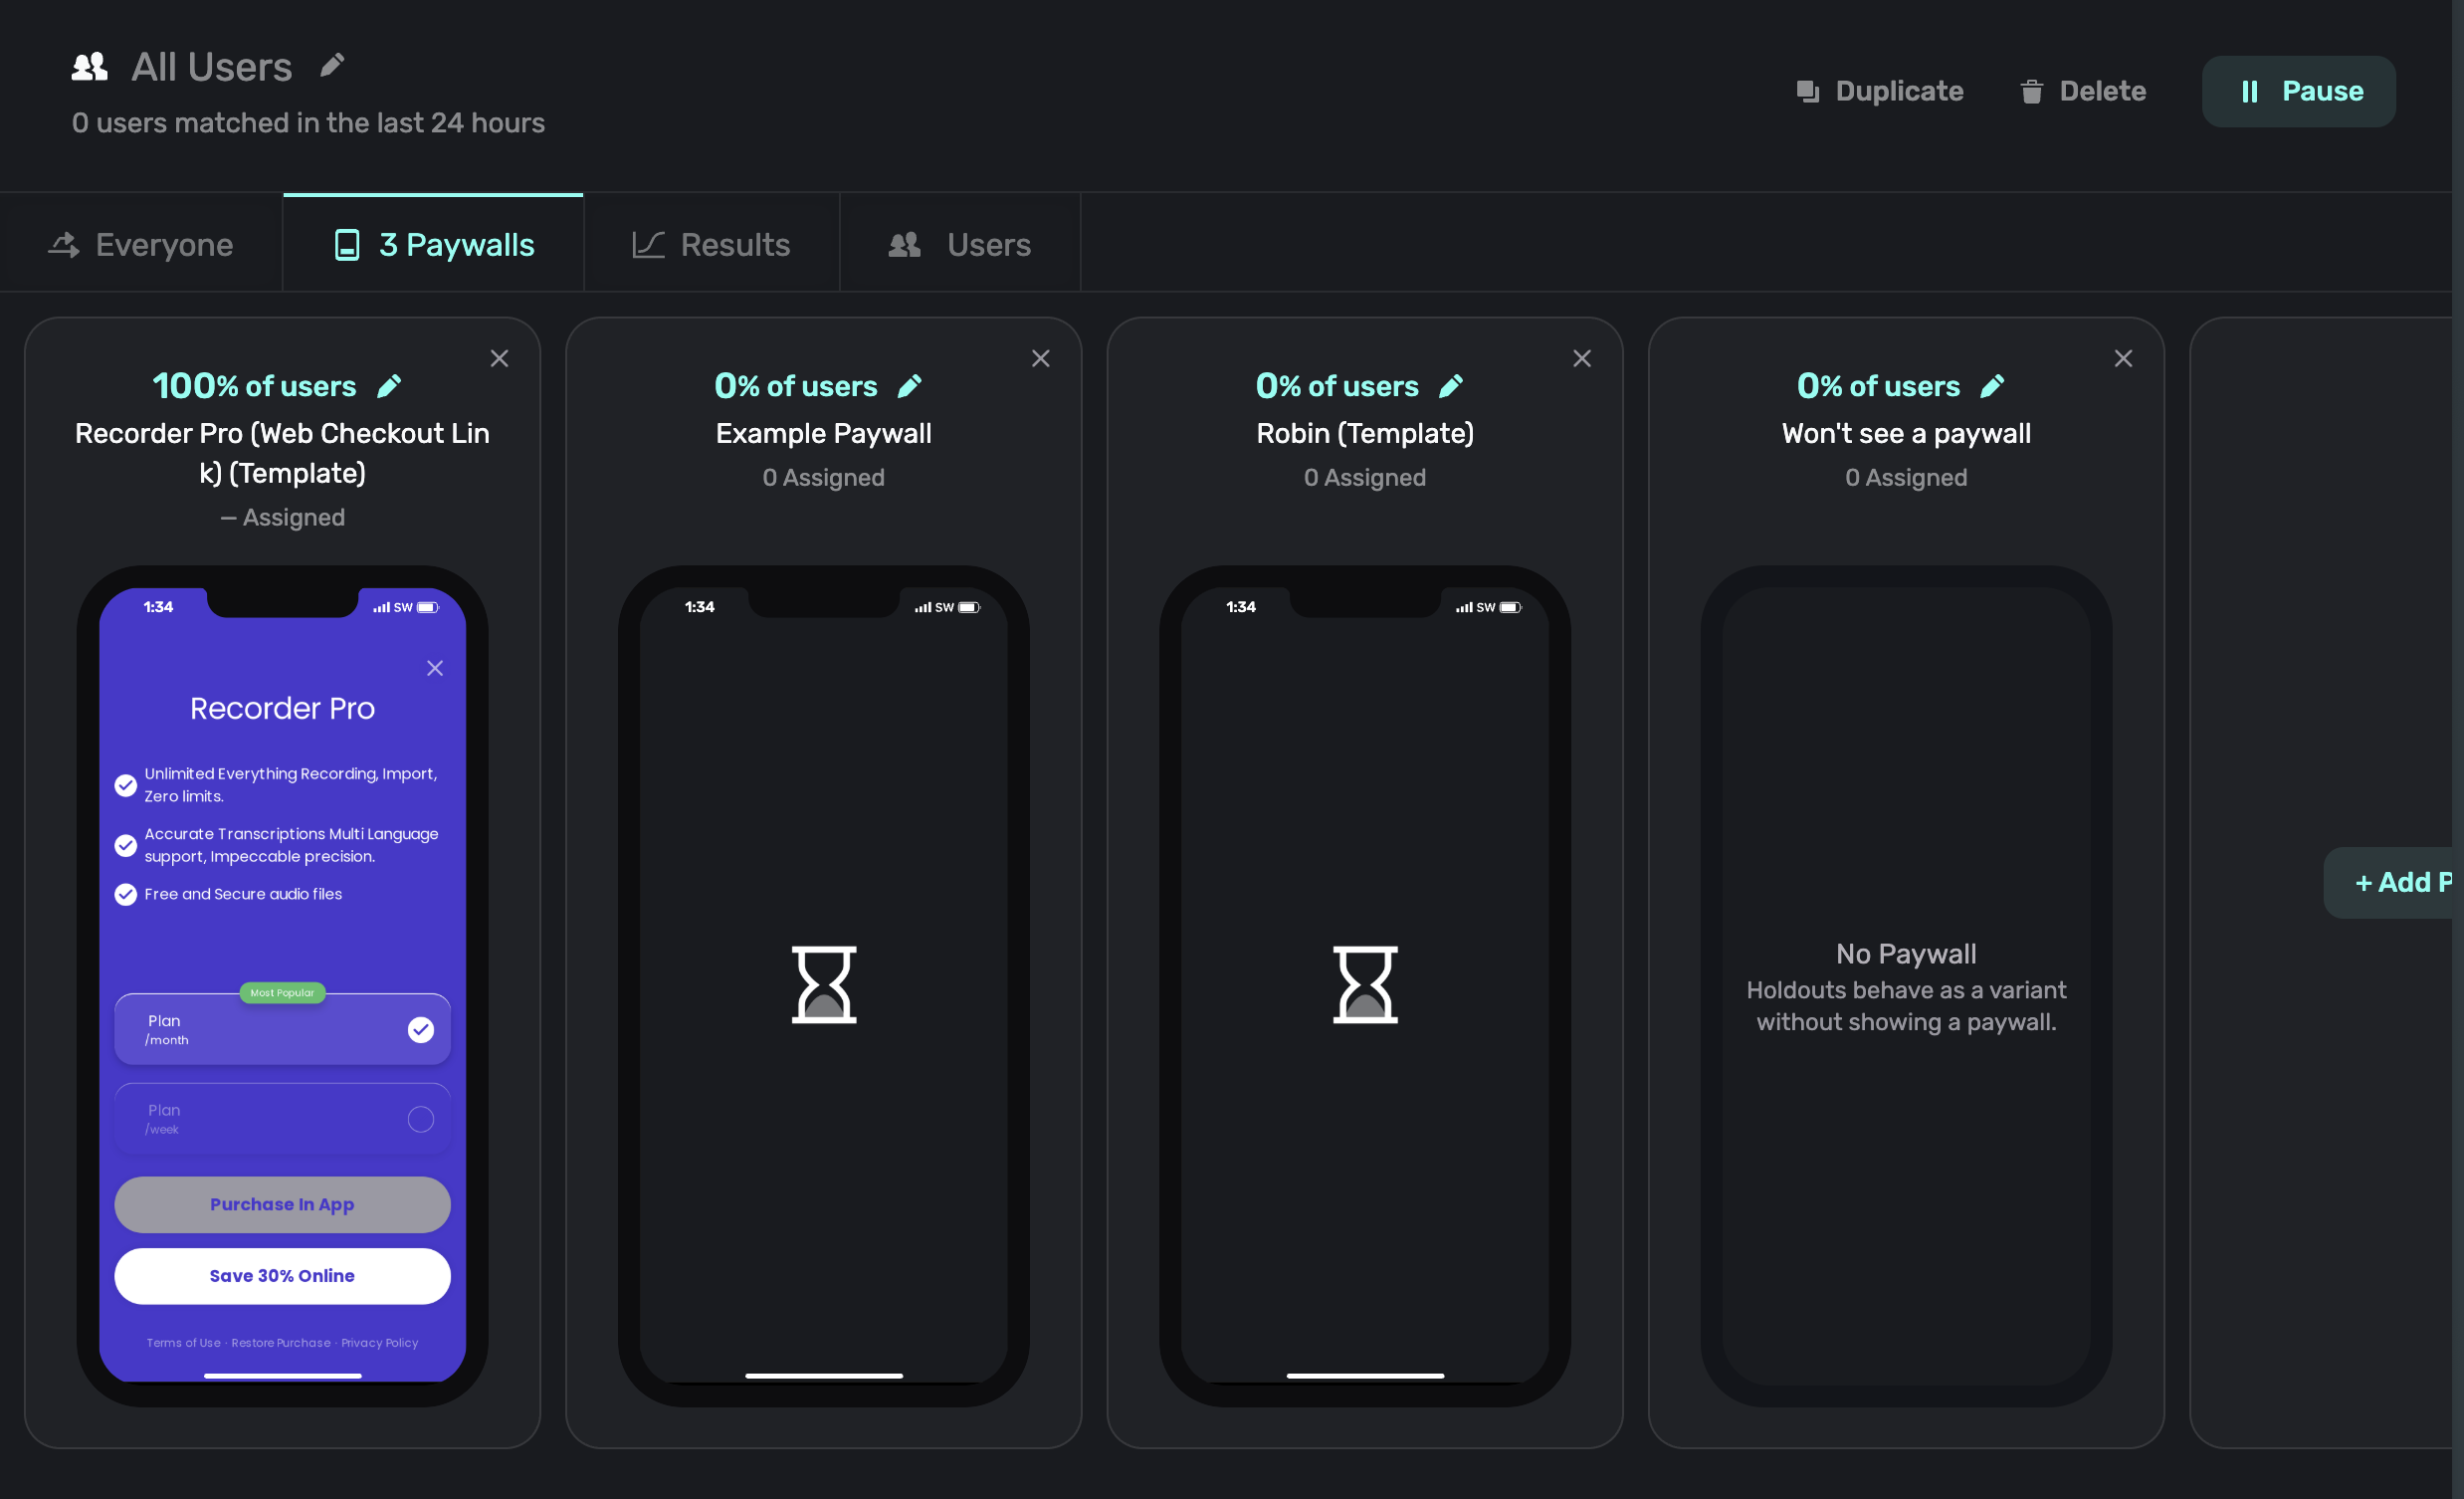
Go to the paywall tab inside of the Campaign and add your newly made paywall and set it to 100% use
8. Install Superwall into the App
https://superwall.com/docs/expo/quickstart/install We need to install the Superwall package into our Expo app. Go back to your IDE and run these commands to install Superwall.Install expo-superwall
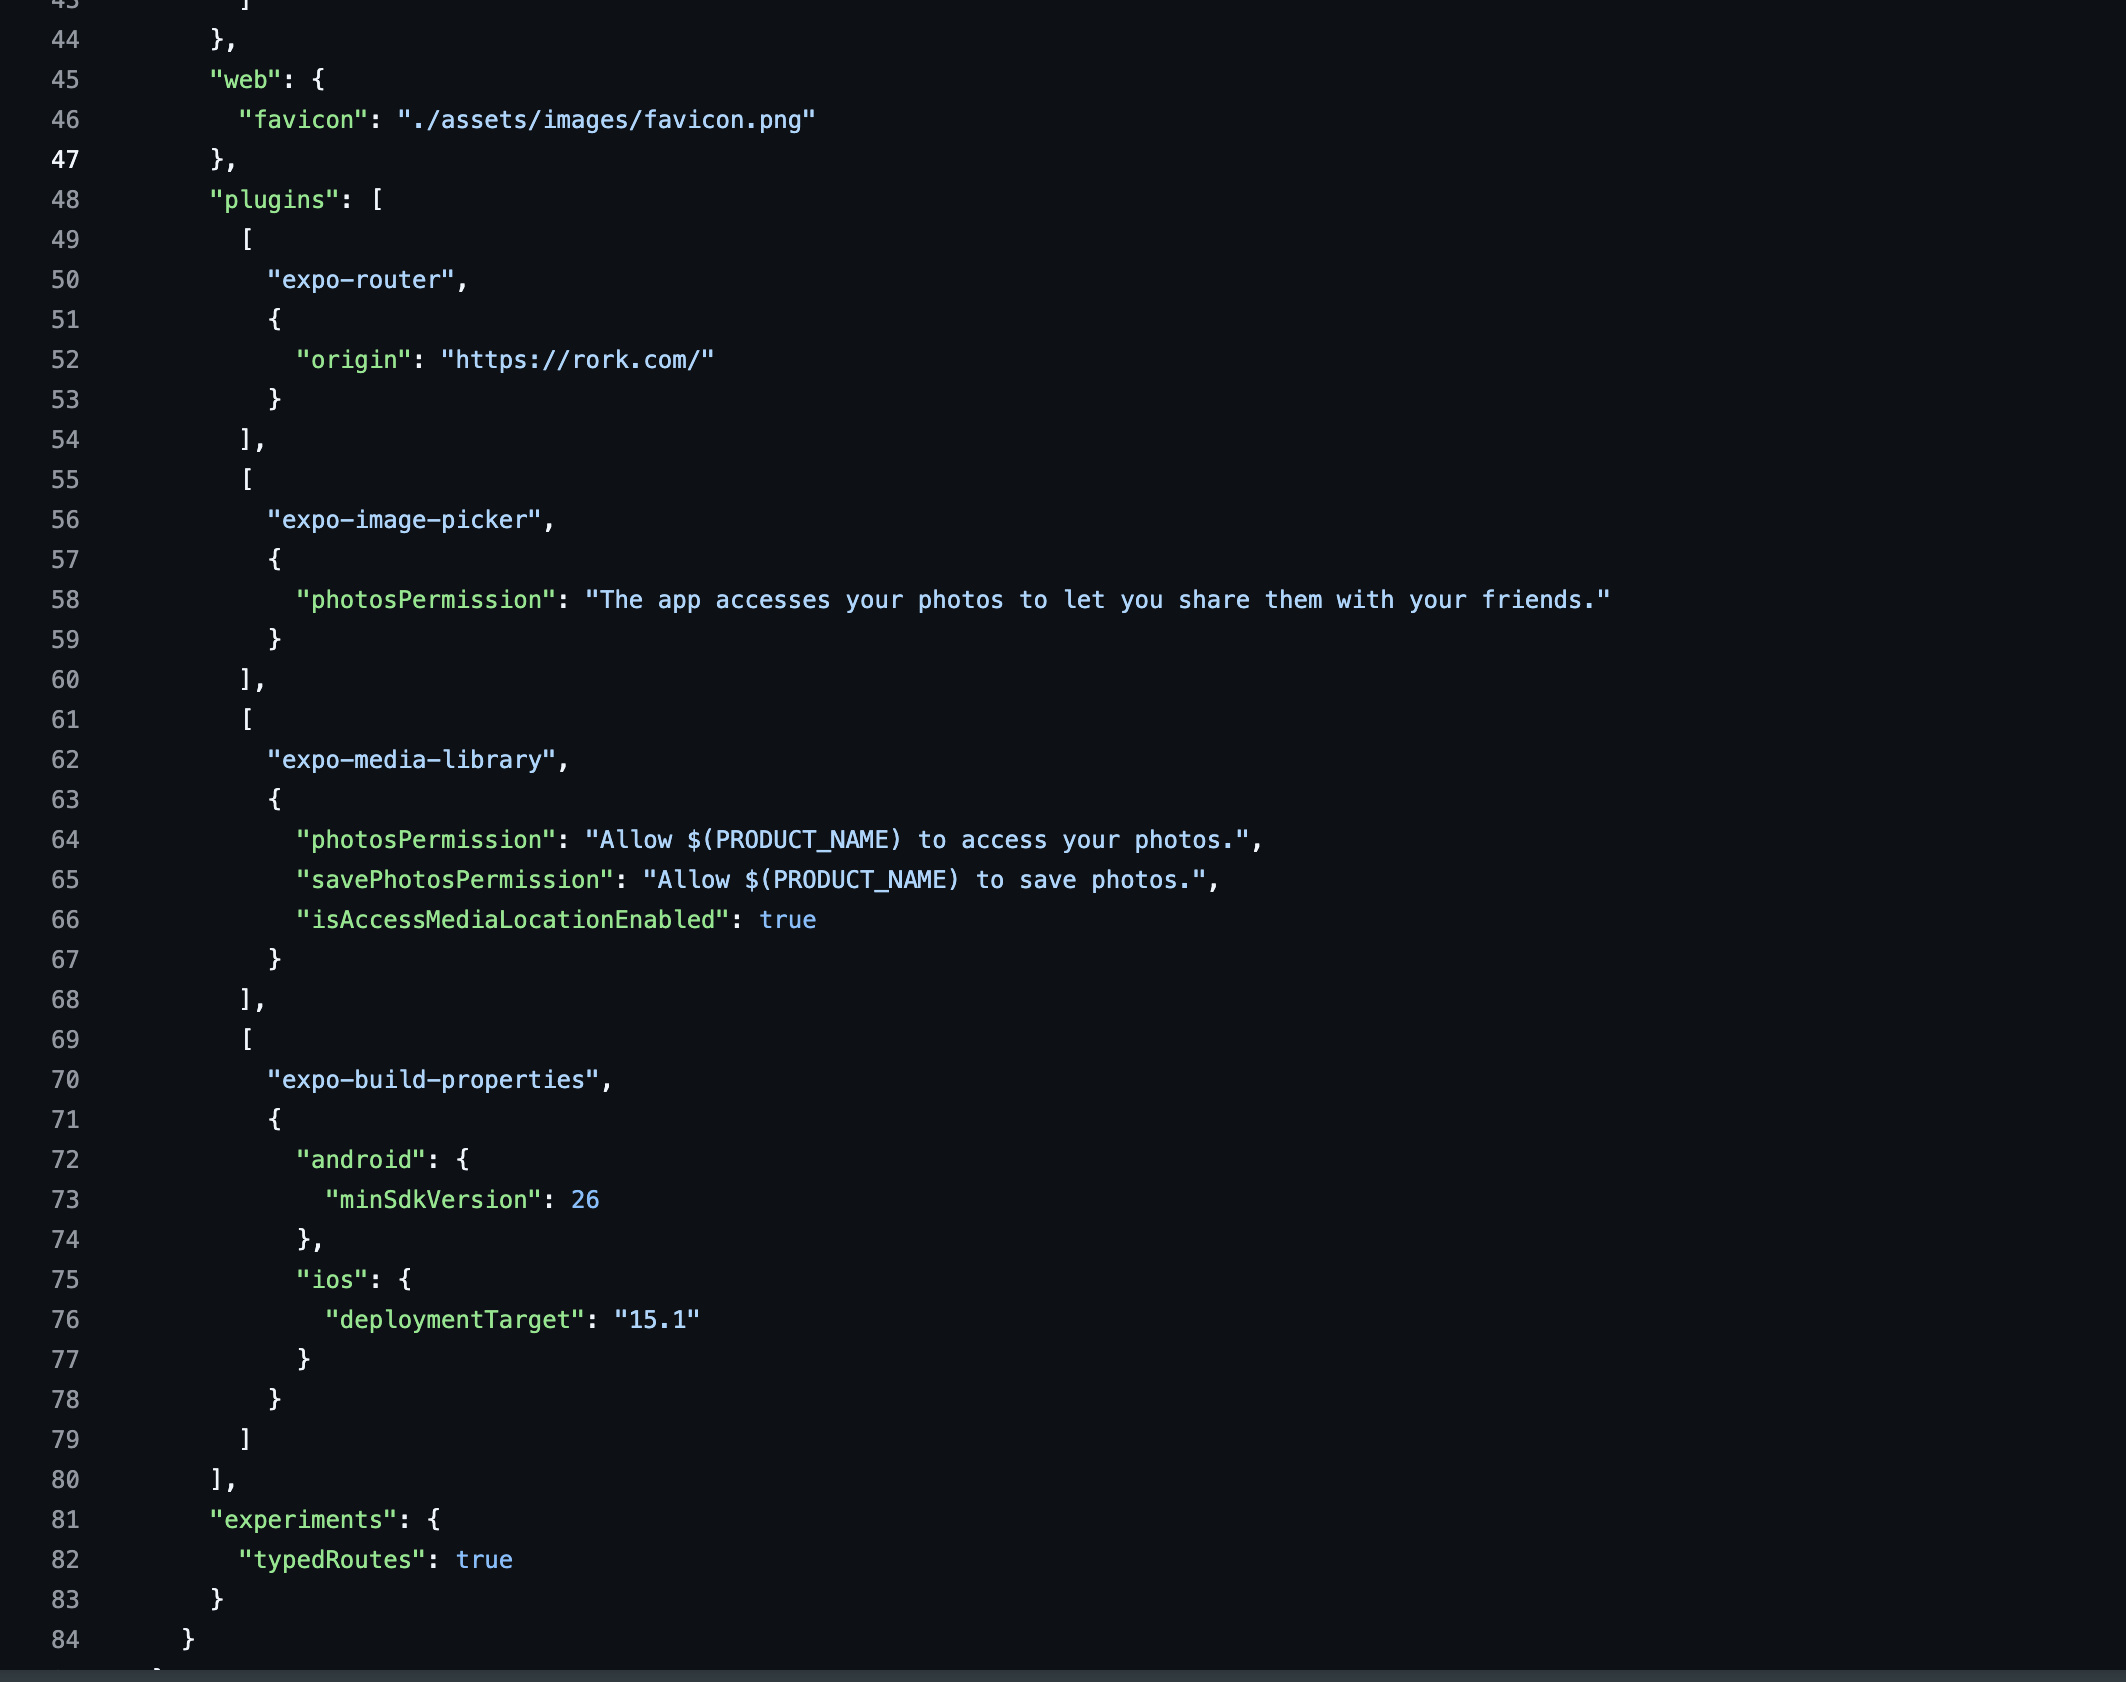
Install the expo-build-properties config plugin:
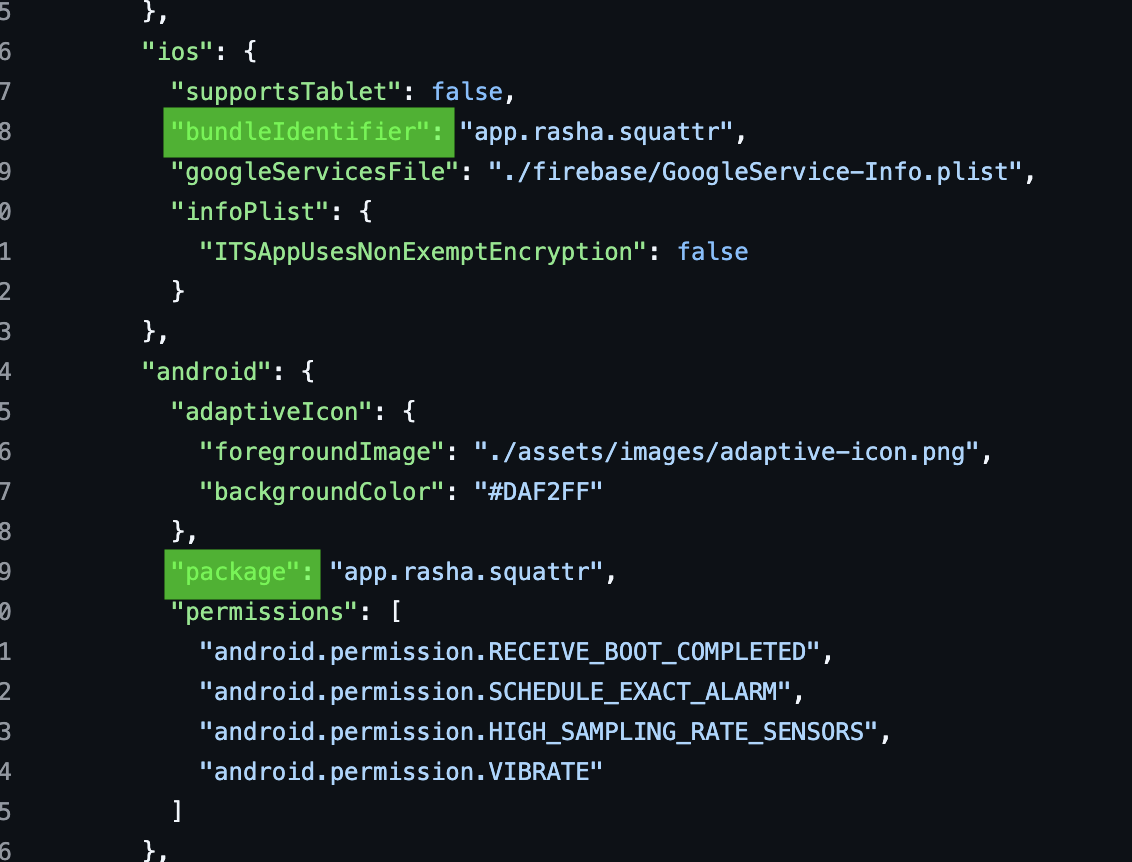
app.json or app.config.js file inside of the expo, plugins array:
Grab Keys
In your Superwall project, click Settings from the panel on the left, click Keys and copy your Public API Key:.png?fit=max&auto=format&n=EfWtJaRbDiqbqHbs&q=85&s=c6e059910a471f4f57ec2d9017578427)
Initialize Superwall in your app
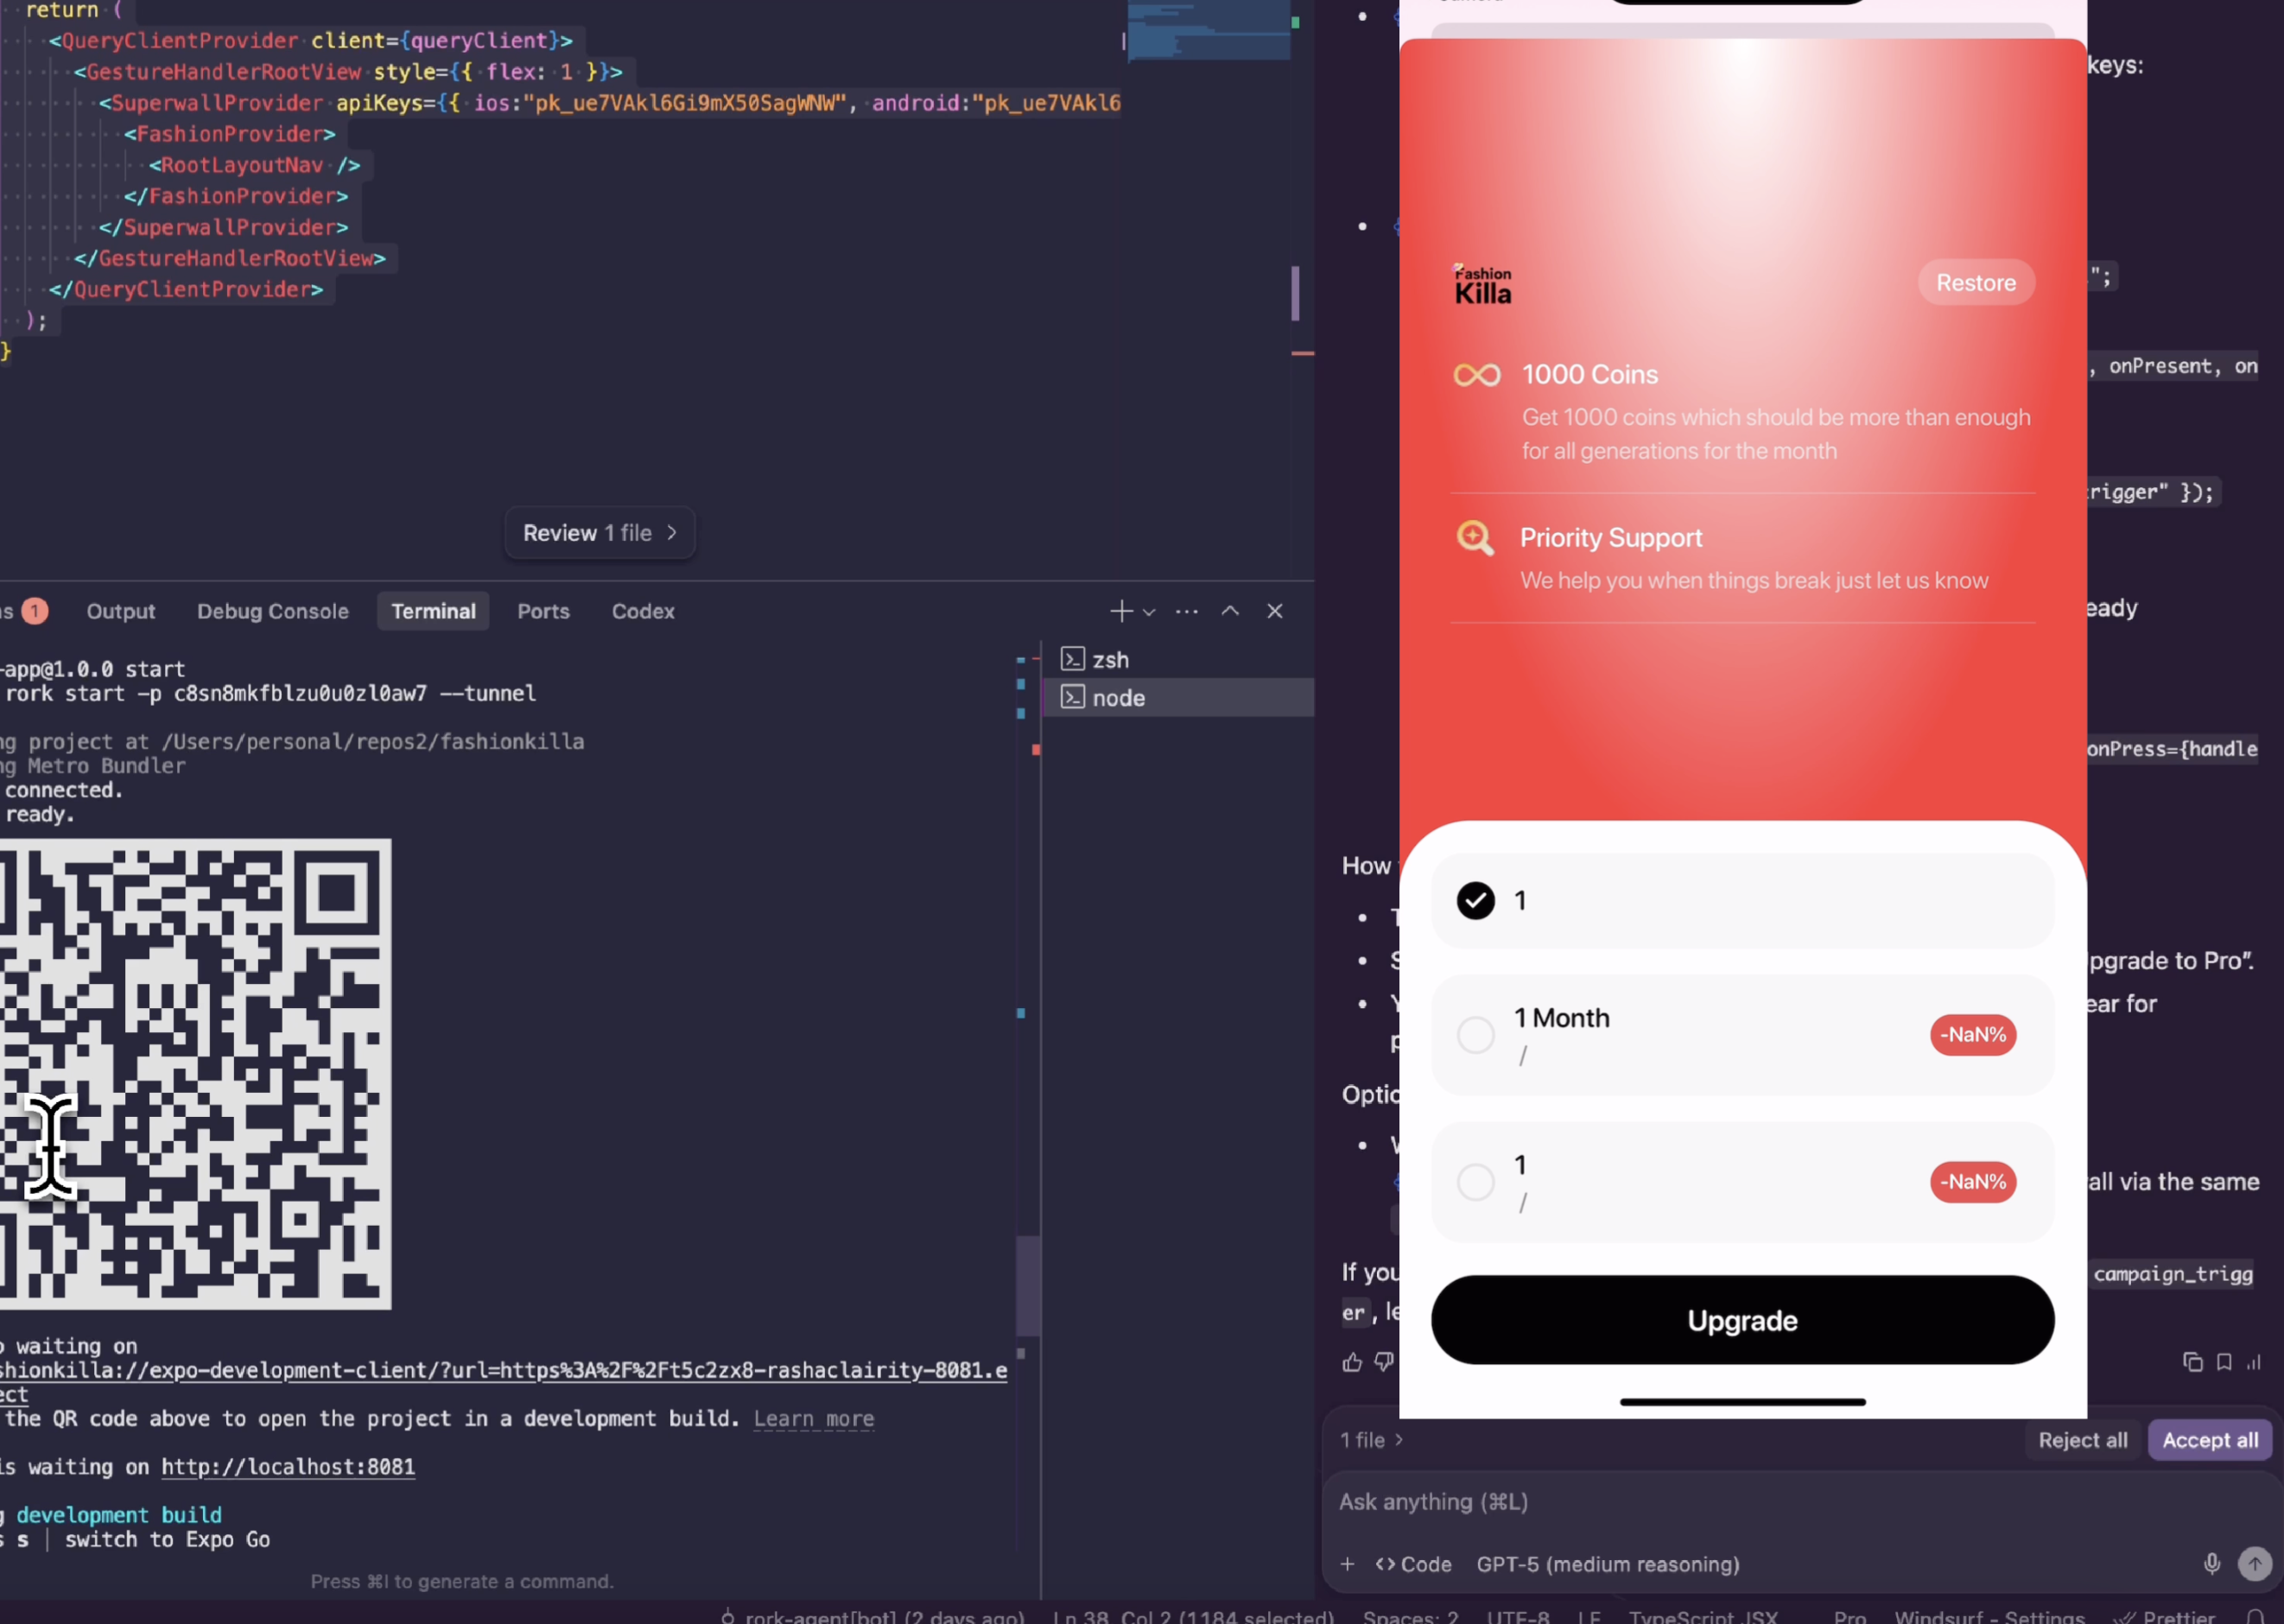
To use the Superwall SDK, you need to wrap your application (or the relevant part of it) with the<SuperwallProvider />. This provider initializes the SDK with your API key.
Edit the file app/layout.tsx
If you don’t want to mess up your code, you can ask the AI chat to do this step.
Please wrap the main part of your app in Layout file with the SuperwallProvider and API key.
9. New Deployment for Superwall Package
Before we move onto the next part, we should run a new development build and get it on our phone.In your app.json file, please bump your Version number up to 1.0.1
Then run the development build deployment command
Run your development server
10. Add Trigger Placement & Feature Gating in App
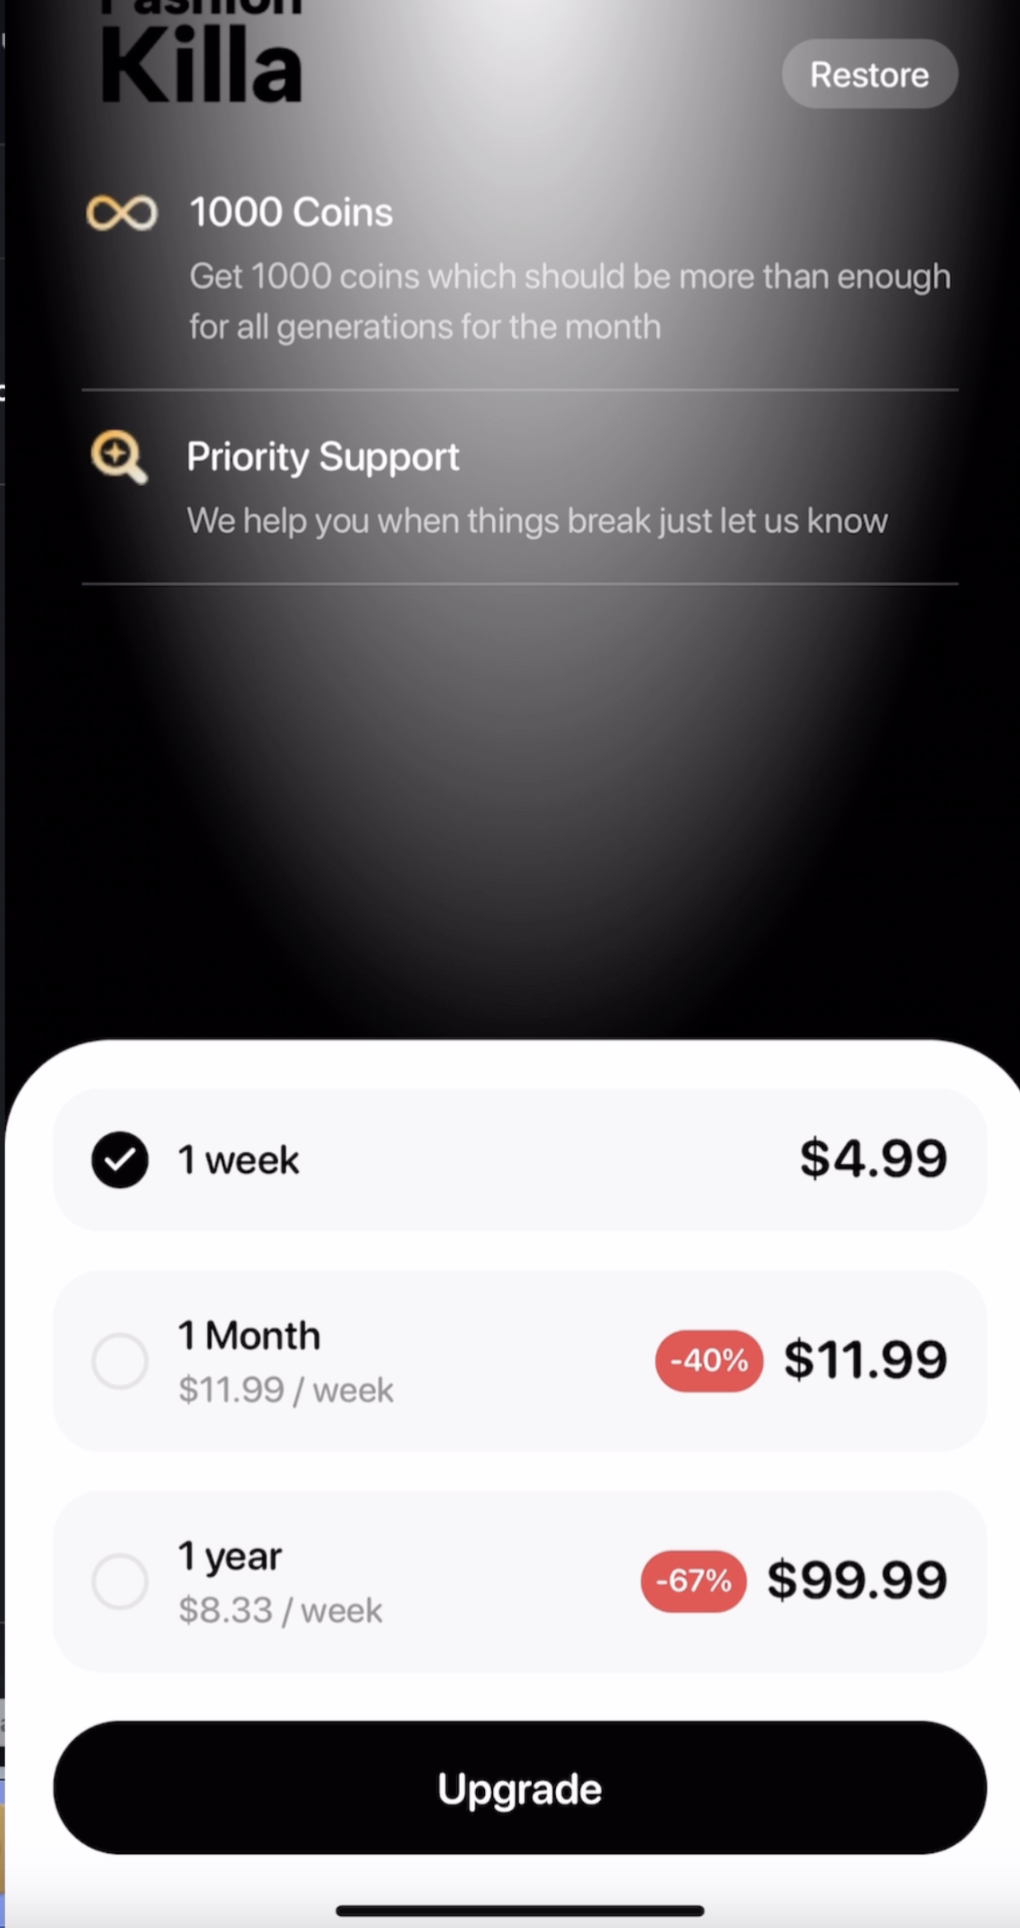
To make it easy for us, we will be using the AI chat inside of the IDE to set this up. To make sure the AI does not mess up, we will connect the MCP server. Every IDE has different instructions but please add the MCP server based on these docs: https://superwall.com/docs/ios/guides/vibe-coding#superwall-docs-mcp For Windsurf, the Cursor code snippet is the exact same. You just have to go to Windsurf Settings → MCP → Configure JSON and add the snippet. Once you’ve done so, you can say the following prompt to add the paywall + feature gating. Please update the text in quotes to your actual trigger placement and feature gate.Use the MCP superwall docs tool to find out exactly how to setup the paywall trigger and feature gating. The trigger name isThe AI should update your project and after restarting the app on your phone, you should be able to test it. Try to do the feature that is now gated and your paywall should pop up. Your paywall make look something like this:“home_submit”and it is placed on thesubmit button on the home page when the user generates an imagePlease make sure the feature is gated otherwise.
11. Deploy to Production + Setup Products in AppStore Connect
Now that we are feature gated and paywall bounded, we can version bump ourapp.json again to 1.1.0
Run the following command for a production deployment
Submit to AppStoreConnect

Create a new Subscription Group
We only need one since there is only one type of subscription (Membership vs No Membership). Name it Premium or Pro.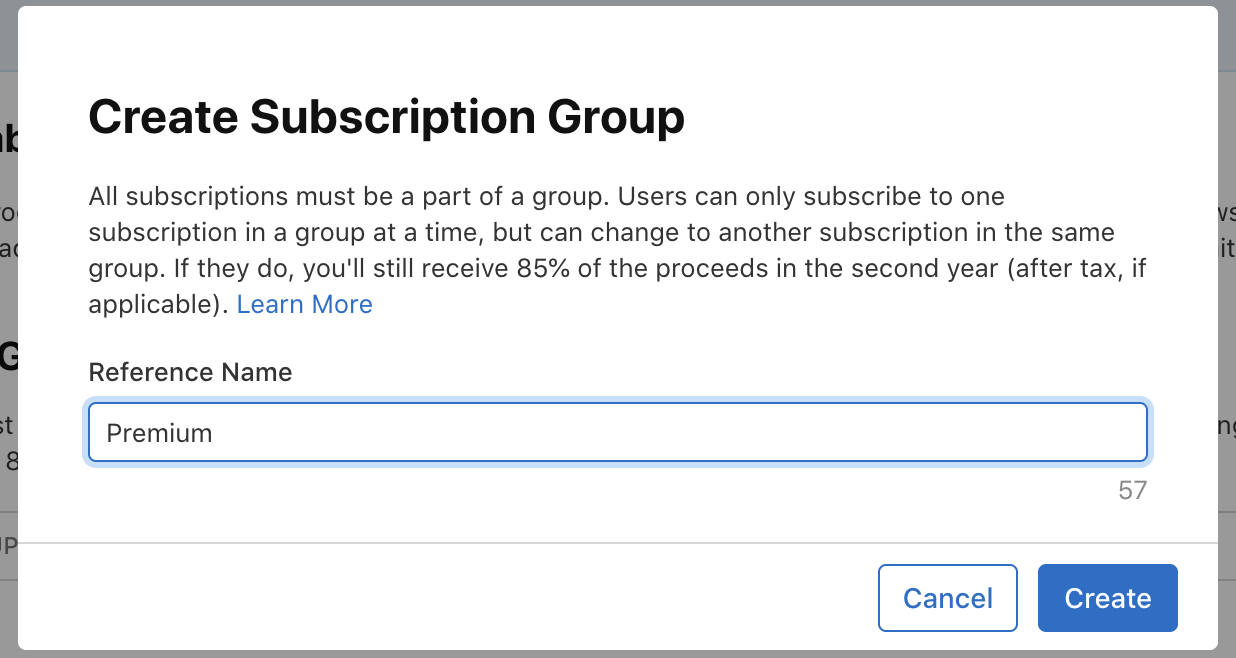
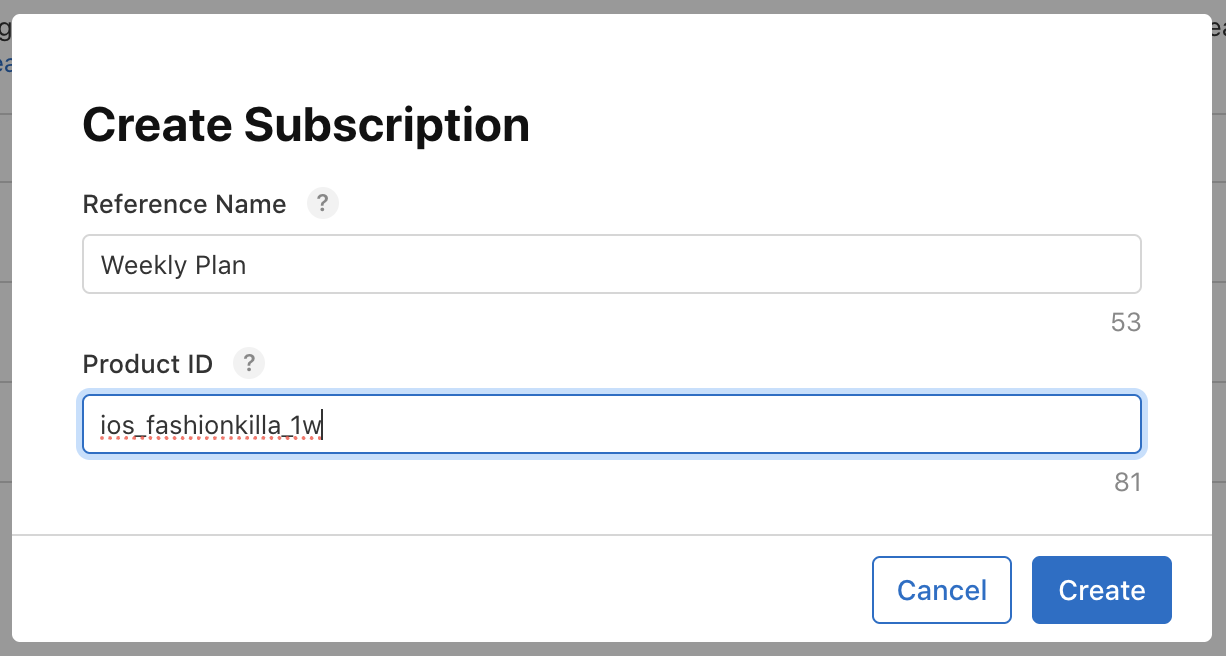
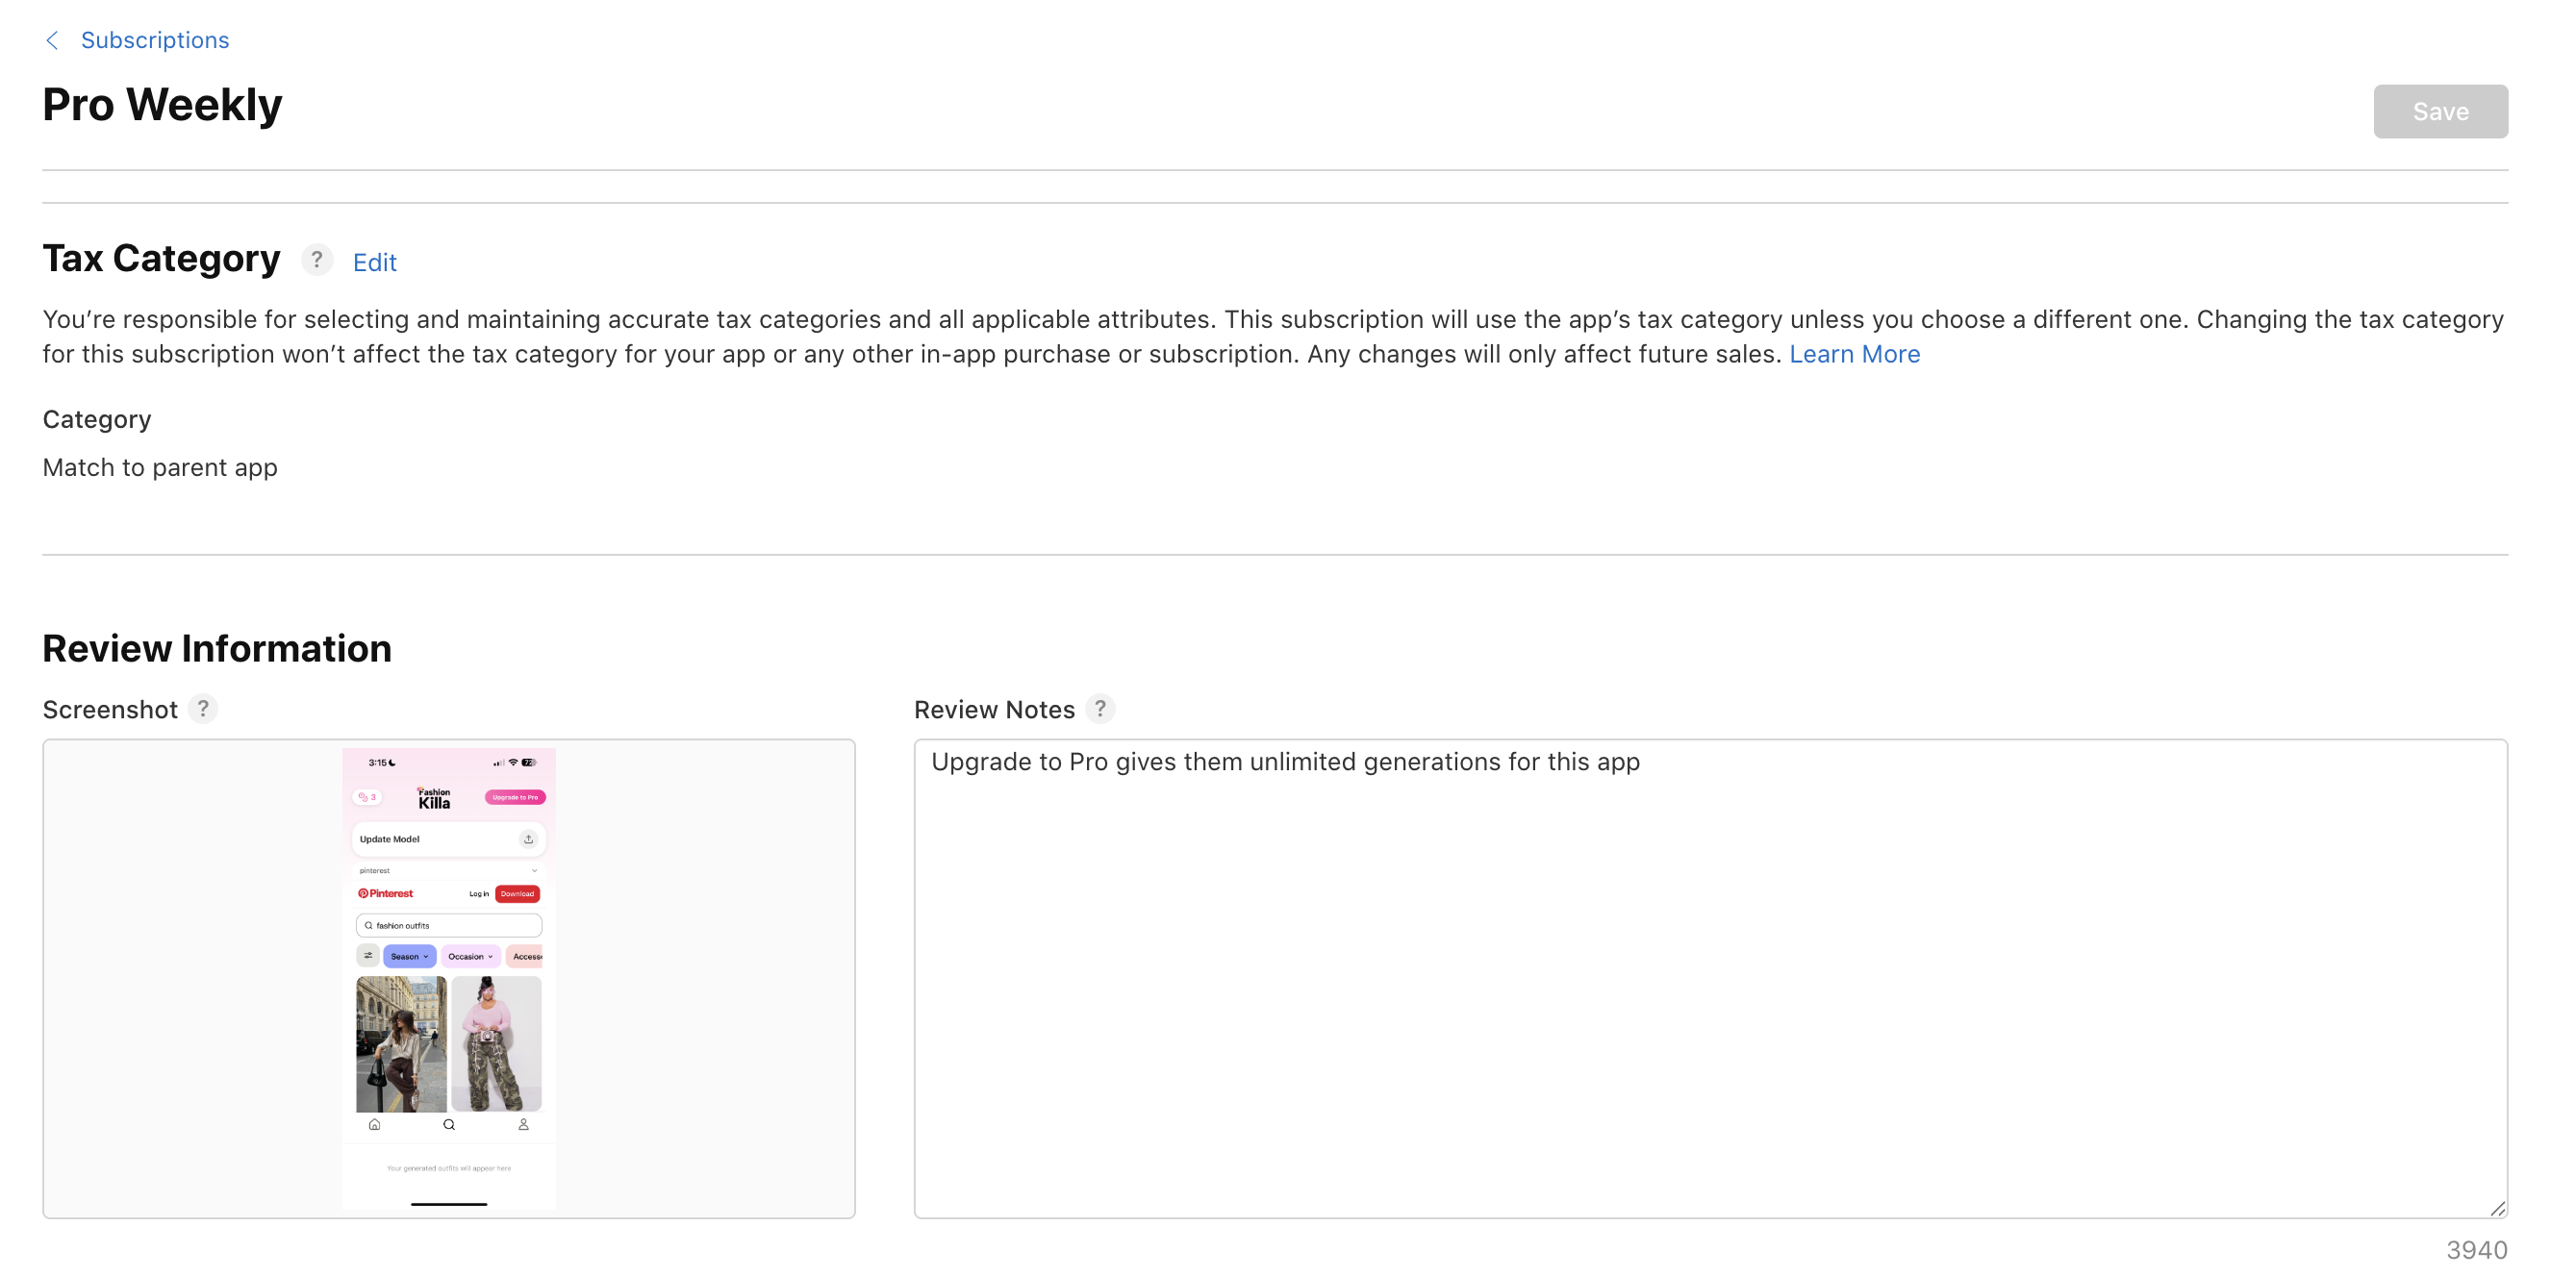
Subscription Duration, the Availability, the Pricing, and the Localization (which is just another way to label the Plan). I would also upload a screenshot of your apps functionality from the development testing to the screenshot section and write a comment about what the plan does for the app.
Setup Localization for the Subscription Group itself
and you should be ready to go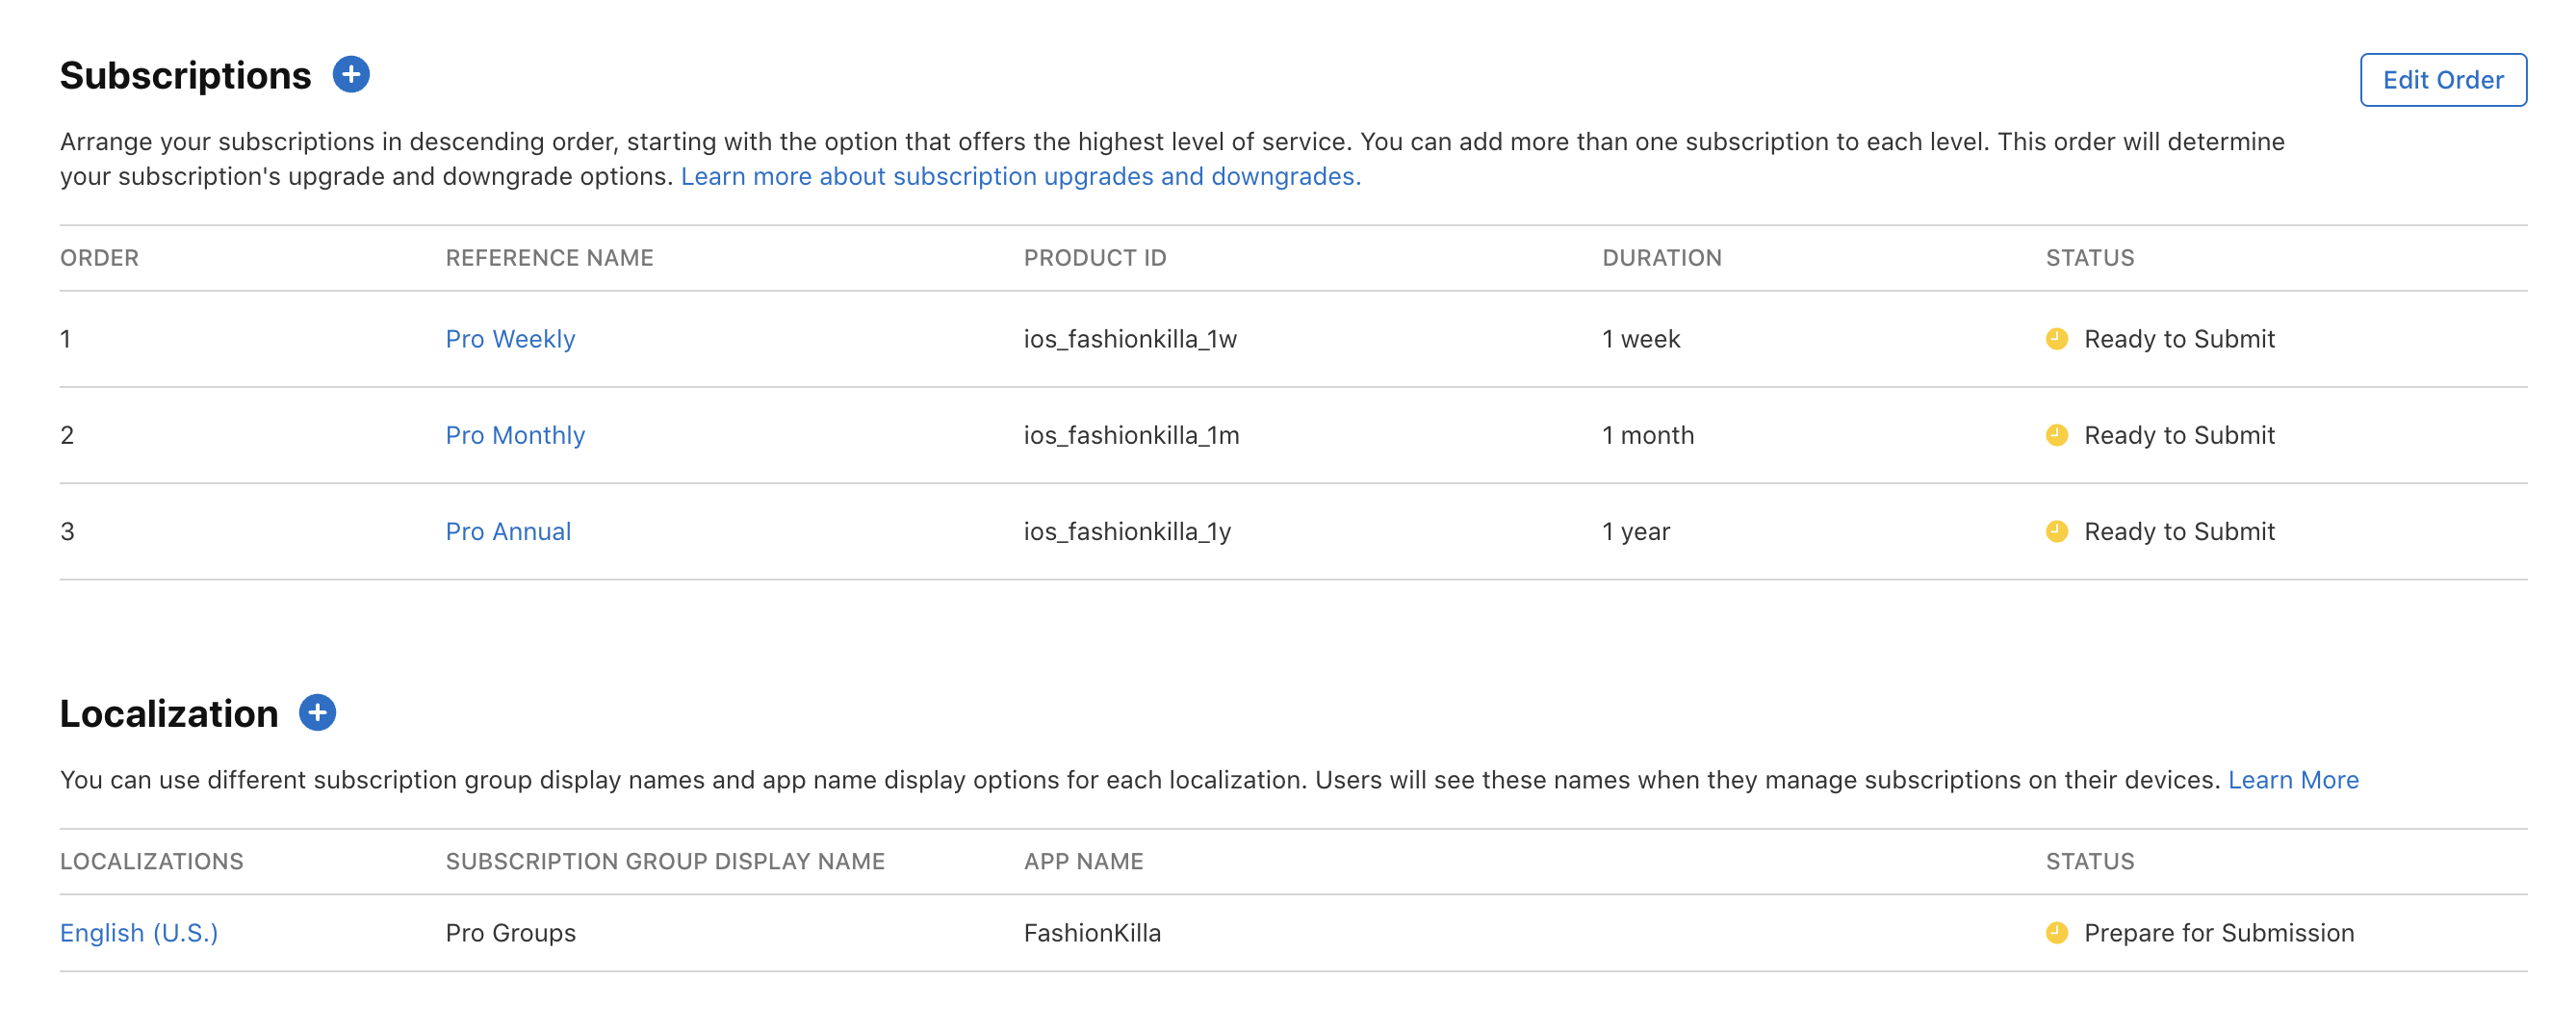
12. Connect Final Configs between Superwall and App Store
We have a few more connections we need to make between Superwall and the Appstore so we can finally see our products show up on the paywall inside the app.Add team id and app id to Superwall settings. Your team id can be found in the app store connect profile settings. Your app id is the numbers found inside under General → App Information inside of the App Store Connect Dashboard.
Click on Revenue Tracking tab inside of Superwall Settings
You will see an App Store Connect button, press that and it will reveal a URL to copy inside of Option1.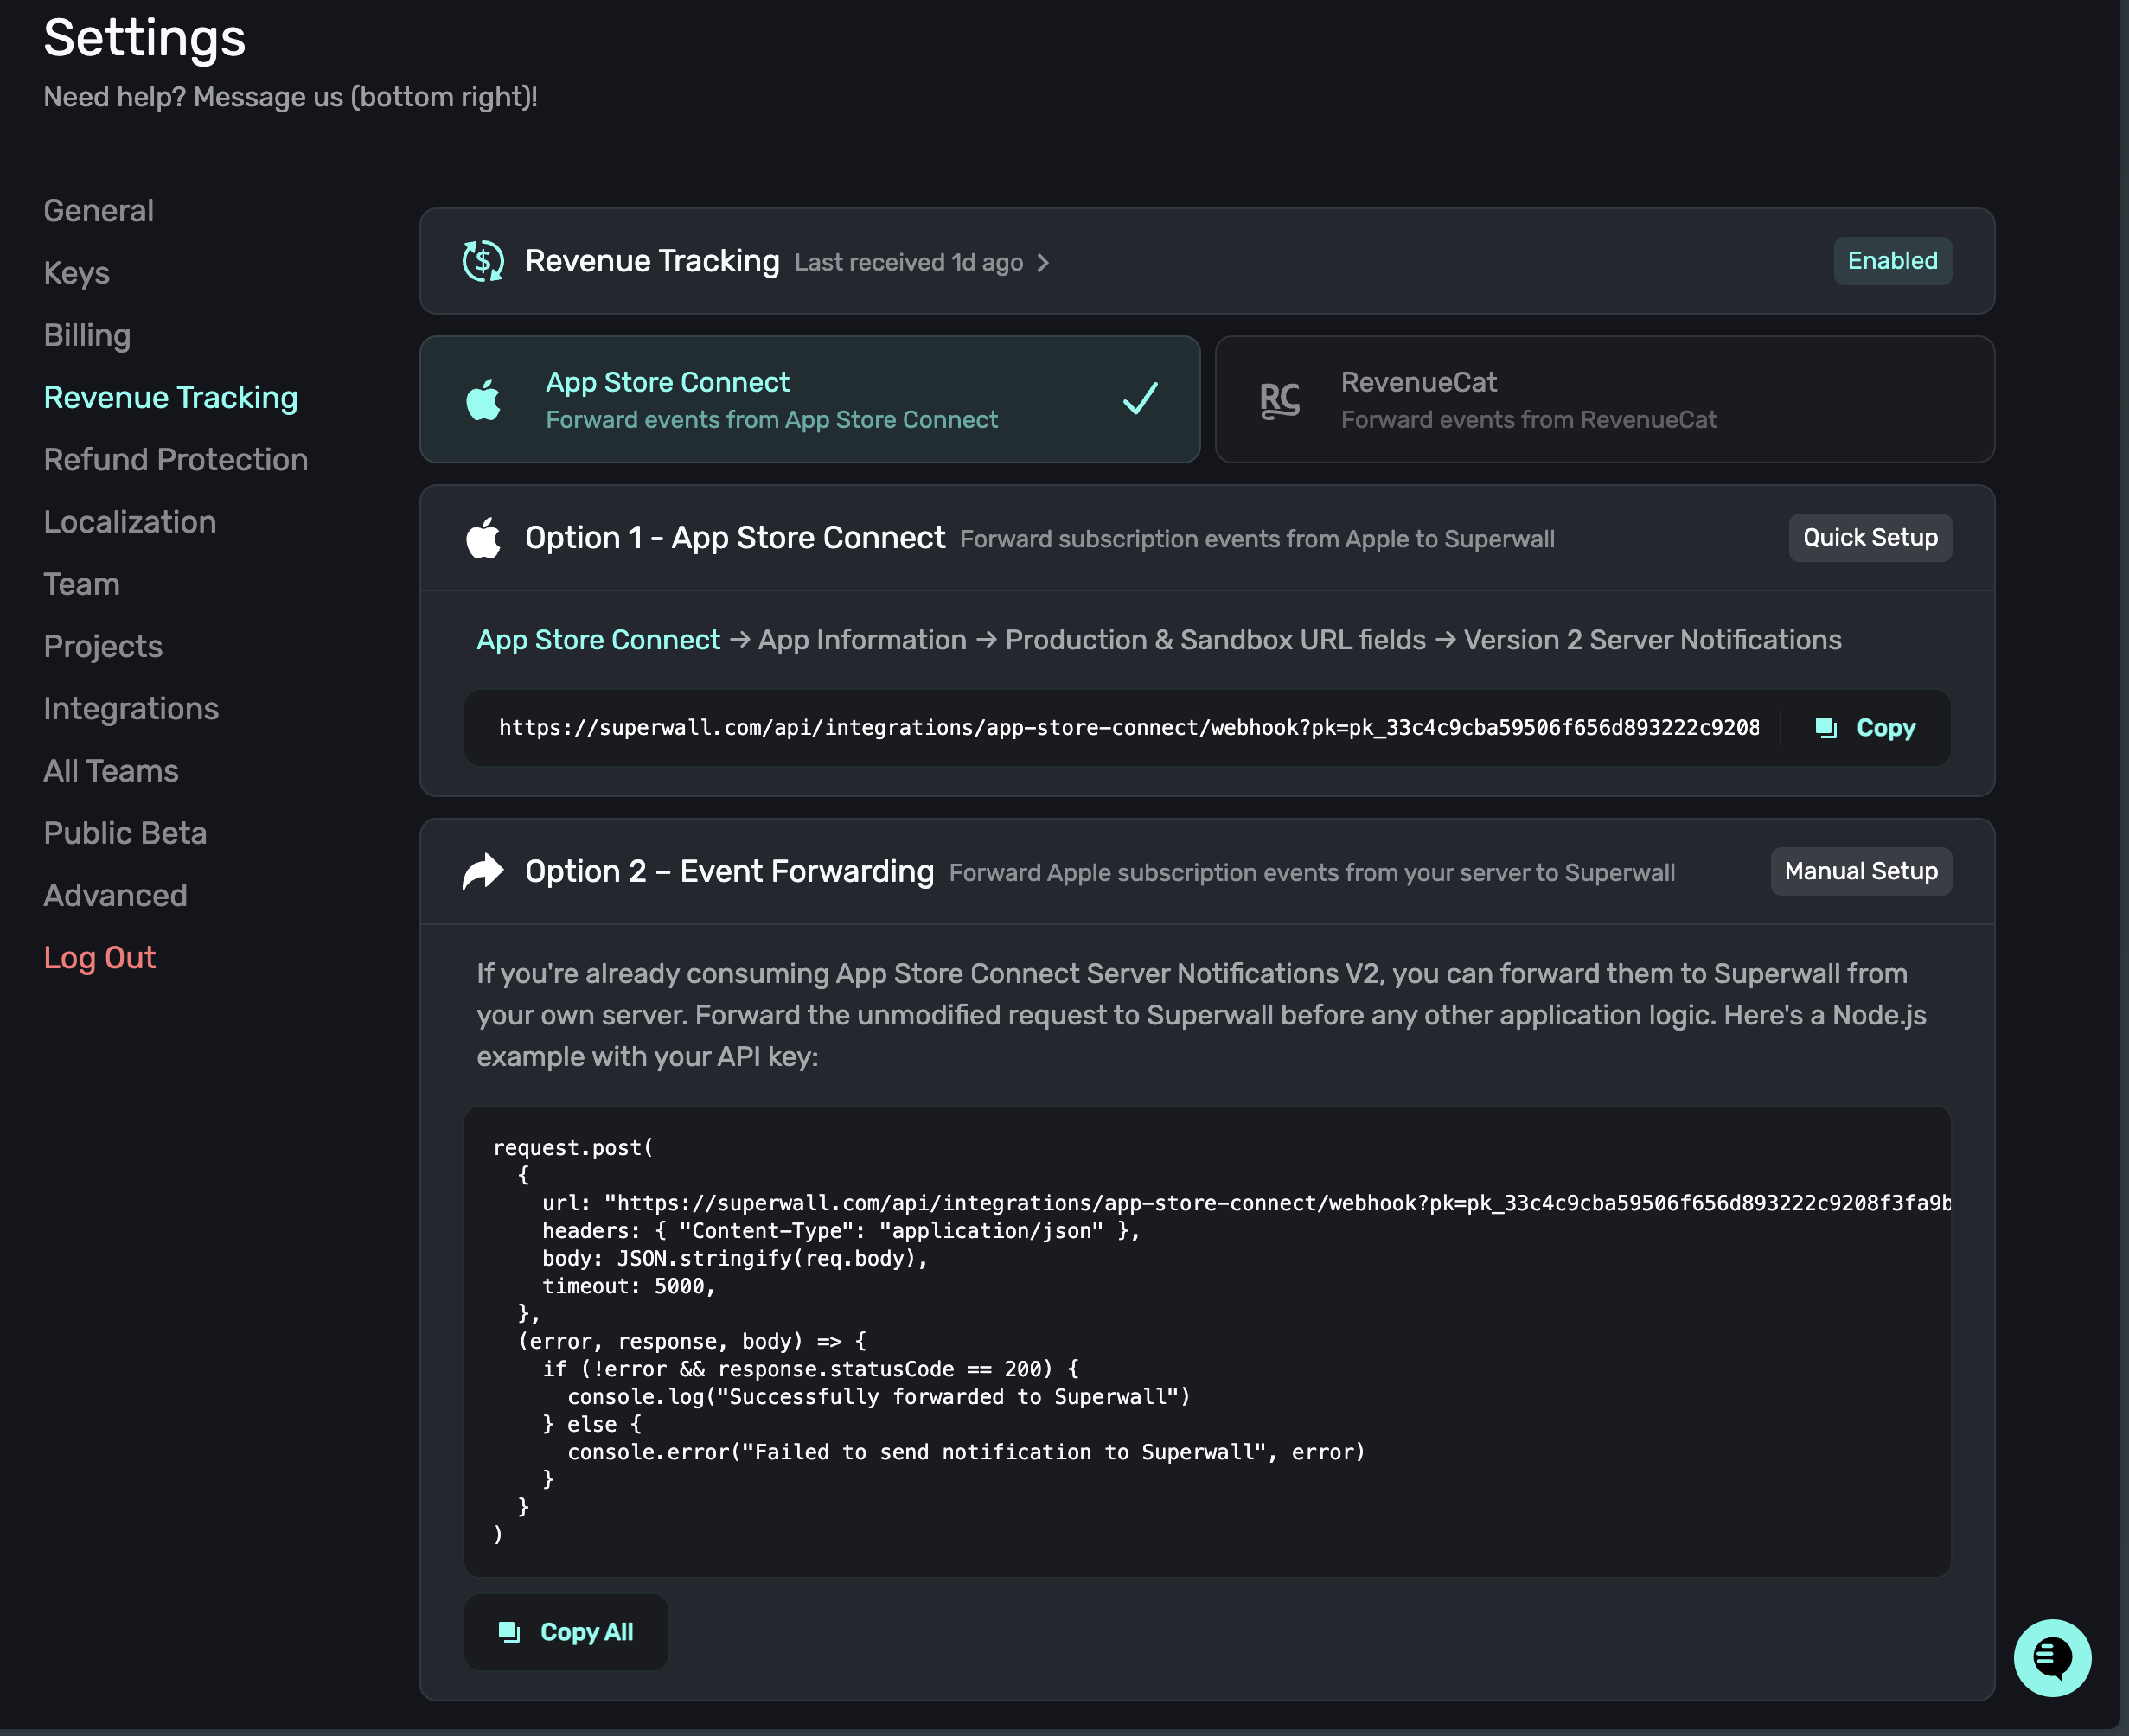
Copy that URL and place it inside of your App Store Server Notifications Production and Sandbox URLS which can be found in App Store Dashboard for your App under General → App Information
Use the same link for both production and sandbox url.

Create an In-App Purchase Key inside of App Store Connect → Users & Access → Integrations → In-App Purchase (CLICK HERE FOR IT)
It will also download a .p8 file after you create the key. Do not lose that file and secure it. Enter your bundle id, key id, and issuer id into this. Upload the p8 file you just downloaded into it as well.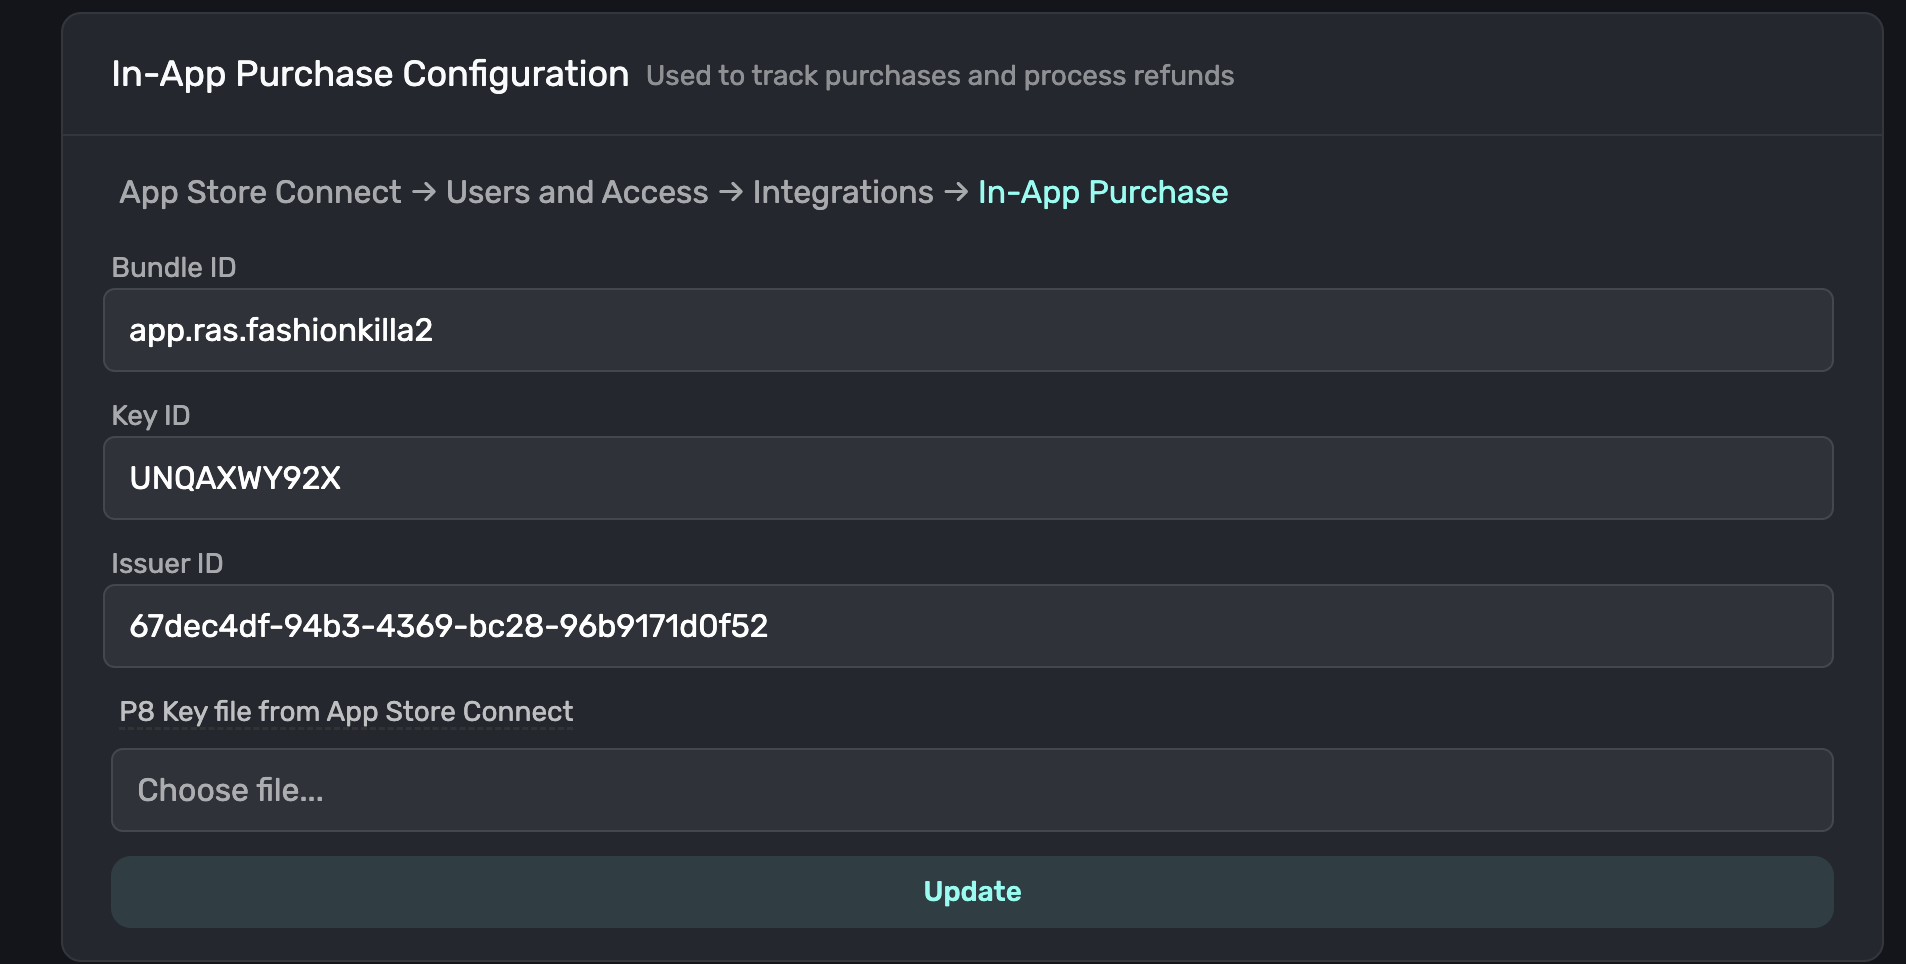
Create an App Store Connect API key inside of App Store Connect → Integrations → In-App Purchase (CLICK HERE FOR IT)
Same situation. Allow for App Manager/Admin permissions and save. It will download another p8 file. Secure that and upload that one in this section too..png?fit=max&auto=format&n=9iqGkgygGStT59NU&q=85&s=17845976e26bc493dd0a2e16b2b4f855)
active status on all of your products

Conclusion: A Working Paywall + Testflight Production App
At this point, we are officially done setting up the paywall! Check your email because you were invited by Testflight to download your apps production build inside of the Testflight app. Do so and then try out the paywall. It should show the real prices and in testflight, it will mock the purchase so you can test the gating and see it work properly! A long process but you finally did it! Congrats! If you have any questions or need any clarification, please contact Ras at x.com/viralmanager