> ## Documentation Index
> Fetch the complete documentation index at: https://docs.rork.com/llms.txt
> Use this file to discover all available pages before exploring further.
# Build a native iPhone app with Rork
> Rork writes native iPhone apps in Swift with SwiftUI, runs them on a cloud iOS simulator next to the chat, and submits the build to TestFlight and the App Store.
export const CtaBanner = () =>
Build your app with Rork today.
Ship iOS, Android, and web apps by chatting with AI.
Try Rork for Free
;
export const stage = {
display: "flex",
justifyContent: "center",
margin: "8px 0 10px"
};
export const phoneShot = {
width: "300px",
maxWidth: "100%",
height: "auto",
display: "block",
margin: 0,
border: 0,
borderRadius: "12px",
verticalAlign: "top"
};
export const panelShot = {
width: "100%",
maxWidth: "460px",
height: "auto",
display: "block",
margin: 0,
border: 0,
borderRadius: "12px",
verticalAlign: "top"
};
export const shotCaption = {
margin: "0 0 28px",
fontSize: "13px",
lineHeight: 1.5,
opacity: 0.55,
textAlign: "center"
};
An iPhone app in Rork is a **native iPhone app**. Rork writes it in **Swift** with **SwiftUI**, the stack Apple uses for its own apps. It is not a website in a shell, and it is not an Android app converted at runtime.
You describe the app, Rork builds it, and you watch it run on a cloud iOS simulator next to the chat. When it is ready, Rork builds the app on its own machines and submits it to TestFlight and the App Store. You do not need Xcode or a Mac to publish.
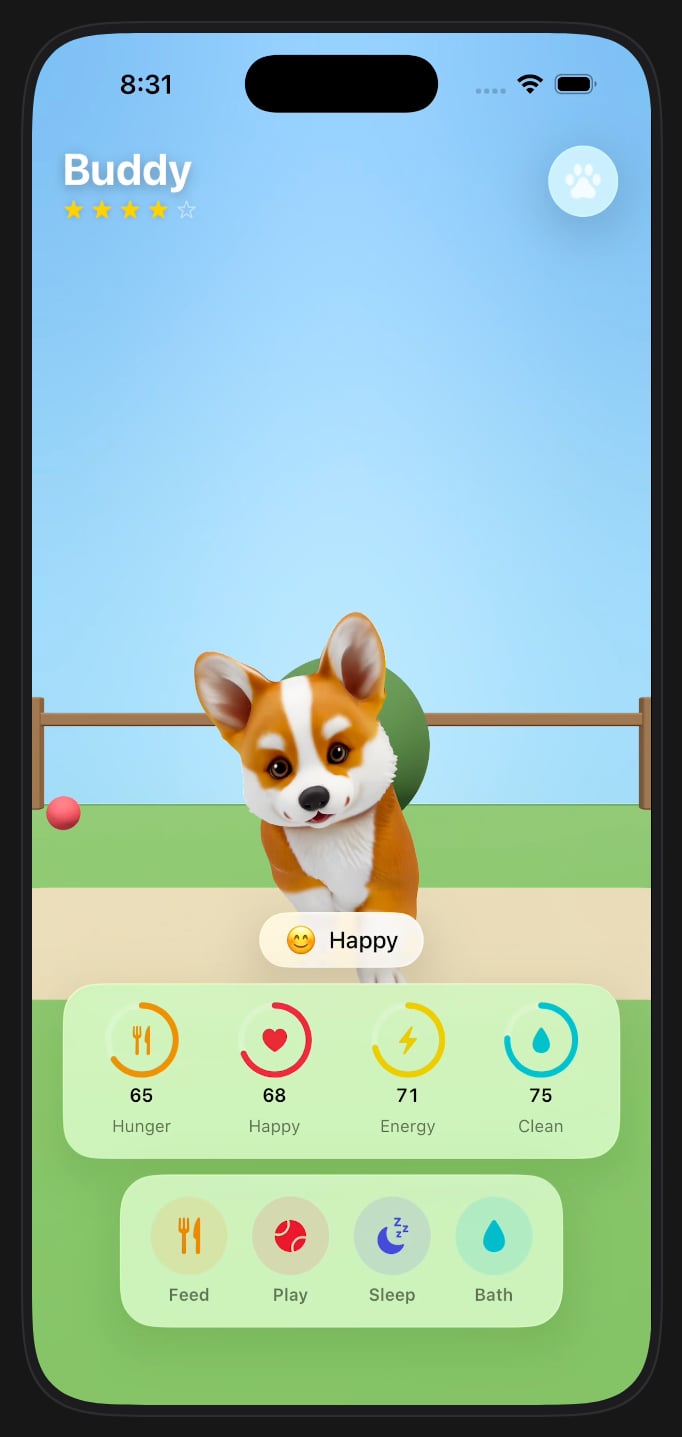
A Swift app running in the iOS simulator inside Rork.
## Start an iPhone app
Pick the platform before you send your first message. On [rork.com](https://rork.com?utm_source=docs\&utm_medium=referral\&utm_campaign=docs-cta\&utm_content=iphone-start), open the platform picker under the prompt box and choose **For iPhone**. The picker describes it as **iPad, Apple Watch, and more with SwiftUI**.
The For iPhone row in the platform picker.
The picker footer says it plainly: **You can add another platform later.** One project can hold an iPhone app, an Android app, and a web app at the same time. See [Convert your app between iOS, Android, and web](/import/convert-between-platforms).
Then describe the product, not the technology:
```
A habit tracker that reminds me each morning and shows my streak on the first screen
```
**Rork Pro** (\$20/month) builds native iPhone apps with SwiftUI. You do not need **Rork Max** for iPhone. Max adds iPad, Apple Watch, Vision Pro, native games, and iOS widgets. See [Plans & Subscriptions](/introduction/subscriptions).
## Answer the questions, then build
Rork does not start writing Swift straight away. It asks a few short questions about the look first. Each answer is a picture, not a word. You can also type your own answer in **Other**, then press **Submit**. Skip this step by writing the look into your first prompt instead.
Next Rork draws the screens and shows them in **Design mode**. Nothing is built yet, so this is the cheap moment to change your mind. Ask for a different screen in chat, or press **Build** to turn the design into a working iPhone app. See [Design mode, Plan mode, and building](/features/agent-modes).
## Run the app on an iOS simulator
Rork runs your Swift app on a **cloud iOS simulator** in your browser. It is the real app on a real iOS system, not a picture, so you tap through it while you build.
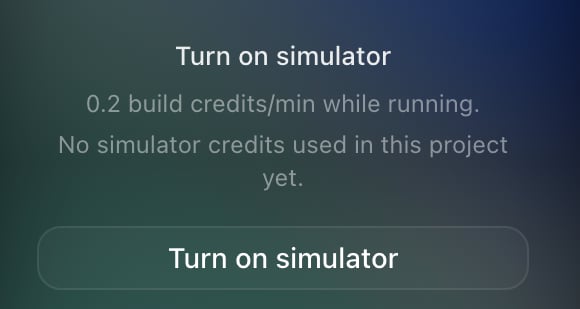
The simulator does not run all the time. It waits behind a **Turn on simulator** button, and it tells you what it costs while it runs:
The simulator waits until you start it, and it shows the price first.
The panel says **0.2 build credits/min while running**, so press **Stop simulator** when you finish a testing round. It also tells you how much simulator time this project has used so far. See [Build credits vs Cloud credits](/billing/build-credits-vs-cloud-credits).
The controls above the simulator do this:
| Control | What it does |
| ---------------------- | ----------------------------------------------------------------------------------------------------- |
| **Record** | Records the preview and attaches it to the chat. |
| **Screenshot** | Attaches a screenshot to the chat. |
| **Home** | Returns the app to its first screen. |
| Simulator settings | Switches **Appearance** between **Light** and **Dark**, changes **Text size**, and sets **Language**. |
| **Select an element** | Point at a part of the screen, then write what to change about it. |
| **Share** | Takes a screenshot you can post. |
| **Restart** | Restarts the simulator when the instance is gone. |
| **Stop simulator** | Shuts it down and stops the per-minute cost. |
| **Run on your device** | Installs the app on a real iPhone. See [Test on your own iPhone](#test-on-your-own-iphone). |
A simulator instance does not live forever. If the connection is gone, press **Restart**. Your app and your project are untouched. Only the running machine is gone.
The simulator has no physical camera, and it cannot receive Apple push notifications. Camera code still builds. Test the camera and real push on a phone.
## Test on your own iPhone
The simulator covers most testing. When you want the app in your own hand, use one of these paths:
1. Press **Run on your device** above the simulator. Rork installs the app over USB with the Companion app. See [Rork Max (Swift)](/rork-max-swift).
2. Open the [Rork Max app](/rork-max/rork-max-app) on your iPhone, then use **Install on Device**. The app lands on your Home Screen as a real iOS app.
3. Submit a build and invite testers with [TestFlight](/store-guides/testflight-beta-testers).
The Rork Max app is the everyday path when you are away from a Mac.
## Publish to the App Store
Rork builds and submits the app for you. What Rork cannot do is be you: the Apple Developer account and the store listing belong to your Apple account.
Open **Publish** in the project. The App Store section says **Build and submit this app to TestFlight and the App Store**. Until you send a build it reads **No App Store submissions yet**. Press **Submit to App Store**.
Apple membership costs **\$99 / year**. Start this early. See [Create your Apple Developer Account](/store-guides/apple-developer-account).
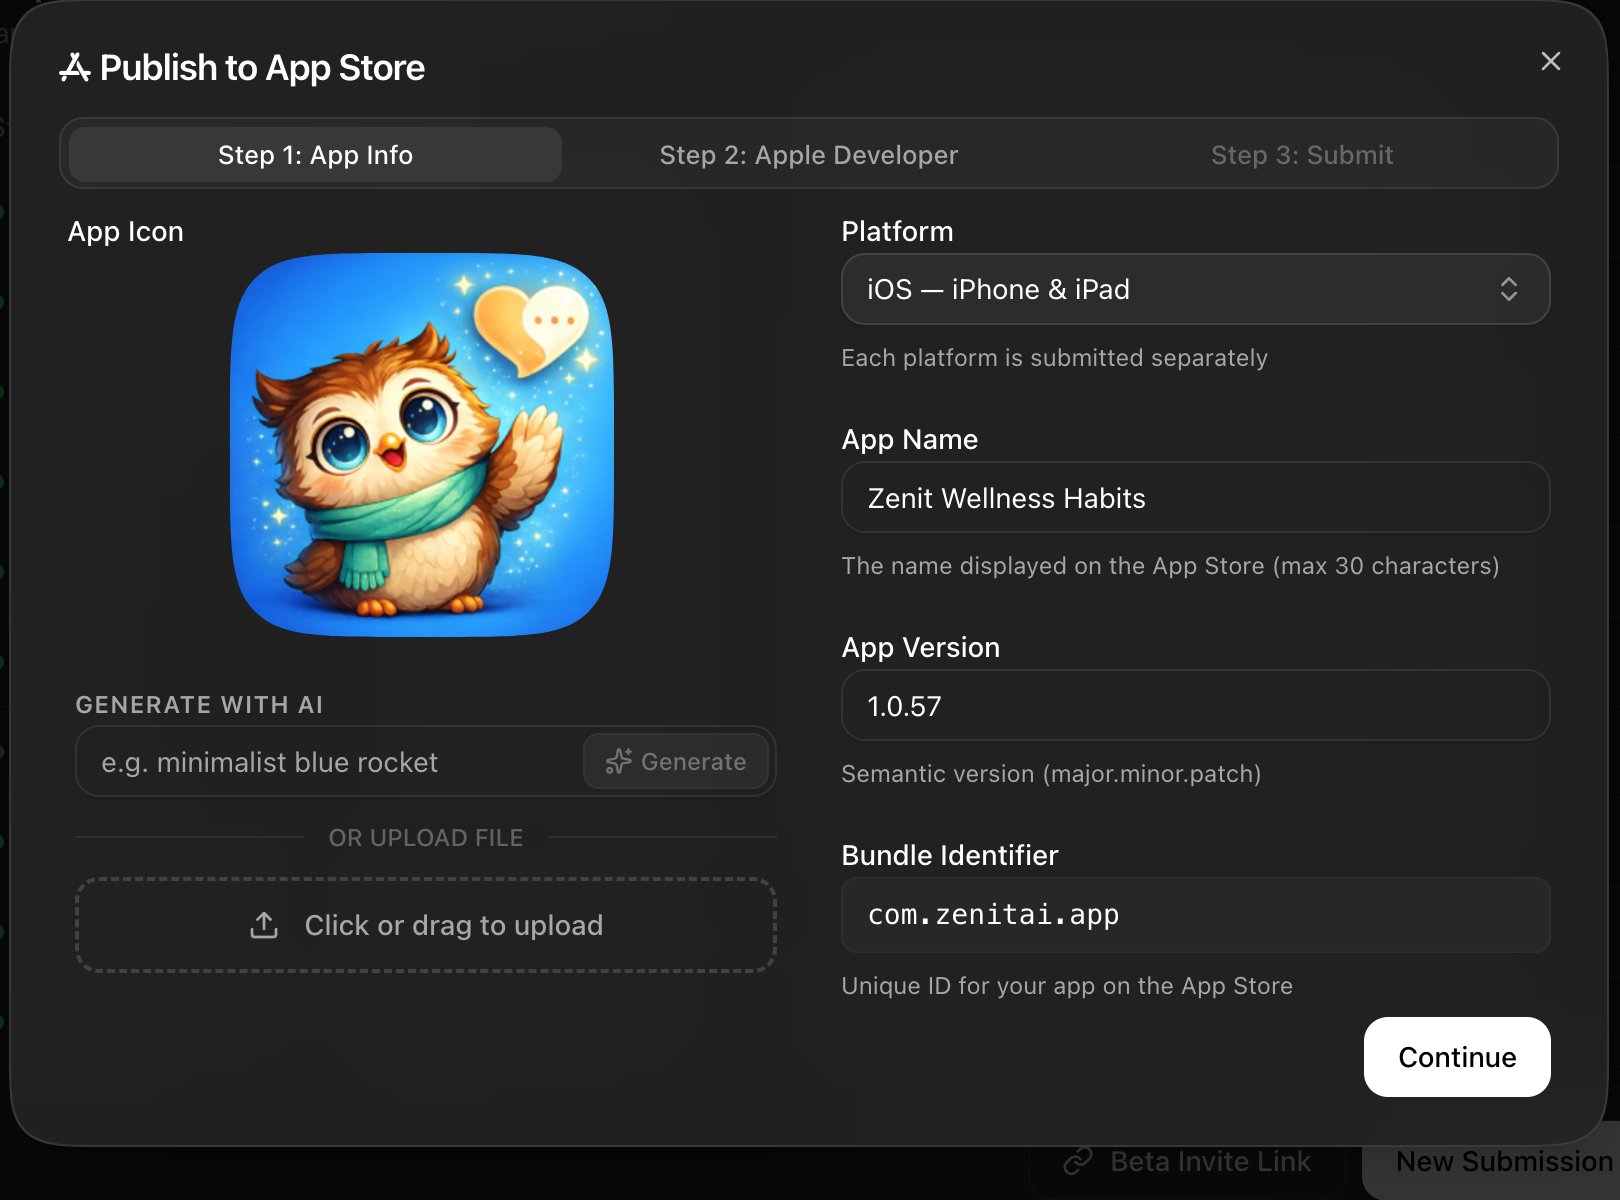
Step 1 of the **Publish to App Store** dialog is **App Info**: the icon, the **App Name** (max 30 characters), the version, and the bundle identifier. The platform field reads **iOS**, described as **iPhone & iPad**. The panel adds **Each platform is submitted separately**.
 Step 2 is **Apple Developer**. Enter your **Apple Developer Email** and **Apple Developer Password**. Rork builds on its own machines, so you do not need Xcode.
Step 3 is **Submit**. Press **Start Submission**, then stay on the page while Rork builds. Apple can ask for a verification code on a signed-in device. Enter that code in Rork when it asks.
A finished upload lands in **App Store Connect**, and the chat shows **Available on TestFlight**. The project keeps every build in **App Store Submissions**, each one with its TestFlight link.
Step 2 is **Apple Developer**. Enter your **Apple Developer Email** and **Apple Developer Password**. Rork builds on its own machines, so you do not need Xcode.
Step 3 is **Submit**. Press **Start Submission**, then stay on the page while Rork builds. Apple can ask for a verification code on a signed-in device. Enter that code in Rork when it asks.
A finished upload lands in **App Store Connect**, and the chat shows **Available on TestFlight**. The project keeps every build in **App Store Submissions**, each one with its TestFlight link.
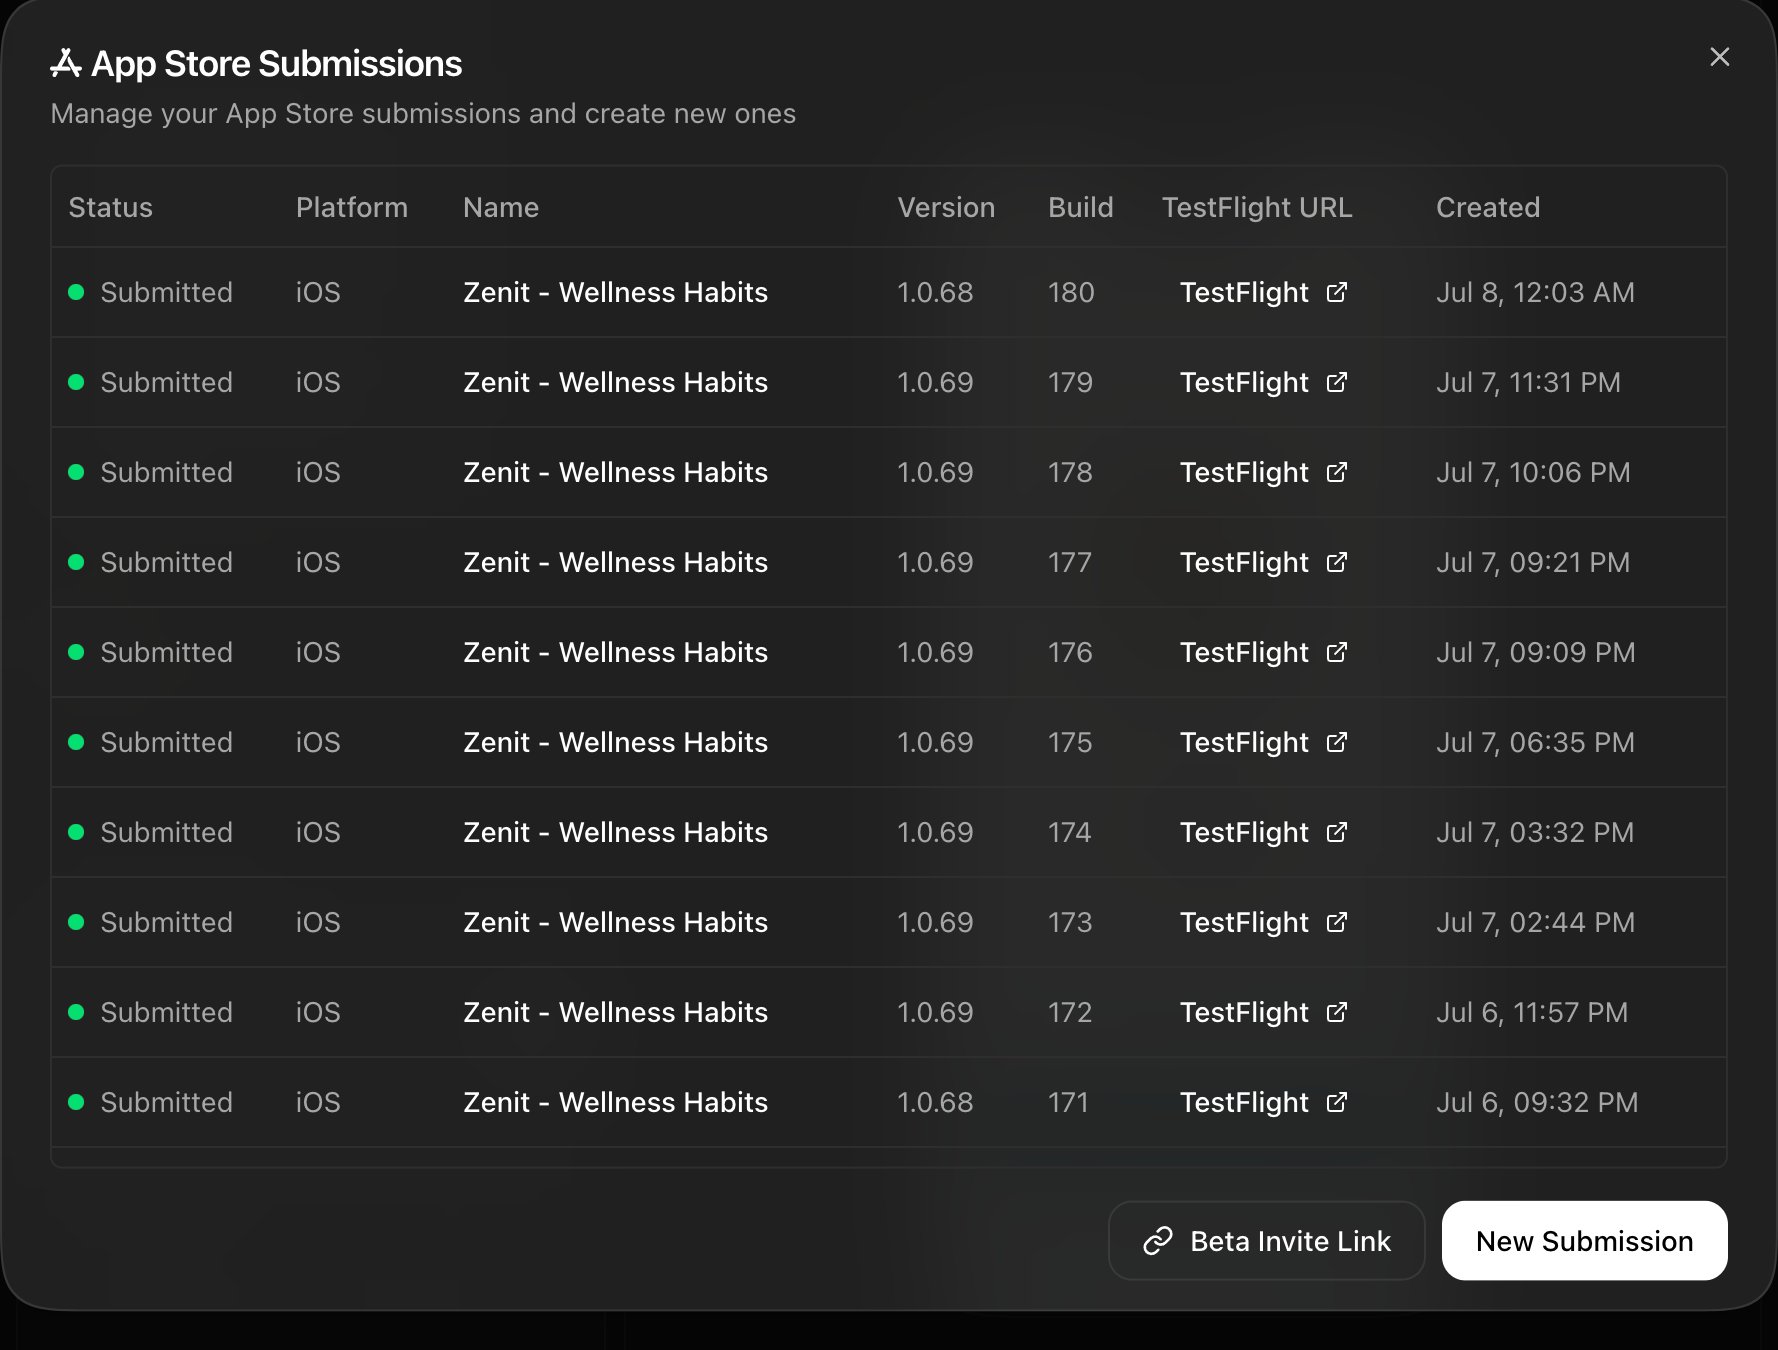 Press **New Submission** for the next version. Use **Beta Invite Link** to share a TestFlight invite. The step-by-step version, with the Apple screens, is in [Publish Your App to the Apple App Store](/store-guides/publish-app-store).
Run the [AI App Store Reviewer](/ai-app-store-reviewer) before you submit. It checks your app against Apple's rules inside the project, so you find the rejection reasons first.
## Add an iPhone app to a project you already have
Any project can grow an iPhone app. Click **+** above the preview and pick **iOS (Swift)**, described as **Native iPhone app**. You can also use **Project Settings → Add new app**, or just ask:
```
Add a native iPhone app to this project
```
On an older Expo project Rork also offers a card: **Make this app native iOS**, with the line **Recreate it in SwiftUI for iPhone**. Press **Add iOS app**.
Press **New Submission** for the next version. Use **Beta Invite Link** to share a TestFlight invite. The step-by-step version, with the Apple screens, is in [Publish Your App to the Apple App Store](/store-guides/publish-app-store).
Run the [AI App Store Reviewer](/ai-app-store-reviewer) before you submit. It checks your app against Apple's rules inside the project, so you find the rejection reasons first.
## Add an iPhone app to a project you already have
Any project can grow an iPhone app. Click **+** above the preview and pick **iOS (Swift)**, described as **Native iPhone app**. You can also use **Project Settings → Add new app**, or just ask:
```
Add a native iPhone app to this project
```
On an older Expo project Rork also offers a card: **Make this app native iOS**, with the line **Recreate it in SwiftUI for iPhone**. Press **Add iOS app**.
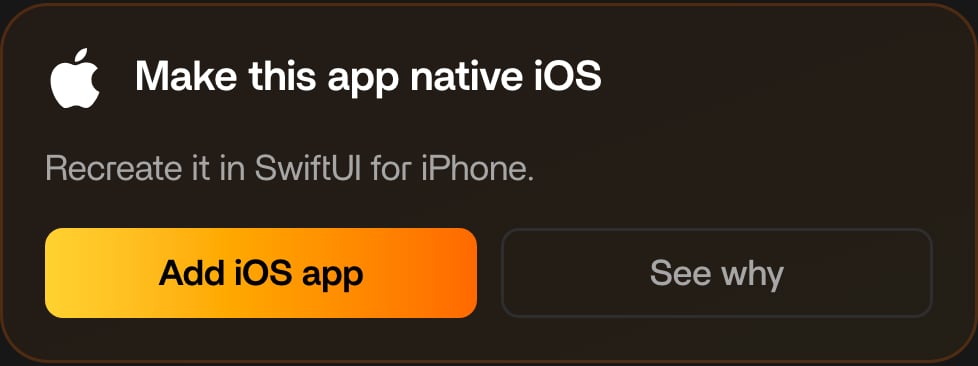 Confirm the **Add iOS app?** card when it appears. The agent rebuilds your screens, navigation, data flows, and design as a Swift app.
When the project already has an iPhone app, the same menus offer the other platforms instead:
Confirm the **Add iOS app?** card when it appears. The agent rebuilds your screens, navigation, data flows, and design as a Swift app.
When the project already has an iPhone app, the same menus offer the other platforms instead:
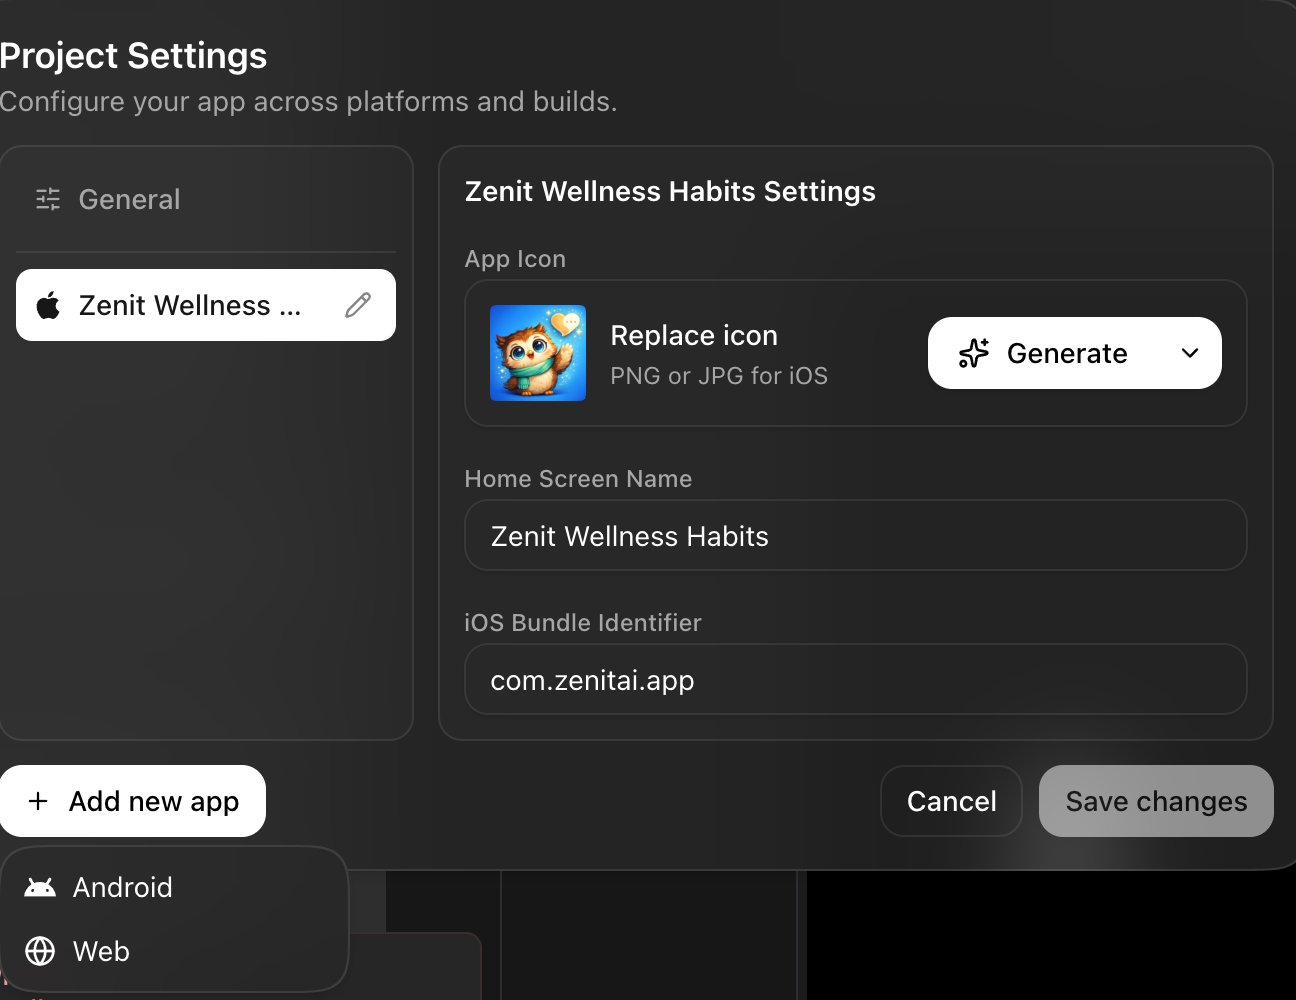 Both apps then live in one project, with **two codebases**: Swift for iPhone, Kotlin for Android. They share the chat and the backend, and they publish from the same **Publish** menu.
## What a Rork iPhone app can do
A Swift app talks to iOS directly:
* Screens in SwiftUI: tab bars, lists, forms, and system-style settings
* The camera, sensors, local storage, and iOS permission prompts
* Work that keeps running in the background, within Apple's rules
* Accounts, data, and push notifications from the same backend as your other apps, see [Backend](/backend/index)
* A real Xcode project you can export to GitHub, see [How to sync your project with GitHub](/tutorials/how-to-connect-github)
**Rork Max** adds iPad layouts, Apple Watch, Vision Pro, iOS widgets, and native games. See [Plans & Subscriptions](/introduction/subscriptions) and the [Rork Max page](https://rork.com/max?utm_source=docs\&utm_medium=referral\&utm_campaign=docs-cta\&utm_content=iphone-max).
## What an iPhone app cannot do
An iPhone app is Apple only. These are the limits that matter:
* It does not run on Android. Add an Android app to the same project if you need both.
* The cloud simulator has no physical camera, and it cannot receive Apple push notifications.
* You need an Apple Developer membership to publish. Membership costs **\$99 / year**.
* Each Apple platform is submitted separately.
* iPad, Apple Watch, Vision Pro, iOS widgets, and native games need **Rork Max**.
* A web app in the same project still cannot ship through the App Store. Publish that one to `rork.app`.
If you also need an Android app or a web app, add that platform to the same project. See [Convert your app between iOS, Android, and web](/import/convert-between-platforms).
## FAQ
No. A Rork iPhone app is a Swift codebase built with SwiftUI. It is not a browser app in a shell, and it is not an Android app.
No. Rork builds on its own machines and submits to App Store Connect from the browser. A Mac is optional: use it only for the USB Companion install.
Any paid plan. **Rork Pro** (\$20/month) builds native iPhone apps with SwiftUI. The **Free** plan designs an iPhone app but does not build one. **Rork Max** adds iPad, Apple Watch, Vision Pro, native games, and iOS widgets. See [Plans & Subscriptions](/introduction/subscriptions).
**0.2 build credits per minute while it runs**, and nothing when it is off. The panel shows how much this project has used. See [Build credits vs Cloud credits](/billing/build-credits-vs-cloud-credits).
To App Store Connect, then TestFlight. It is not on the public App Store until you finish the product page and pass Apple review.
Yes. An iPhone app is iPhone only, but you can add an Android app or a web app to the same project and share one backend. See [Convert your app between iOS, Android, and web](/import/convert-between-platforms).
Yes. Add a native iPhone app to the same project and the agent rebuilds your screens in Swift. Your Expo app stays where it is. See [What happened to Expo?](/expo).
## Next steps
What each platform is good at, and how to choose.
Install the app on your iPhone and keep building there.
The \$99 / year membership you need before App Store review.
Check Apple's rules inside the project, before you submit.
Accounts, data, files, and push notifications.
iPad, Apple Watch, Vision Pro, widgets, and native games.
Both apps then live in one project, with **two codebases**: Swift for iPhone, Kotlin for Android. They share the chat and the backend, and they publish from the same **Publish** menu.
## What a Rork iPhone app can do
A Swift app talks to iOS directly:
* Screens in SwiftUI: tab bars, lists, forms, and system-style settings
* The camera, sensors, local storage, and iOS permission prompts
* Work that keeps running in the background, within Apple's rules
* Accounts, data, and push notifications from the same backend as your other apps, see [Backend](/backend/index)
* A real Xcode project you can export to GitHub, see [How to sync your project with GitHub](/tutorials/how-to-connect-github)
**Rork Max** adds iPad layouts, Apple Watch, Vision Pro, iOS widgets, and native games. See [Plans & Subscriptions](/introduction/subscriptions) and the [Rork Max page](https://rork.com/max?utm_source=docs\&utm_medium=referral\&utm_campaign=docs-cta\&utm_content=iphone-max).
## What an iPhone app cannot do
An iPhone app is Apple only. These are the limits that matter:
* It does not run on Android. Add an Android app to the same project if you need both.
* The cloud simulator has no physical camera, and it cannot receive Apple push notifications.
* You need an Apple Developer membership to publish. Membership costs **\$99 / year**.
* Each Apple platform is submitted separately.
* iPad, Apple Watch, Vision Pro, iOS widgets, and native games need **Rork Max**.
* A web app in the same project still cannot ship through the App Store. Publish that one to `rork.app`.
If you also need an Android app or a web app, add that platform to the same project. See [Convert your app between iOS, Android, and web](/import/convert-between-platforms).
## FAQ
No. A Rork iPhone app is a Swift codebase built with SwiftUI. It is not a browser app in a shell, and it is not an Android app.
No. Rork builds on its own machines and submits to App Store Connect from the browser. A Mac is optional: use it only for the USB Companion install.
Any paid plan. **Rork Pro** (\$20/month) builds native iPhone apps with SwiftUI. The **Free** plan designs an iPhone app but does not build one. **Rork Max** adds iPad, Apple Watch, Vision Pro, native games, and iOS widgets. See [Plans & Subscriptions](/introduction/subscriptions).
**0.2 build credits per minute while it runs**, and nothing when it is off. The panel shows how much this project has used. See [Build credits vs Cloud credits](/billing/build-credits-vs-cloud-credits).
To App Store Connect, then TestFlight. It is not on the public App Store until you finish the product page and pass Apple review.
Yes. An iPhone app is iPhone only, but you can add an Android app or a web app to the same project and share one backend. See [Convert your app between iOS, Android, and web](/import/convert-between-platforms).
Yes. Add a native iPhone app to the same project and the agent rebuilds your screens in Swift. Your Expo app stays where it is. See [What happened to Expo?](/expo).
## Next steps
What each platform is good at, and how to choose.
Install the app on your iPhone and keep building there.
The \$99 / year membership you need before App Store review.
Check Apple's rules inside the project, before you submit.
Accounts, data, files, and push notifications.
iPad, Apple Watch, Vision Pro, widgets, and native games.