> ## Documentation Index
> Fetch the complete documentation index at: https://docs.rork.com/llms.txt
> Use this file to discover all available pages before exploring further.
# Plan mode: see the whole app before you build
> Plan mode makes Rork write a plan before it changes any code. For a new app, the plan also draws the key screens and a flow diagram. Read it, change it in chat, then press Build.
export const CtaBanner = () =>
Build your app with Rork today.
Ship iOS, Android, and web apps by chatting with AI.
Plan mode in 23 seconds. Turn the sound on for the music.
Plan mode makes Rork think before it builds. You describe the app or the change, Rork asks a few questions, and it writes a plan. It changes no code until you press **Build**.
For a new app, the plan also draws the app's key screens and a small diagram of how they connect. You see the whole app before a single file exists, and a change costs one message instead of a rebuild.
| Use Plan mode when | Use Build when |
| - | - |
| You start a new app and want to see it first | You know exactly what you want |
| The change touches many screens | The change is small, like a color or a label |
| You are not sure how a feature should work | You fix a bug or a typo |
## Turn on Plan mode
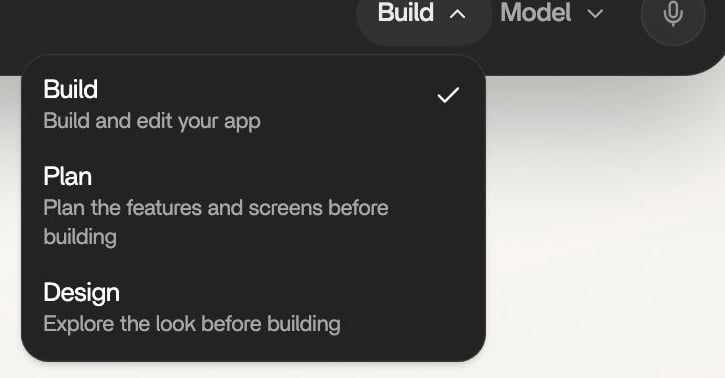
The mode menu sits next to the model picker in the composer. It shows the current mode, **Build** by default. Open it and pick **Plan**.
The mode menu. Before an app exists, Plan reads "Plan the features and screens before building".
The same menu sits on the home screen and inside every project. Only one mode is on at a time: picking **Plan** turns **Design** off.
Two faster ways in:
* On the home screen, press **P** when you are not typing. It switches Plan on or off and opens the menu so you see the change.
* Open [rork.com/?plan=true](https://rork.com/?plan=true\&utm_source=docs\&utm_medium=referral\&utm_campaign=docs-cta\&utm_content=plan-mode-link). The home screen opens with **Plan** already on.
Plan mode stays on for the project until you press **Build** on a plan, pick **Build** in the menu, or approve **Return to Agent Mode?**. Rork remembers the choice in your browser, so it survives a reload.
## How a plan comes together
Describe the app or the change in plain words. You do not need a spec. "A habit tracker with daily check-ins, streaks and weekly stats" is enough.
Rork looks through your project and, when it helps, the web. In Plan mode it can read but not write: every tool that changes files is switched off.
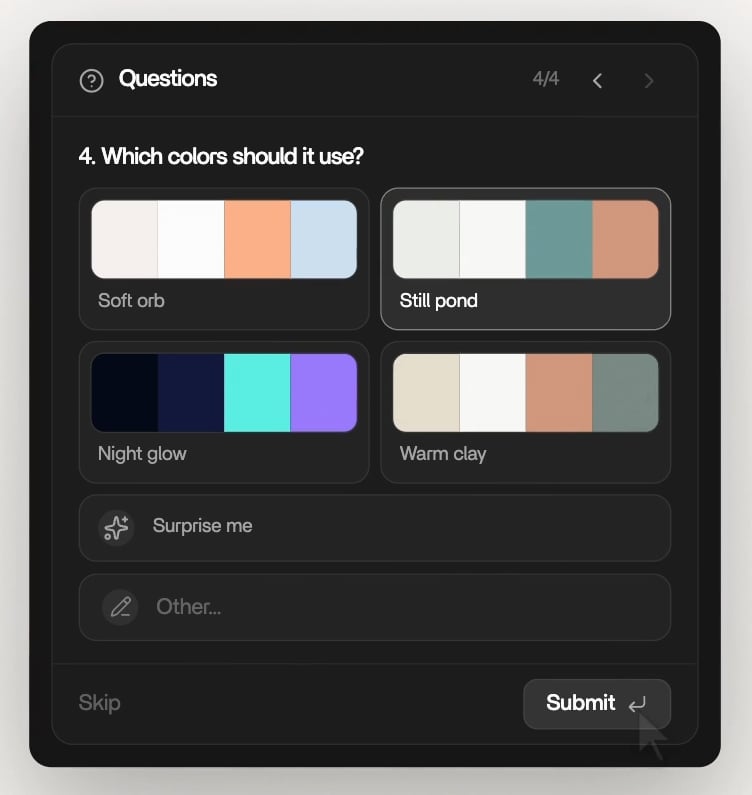
Rork batches its open questions into one **Questions** card. Colors and layouts come as pictures, so you pick a look instead of describing one. Type your own answer in **Other...**, or press **Skip**. Press **Submit** when you are done.
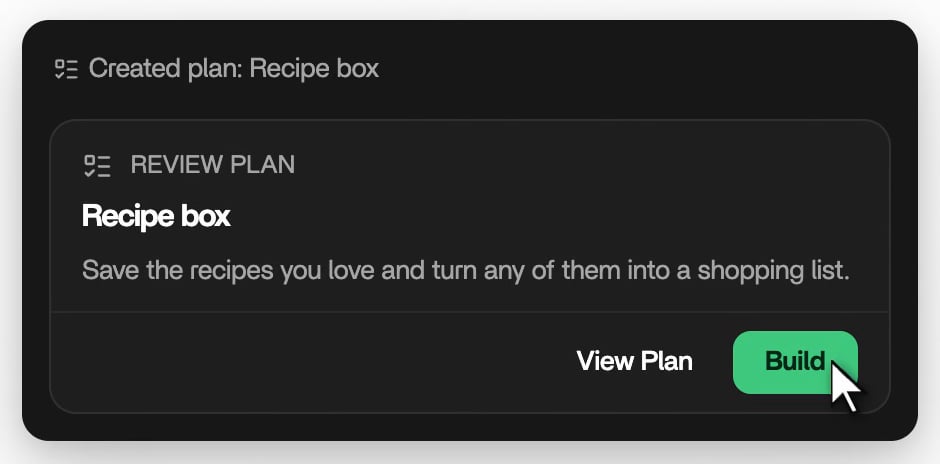
Rork writes the plan and shows a **Review Plan** card at the end of its answer. **View Plan** opens the plan in the panel on the right. For a new app, the screens fill in as Rork draws them.
Reply in chat to change the plan. When it is right, press **Build**.
Questions arrive in one card. A color question shows each option as a palette.
Rork asks at most two rounds of questions. After that it writes the plan with what it knows, so a plan never turns into an interview.
## What a plan contains
A plan is written for a person, not for a programmer. It describes what the app does and how it looks. It never lists file names, libraries, or code.
| Section | What it says |
| - | - |
| **Title and overview** | One line about the app, in everyday words. The same lines show on the **Review Plan** card. |
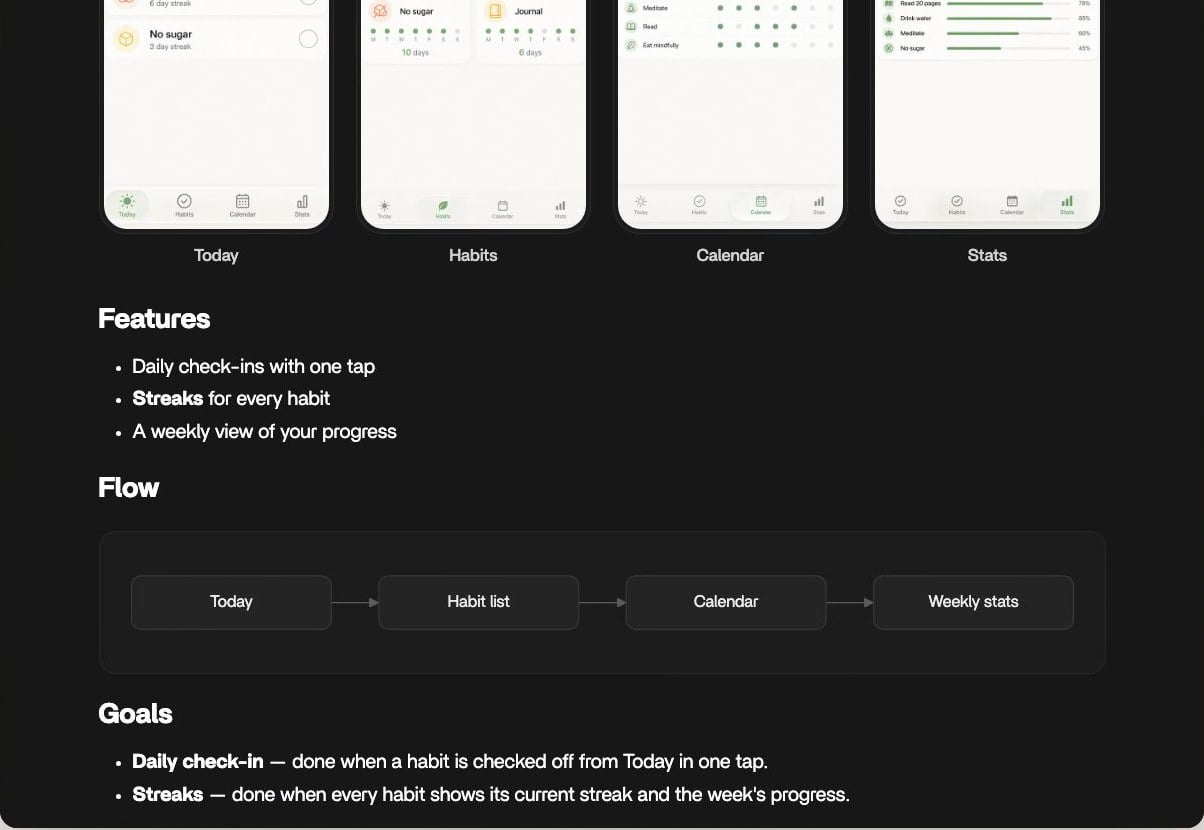
| **Screens** | For a new app: 3 or 4 key screens, drawn as pictures. |
| **Features** | What people can do in the app, one line each. |
| **Design** | Layout, colors by name, and motion, in plain words. |
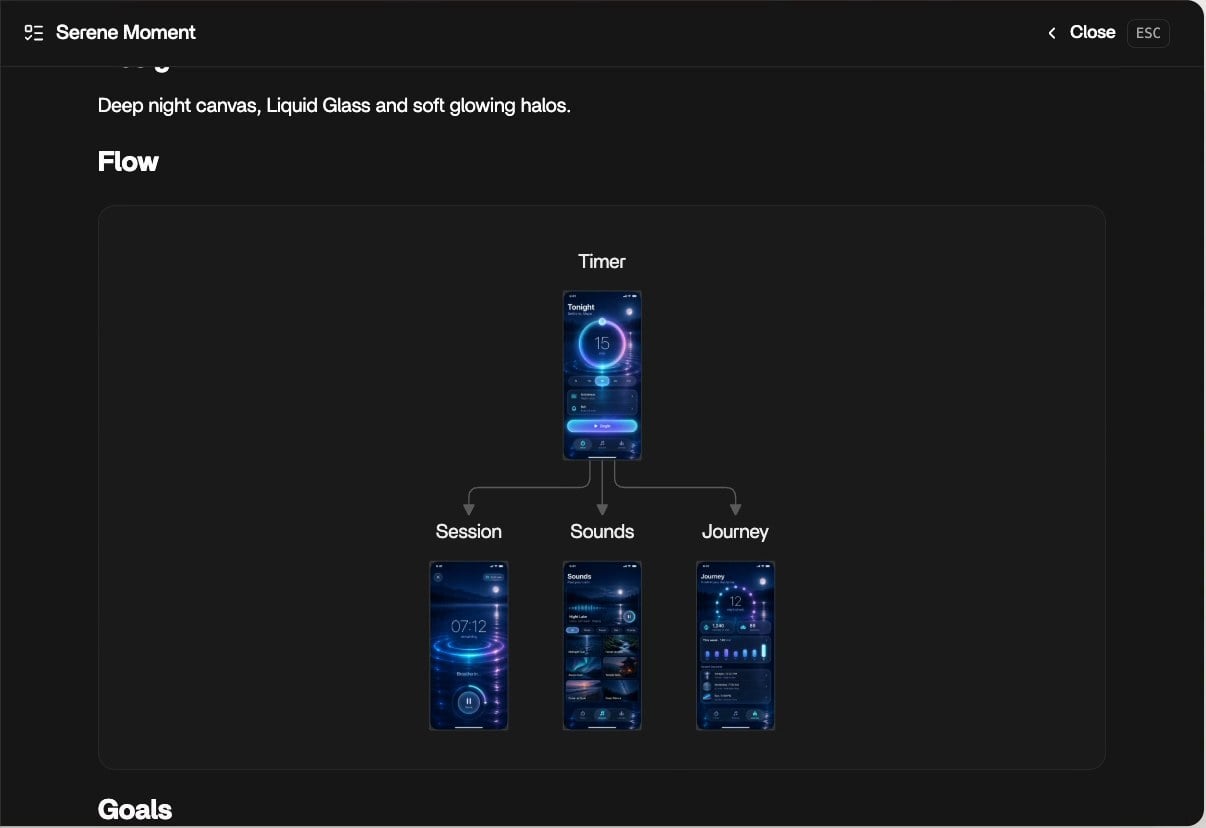
| **Flow** | A small diagram of how the screens connect, when a picture explains it faster than text. |
| **Goals** | For hard parts only: each goal says what "done" looks like. |
A new app's plan: its screens, then Features, Flow, and Goals.
A small change gets a small plan. A new app gets a fuller one. A plan can also show pictures, for example a reference design Rork found or a screen your app already has, and a diagram box can carry a screen.
A Flow diagram whose boxes show the drawn screens. Close the panel with Close or Esc.
The plan panel is read-only. To change a plan, ask Rork in chat. This keeps the plan Rork reads and the plan you read the same file.
## Tutorial 1: plan a new app
This walkthrough takes about five minutes. You end with a plan, drawn screens, and a running app.
On the home screen, open the mode menu and pick **Plan**. Type your idea and send it.
```
A habit tracker with daily check-ins, streaks and weekly stats
```
Rork usually asks what the app is mainly for and which features the first version must have. Then it asks one to three questions about the look, unless your message already settles it. Pick the answers that feel right and press **Submit**.
The plan opens on the right by itself, because a new project has no preview yet. The screens fill in one by one. Scroll down for Features, Flow, and Goals.
The **Review Plan** card waits at the end of Rork's answer. Press **Build**. Rork switches Plan mode off, opens the preview, and builds the app from the plan and its screens.
Put the look into your first message and Rork has fewer questions to ask. "A calm habit tracker, white background, green accents" settles most of the design questions before they come up.
## Tutorial 2: change the plan before you build
The cheapest moment to change your mind is before the build. Every change here costs one message, not a rebuild.
After the first plan, the mode menu still reads **Plan**. Leave it that way.
Say what you want in plain words. Rork edits the same plan file instead of starting a new one.
```
Add a calendar for my month
```
For a new app, Rork redraws only the screens the change affects. A visual change, like "make it orange", updates the screens and the plan's Design section together.
The **Review Plan** card moves to Rork's latest answer. Press **Build** there.
Good change requests are short and specific:
```
Make it orange and warmer
```
```
Drop the Stats screen, put the weekly view on Today
```
```
Add a sign-in screen before Today
```
## Tutorial 3: plan a big change in an app you already have
Plan mode is not only for new apps. Use it before a change that touches many screens, like accounts, payments, or a new section.
Open the mode menu in the project's composer and pick **Plan**. In an existing app, the row reads "Map out the work before building".
Say what people should be able to do, not how to code it.
```
Let people book a class, pay for it, and see their upcoming bookings
```
Rork reads your code first, so the plan fits the app you have. A plan for an existing app has no drawn screens: your preview already shows the app. Press **View Plan** to read it.
The Review Plan card. View Plan opens the plan, Build starts the work.
Press **Build**. Rork sends `Build the plan.` for you, turns Plan mode off, and works through the plan. It ticks off each item as it finishes it.
You can also type "go" instead of pressing **Build**. Rork then shows a **Return to Agent Mode?** card. Press **Approve** and it starts building.
## When Rork suggests Plan mode
In Build mode, Rork can ask to switch when a request looks large or has several sensible answers. A **Switch to Plan Mode?** card appears with a short reason.
* **Approve** turns Plan mode on, and Rork plans before it builds.
* **Decline** keeps Build mode, and Rork goes on with your request.
* No answer in 30 seconds cancels the switch. The card shows how many seconds are left.
Rork asks at most once per message. If you asked for a plan yourself and the switch timed out, Rork stops and asks you to approve it or turn on **Plan** in the menu.
## After you press Build
* **Build** sends `Build the plan.` and switches Plan mode off for you. No extra approval is needed.
* The card then shows **Built** instead of **Build**. **View Plan** stays, so you can reopen the plan at any time.
* Rork keeps the latest plan in front of it on every later message, and ticks off items as it finishes them.
* Each goal becomes its own task. Rork marks a goal done only when its "done when" line is true, or it tells you what is missing.
Plans live in `.rork/plans/` in your project, one file per plan. They travel with your code to GitHub, but they stay out of the file tree in Rork.
## What Plan mode cannot do
* It does not change code. Rork only reads, asks, and writes the plan.
* You cannot edit the plan by hand in Rork. The plan panel is read-only, so ask Rork in chat.
* Drawn screens are for new apps only. Once the app exists, a plan is text, pictures, and a diagram.
* Rork asks at most two rounds of questions per plan.
* The mode menu hides while a Design mode session is open. Finish the design or build it first.
* A plan is a strong guide, not a promise of the exact result. Check the preview after the build and ask for fixes as usual.
## FAQ
Plan mode has no separate price. A plan message spends build credits like any other message. For a new app, the drawn screens add to the cost of that message, the same way Design mode screens do. See [Build credits vs Cloud credits](/billing/build-credits-vs-cloud-credits).
Design mode is about the look: it proposes screens and nothing else. Plan mode covers the whole app: features, screens, flow, and goals. For a new app, a plan includes its screens, so you get the design inside the plan. See [Design mode](/features/design-mode).
Rork starts building from the plan. Stop the message, or let it finish and roll back with [Undo and version history](/features/undo-and-history). The plan file stays, so you can press **View Plan** and continue later.
Every plan is its own file in `.rork/plans/`, and Rork follows the newest one. Ask Rork in chat to bring parts of an older plan back into the current plan.
No. After 30 seconds the card says the switch timed out, and Rork goes on in Build mode. Turn on **Plan** in the menu and send the message again if you want a plan.
Yes. On a phone, the mode menu opens as a dialog in the middle of the screen. Pick **Plan** there.
## Next steps
Settle the look of a new app before you build.
Write the first message that makes a good plan.
After the build, point at a part of the app and change it.
Roll back a build you did not like.
This documentation is built and hosted on [Mintlify](https://mintlify.com), a developer documentation platform.