> ## Documentation Index
> Fetch the complete documentation index at: https://docs.rork.com/llms.txt
> Use this file to discover all available pages before exploring further.
# Design mode: design a mobile app with AI
> Rork Design mode is an AI app designer. It draws your iPhone, Android, or web app's screens before any code exists, then builds the design you approve.
export const CtaBanner = () =>
Build your app with Rork today.
Ship iOS, Android, and web apps by chatting with AI.
Try Rork for Free
;
export const frame = {
margin: "8px 0 12px",
borderRadius: "16px",
overflow: "hidden",
border: "1px solid color-mix(in srgb, currentColor 12%, transparent)",
boxShadow: "0 18px 40px rgba(0,0,0,0.25)",
lineHeight: 0
};
export const frameCaption = {
margin: "0 0 32px",
fontSize: "13px",
lineHeight: 1.5,
opacity: 0.55,
textAlign: "center"
};
export const frameMedia = {
width: "100%",
height: "auto",
display: "block",
margin: 0,
border: 0,
borderRadius: 0,
verticalAlign: "top"
};
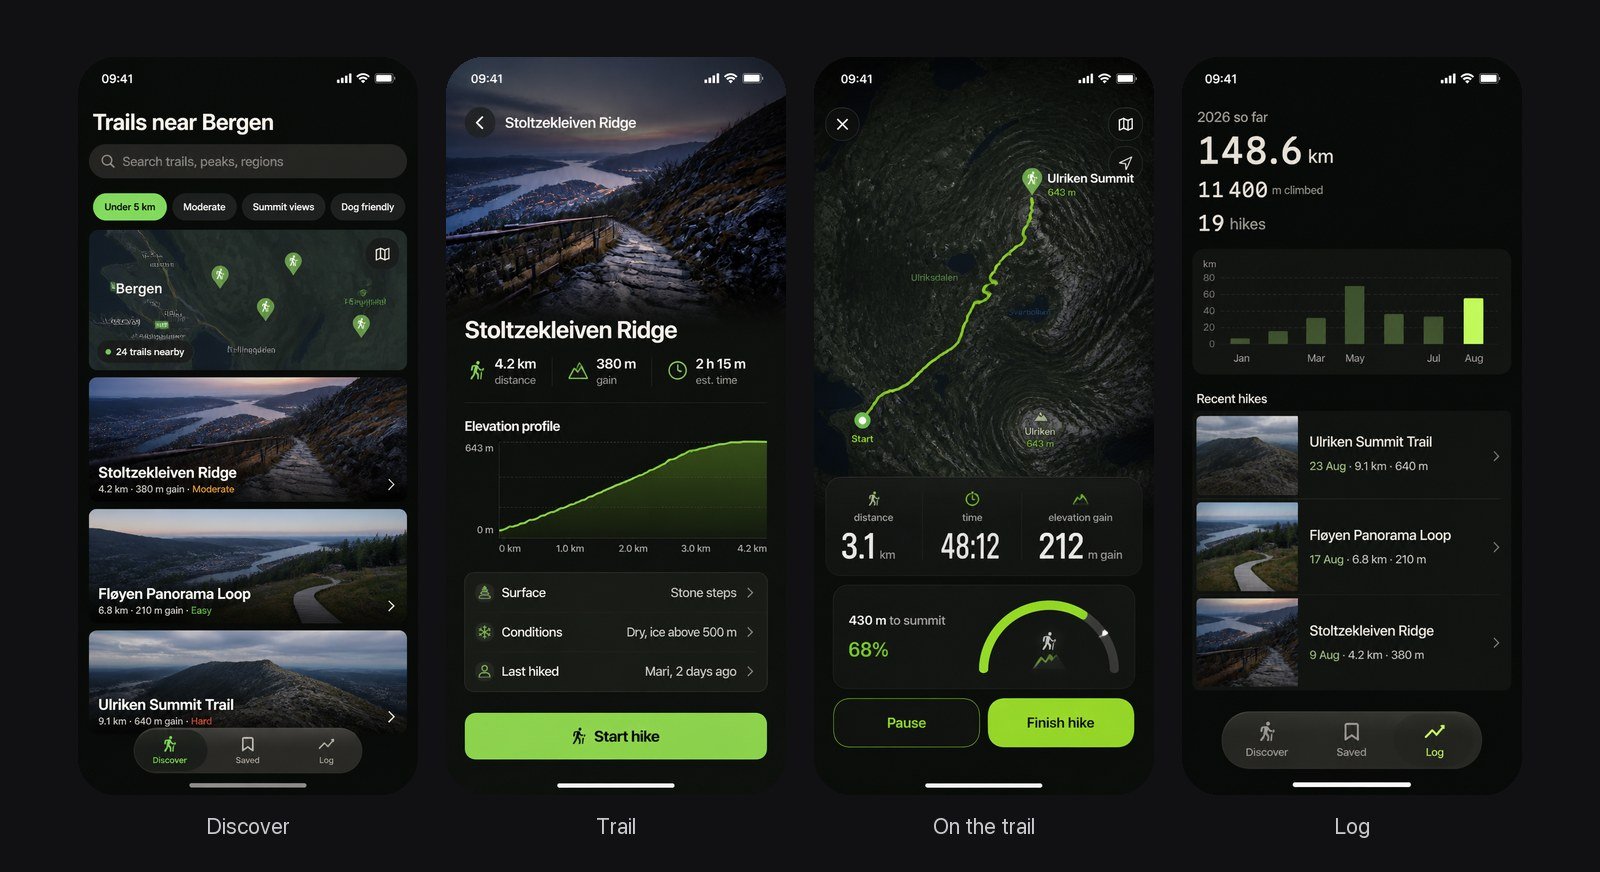
A real Design mode proposal: “A dark, photo-led hiking companion that finds the best trails near you, then walks with you to the summit.” No code exists yet.
Design mode turns Rork into an AI app designer: it designs your mobile app with AI before any code exists. Rork asks a few questions about the style, then draws three or four screens of your iPhone, Android, or web app. It writes no code until you press **Build**.
It is the cheap way to decide how your app looks. Changing a picture costs far less than rebuilding a working app. So you can try another palette, another layout, or another first screen while you have design credits, before anything is built.
| Use Design mode when | Use Plan mode when |
| - | - |
| You start a new app and the look matters most | You want the features, screens, and flow agreed together |
| You want to compare styles fast | The change touches many screens of an app you already have |
| You have a reference app or a screenshot in mind | You are not sure how a feature should work |
For a new app, a [Plan mode](/features/plan-mode) plan draws the screens too. Pick Design mode when the look is the question, and Plan mode when the whole app is.
## Turn on Design mode
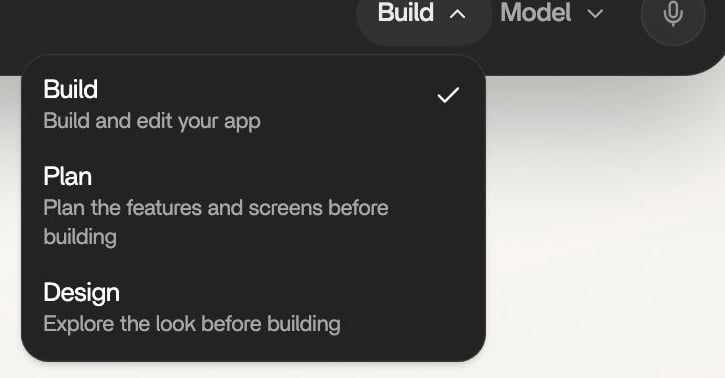
The mode menu sits next to the model picker in the composer. It shows the current mode, **Build** by default. Open it and pick **Design**.
Design reads “Explore the look before building”.
Only one mode is on at a time: picking **Design** turns **Plan** off.
On the home screen, the **Design** row belongs to paid plans. Rork tests a design-first start with some free accounts: they start in Design automatically and may not see the mode menu at all. Free credits cover design, and building your app needs a plan. See [Plans & Subscriptions](/introduction/subscriptions).
## How a design comes together
Say what the app is for and, if you know it, how it should feel. "A calm habit tracker with daily check-ins, streaks and weekly stats" is enough.
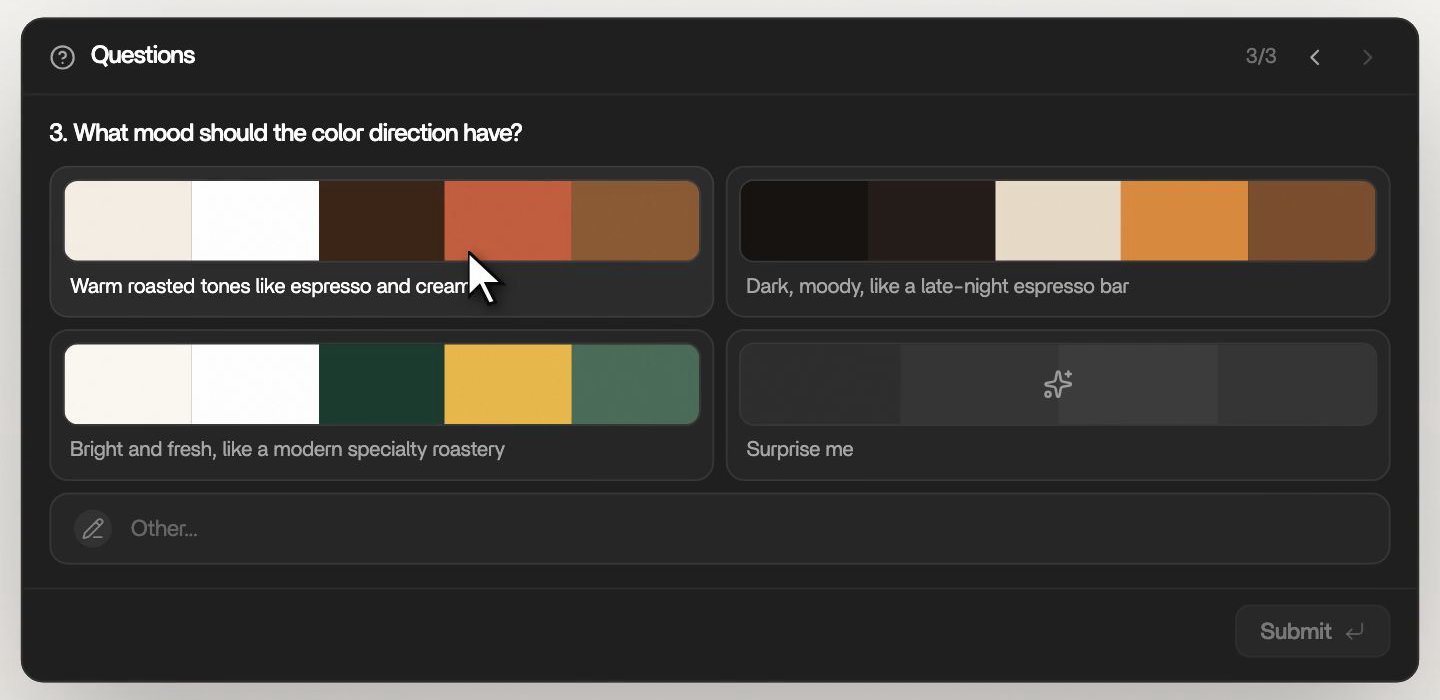
Rork asks one short batch of questions before it draws anything, usually about the main screen, the layout, and the colors. Most answers come with a small picture of the style they stand for. Every question also offers **Surprise me** and an **Other...** box for your own words. Press **Submit** when you are done.
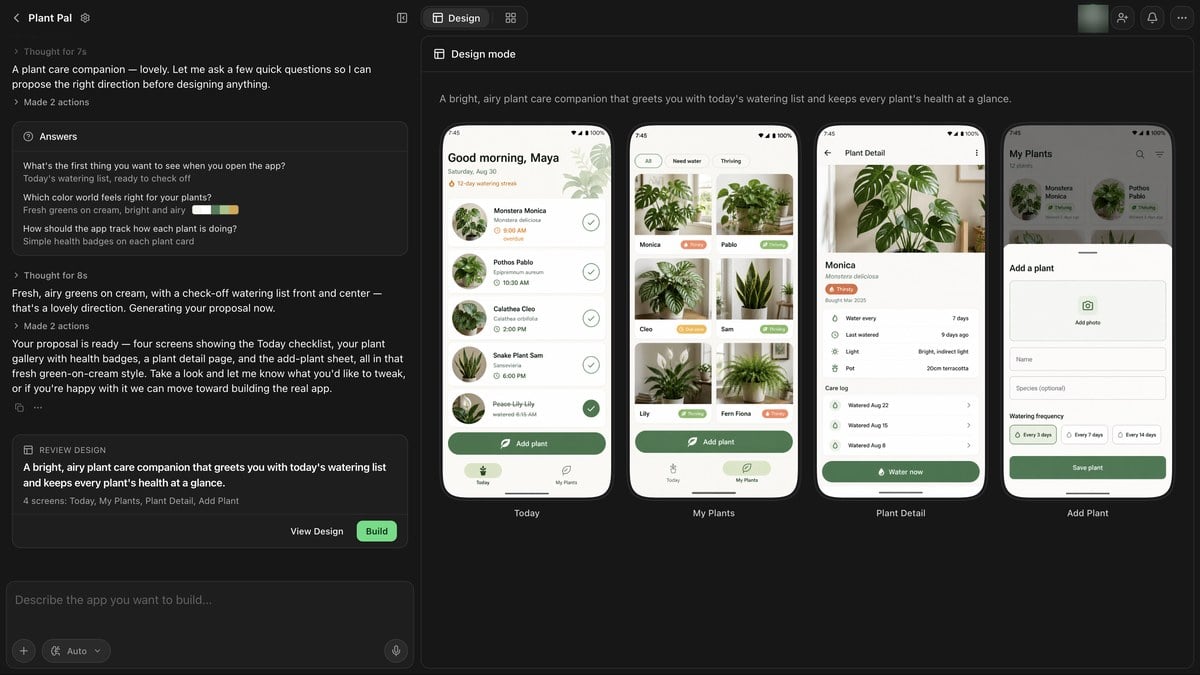
The **Design mode** panel opens next to the chat. One line at the top says what the app is and how it feels. The screens fill in one by one, each with its name under it.
Ask for a change in chat. A change to one or two screens redraws only those. A new style redraws the whole set.
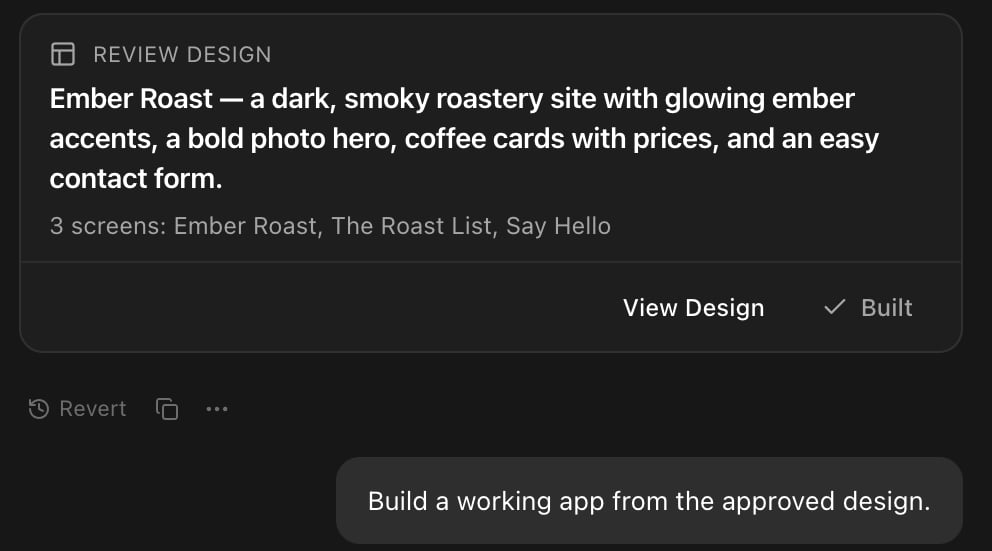
The **Review Design** card waits at the bottom of the chat. **View Design** reopens the screens and **Build** turns them into a working app.
A color question. Each answer shows its palette, and Surprise me leaves the choice to Rork.
After you answer, Rork does not ask again before it draws. Anything your answers leave open, Rork decides, and you correct it after you see the screens.
Design mode in Rork: your answers and the Review Design card in the chat, the drawn screens in the Design mode panel.
## What a design includes
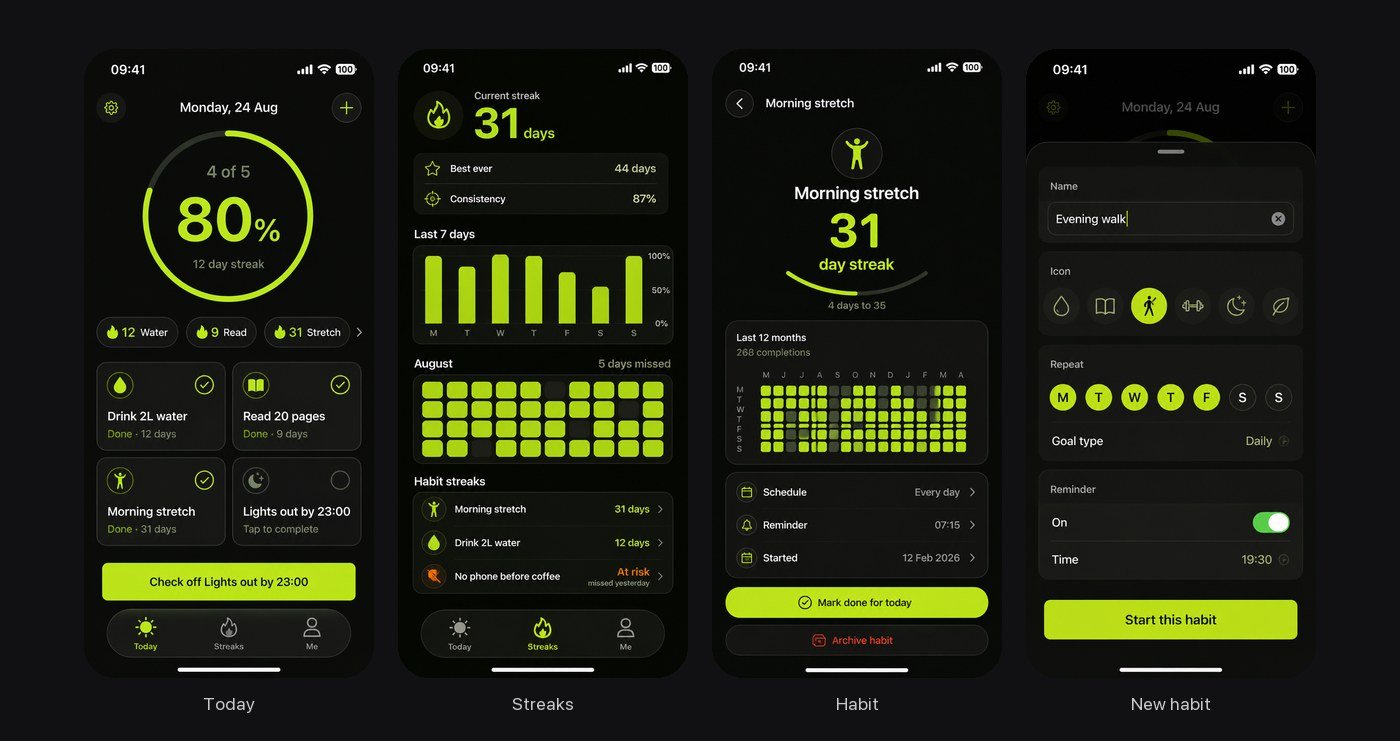
A habit tracker: the main moment (Today), a list (Streaks), one item in full (Habit), and adding one (New habit).
* **3 or 4 screens**, each with a different job: the main moment of the app, a list or feed, one item opened in full, progress, or a first-run screen. Never two screens that say the same thing, and never a settings screen.
* **One look across all screens.** The same colors, type, and icons on every screen, so the set reads as one app.
* **Real content** in your language: real names, amounts, and times, not placeholder text.
* **Your platform's own controls.** An iPhone design uses iPhone controls and navigation, an Android design uses Android ones, and a web design uses full-width desktop layouts.
The screens are pictures, not a running app. You cannot tap them, but you can open each one large.
If you name a reference app or a visual style, Rork can look it up on the web first and carry what it sees into the design. Ask "show me the references" and it shows them in chat before it draws.
### Examples of mobile app designs made with AI
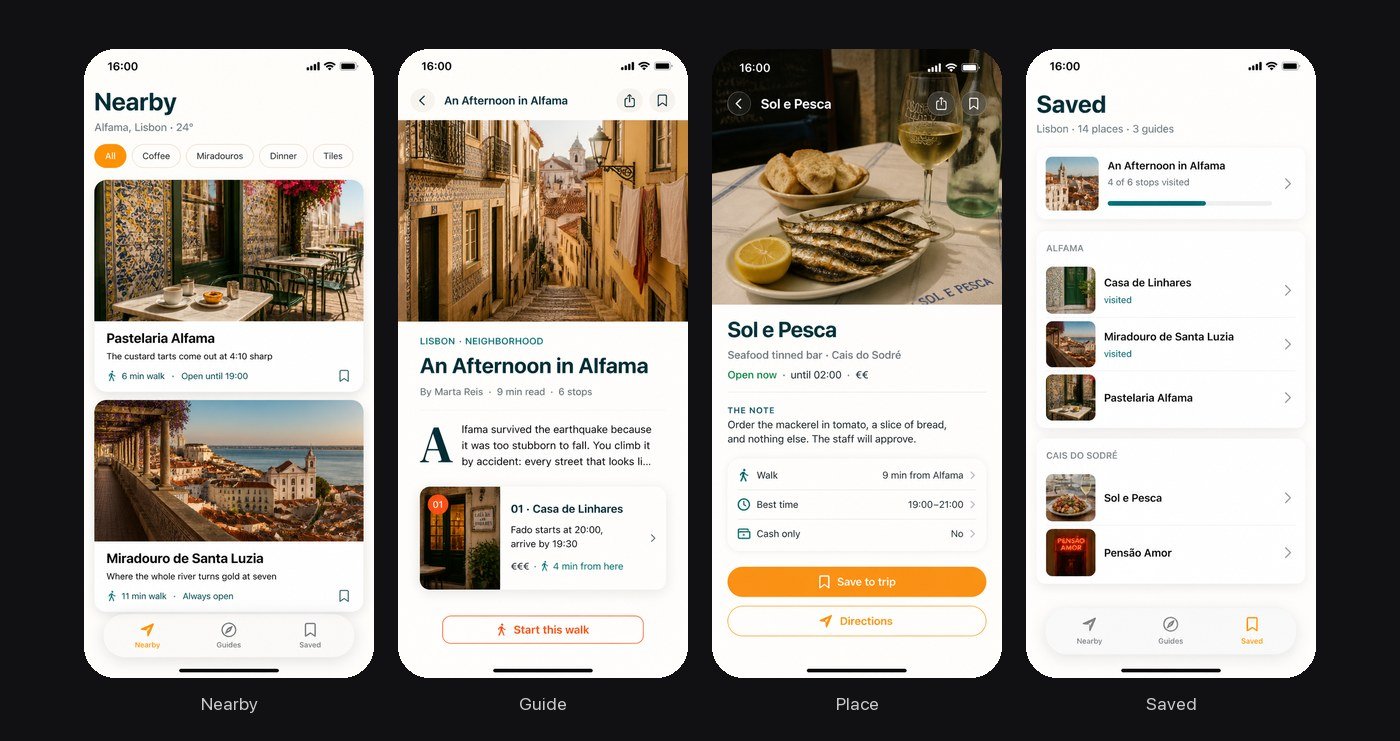
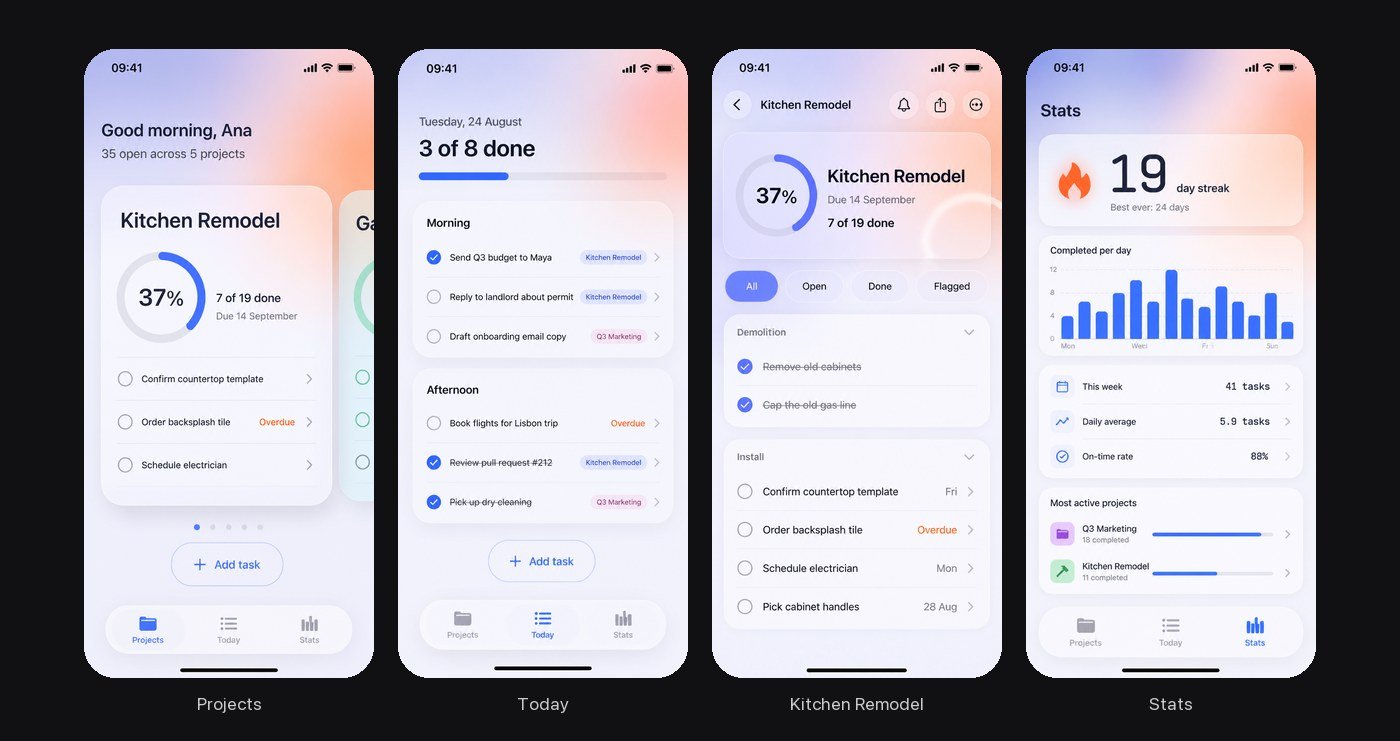
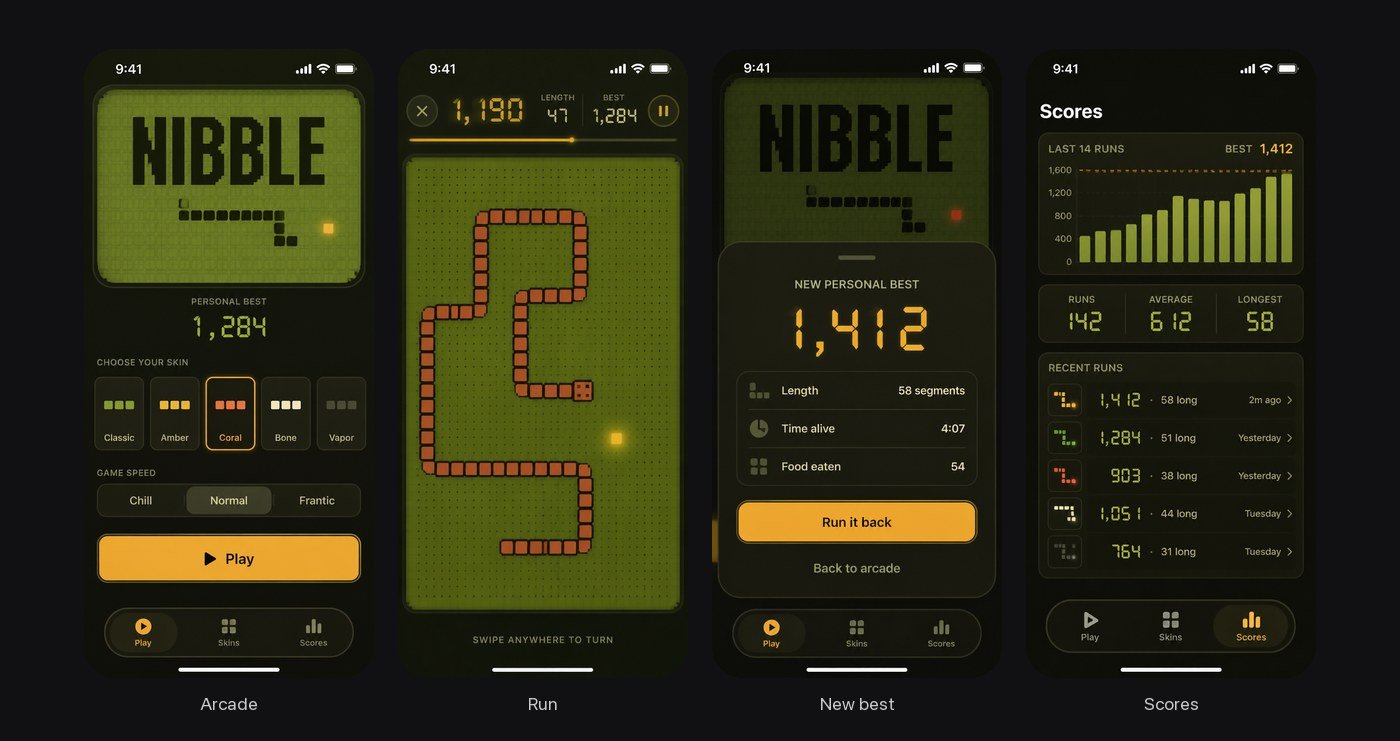
Every proposal gets its own look. These are real Design mode proposals, shown as Rork drew them.
“A bright, sun-bleached city companion where every place comes with a short story worth reading before you go.”
“A bright, glassy task tracker where you flick through your projects like cards and every layer floats over a soft color wash.”
“An endless Snake that feels like a beloved 90s handheld.” Games get a design too.
## Choose one of four designs
Some Design mode sessions start with a choice instead of a full set. Rork tests this with some accounts, so you may not see it. Rork draws your app's Home screen four different ways and shows **Choose a design for your app**, with the line "One screen, four directions. Select your favorite to design the remaining screens."
* Click a design to select it. The expand button under each design opens it large, and **Select this design** there marks it.
* The chat card reads **Choose a design direction** until you pick, then **Design 2 selected** (or whichever number you chose). **View designs** reopens all four.
* Confirm with **Use this design** on the chat card. Rork keeps that Home screen and draws three more screens in the same look.
* To change one design before you choose, say so in chat, for example "Make Design 2 cleaner". Only that design is redrawn. If the change fails, press **Retry changes**.
* None of the four fit? **Generate other designs** asks what to change in chat, then draws four new designs.
## Tutorial 1: design a new app
This walkthrough takes a few minutes. You end with approved screens and a running app.
On the home screen, open the mode menu and pick **Design**. Then send:
```
A calm habit tracker with daily check-ins, streaks and weekly stats
```
Pick the answers that feel right, or **Surprise me** where you have no opinion. Press **Submit**.
The screens arrive in the **Design mode** panel, one by one. Read the line at the top: it is Rork's short description of your app. Open a screen to see it large.
Try a small change first, so you see how cheap it is:
```
Make the Today screen darker and put the streak at the top
```
Press **Build** on the **Review Design** card. Rork sends `Build a working app from the approved design.` for you and writes the app.
Write the look into your first message and Rork has less to ask. "A dark, smoky roastery site with big photo cards" answers most of the questions before Rork asks them.
## Tutorial 2: design a website
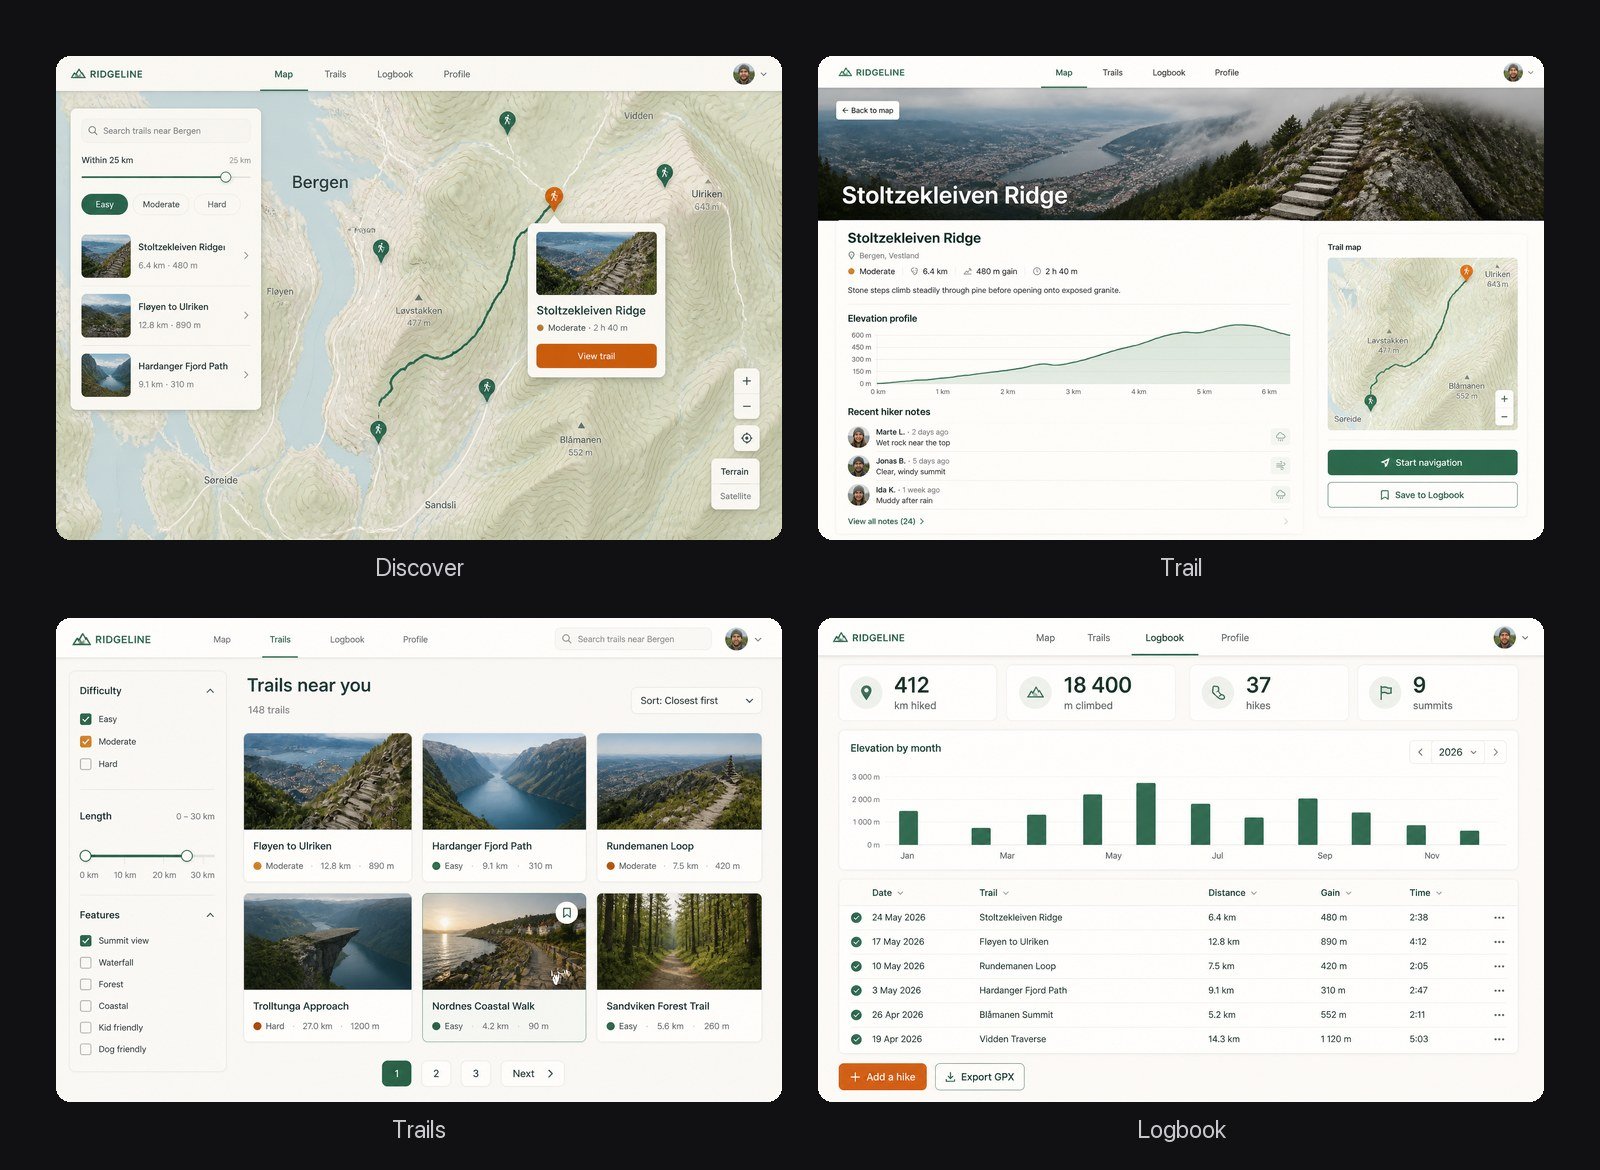
Design mode works for web apps too. A web design uses wide desktop sections instead of phone screens.
```
A trail finder website with a big map, trail pages and a hike logbook
```
Each picture is one full-width page of the site, like a map, a detail page, or a list.
A real web design: four full-width pages of a trail finder, drawn before any code.
Ask for changes in chat, then press **Build** on the **Review Design** card.
## Tutorial 3: change a design for very little
Short, specific requests work best. Each of these redraws one or two screens, not the whole set:
```
Make the Habits screen a grid instead of a list
```
```
Use a warmer orange as the accent
```
```
Replace the photo on Today with an illustration
```
To start over with a new style, say so plainly. Rork redraws all the screens:
```
Start over: dark background, neon green, bold type
```
If too few screens come out, the **Review Design** card shows **Try design again** in place of **Build**. Press it to draw the design again before anything is built.
## After you press Build
On a paid plan, **Build** sends `Build a working app from the approved design.` and Rork writes the app. On the free plan, **Build** opens the plan picker under the title **Turn your design into a real app**. Pick a plan and the build continues.
The Review Design card after the build: it shows Built and keeps View Design.
* Rork saves the chosen look to `.rork/DESIGN.md`: the direction, colors, type, and screen decisions. Rork reads that file on later changes, so new screens keep the same look. Open it in **More → Code**, in the `.rork` folder.
* The **Design** tab closes when the build starts. Find the proposal again in **More → Design**.
* On a phone, the **Design** tab also has a floating **Build** button.
## What Design mode cannot do
* It does not write code. A design turn only asks, draws, and waits for you.
* The screens are pictures. You cannot tap through them like a prototype.
* The first proposal has 3 or 4 screens. Ask for more screens after the build, in chat.
* While a design session is open, the mode menu hides. **Build** is the way forward.
* The built app follows the design closely, but it is real code, not a copy of the pictures. Check the preview and ask for fixes as usual.
## FAQ
Yes, but design credits, not build credits. The free plan includes a monthly allowance for designing. Turning an approved design into a working app needs a paid plan. See [Build credits vs Cloud credits](/billing/build-credits-vs-cloud-credits).
Free credits cover design, so on the free plan Rork can design your app before you pay. Turning the design into a working app needs a paid plan. See [Plans & Subscriptions](/introduction/subscriptions).
Yes. Every screen in a proposal uses the same colors, type, and icons. After the build, Rork keeps the look in `.rork/DESIGN.md`, so new screens match the ones you approved.
Yes. Pick **Build** in the mode menu before you send, and Rork builds without a design. To keep the design but skip changes, press **Build** on the first proposal.
Yes. Attach it with **+ → Upload image** and say what you like about it. Rork uses it as a style or content reference for the screens.
Design mode settles the look. Plan mode settles the whole app: features, screens, flow, and goals, and for a new app it draws the screens as well. See [Plan mode](/features/plan-mode).
Press **View Design** on the **Review Design** card. After the build, open **More → Design**.
It is on the **Review Design** card at the bottom of the chat. On a phone, the **Design** tab also has a floating **Build** button.
## Next steps
Agree on features, screens, and flow before you build.
Build, Plan, and Design side by side.
After the build, point at a part of the app and change it.
Generate the pictures and sounds your app needs.
This documentation is built and hosted on [Mintlify](https://mintlify.com), a developer documentation platform.